How to Make a Family Room for the Whole Family

Listing #3828 Listed on: 04/15/2012 Company Name: Hudson Cabinetmaking, Inc.
Name: Russell Hudson Member
Website:   www.hudsoncabinetmaking.com

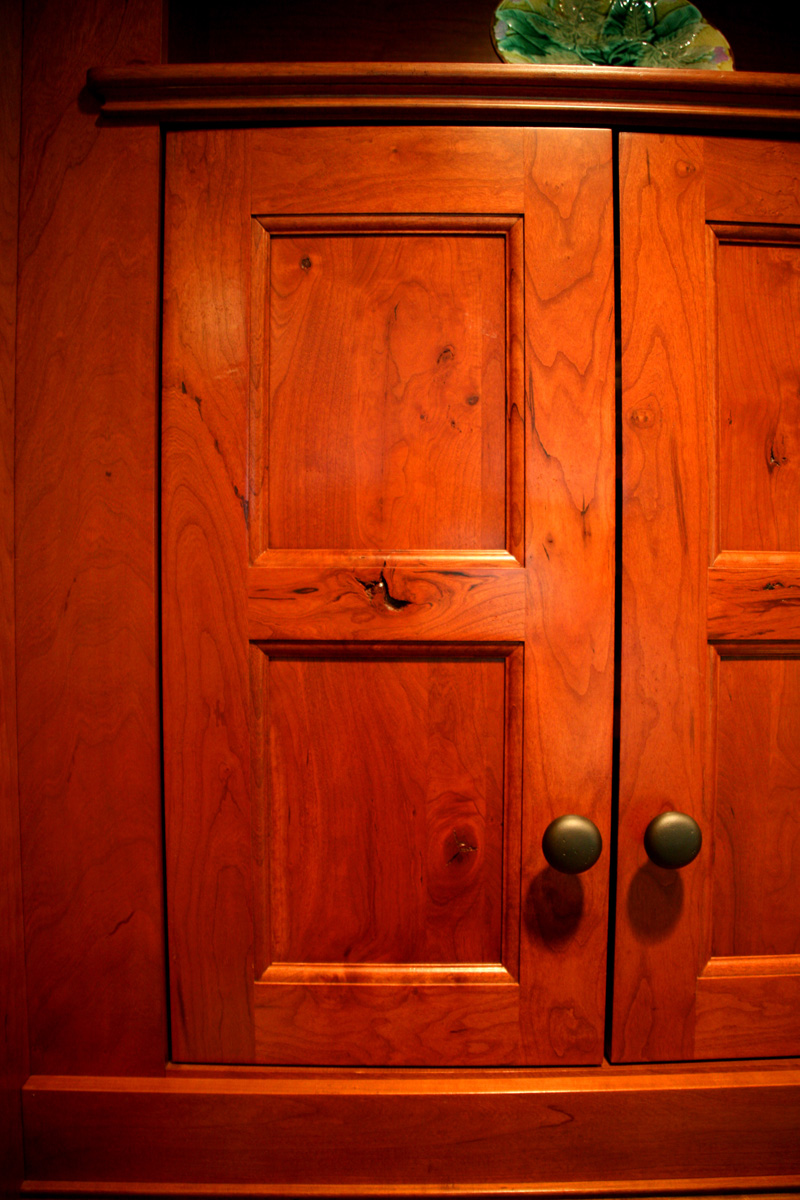
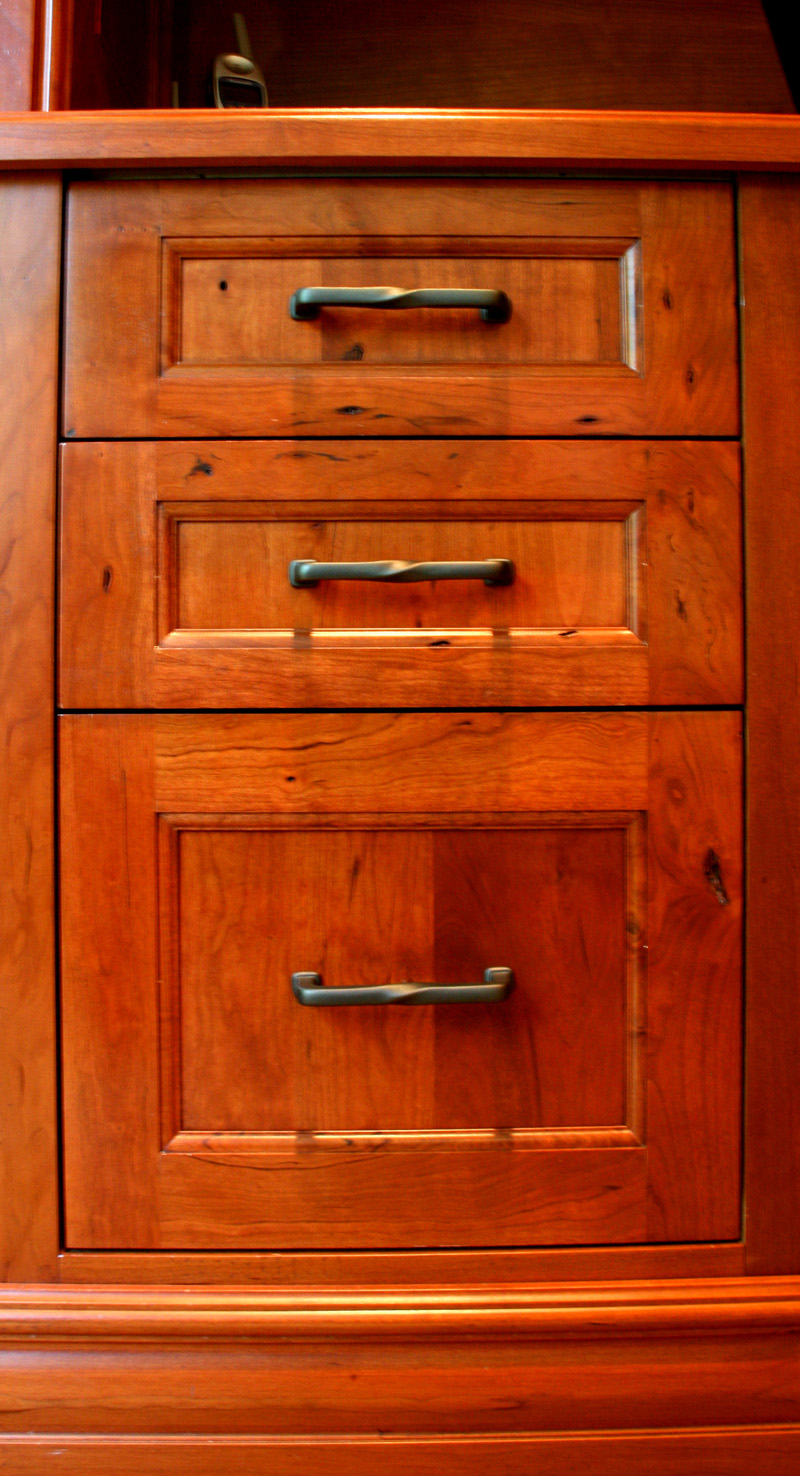
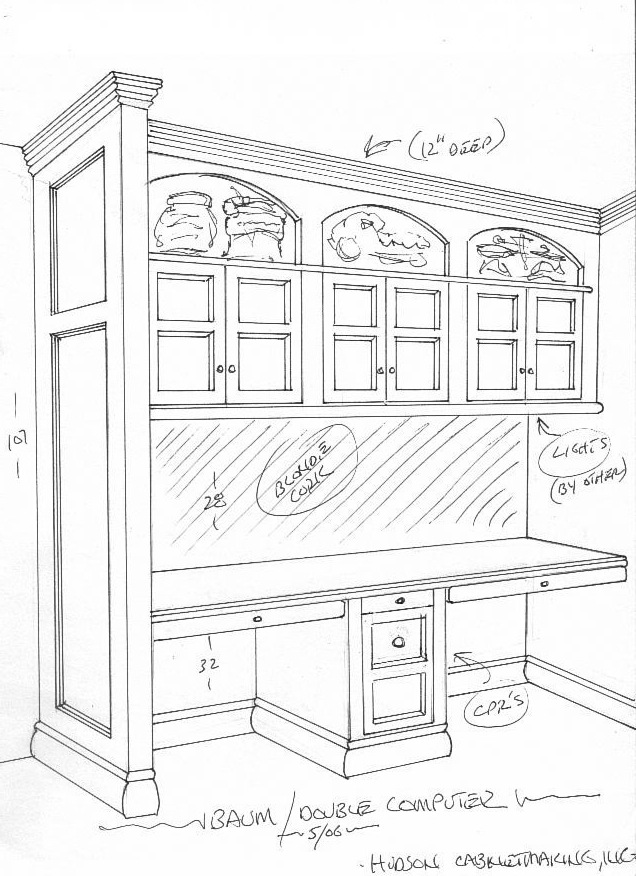
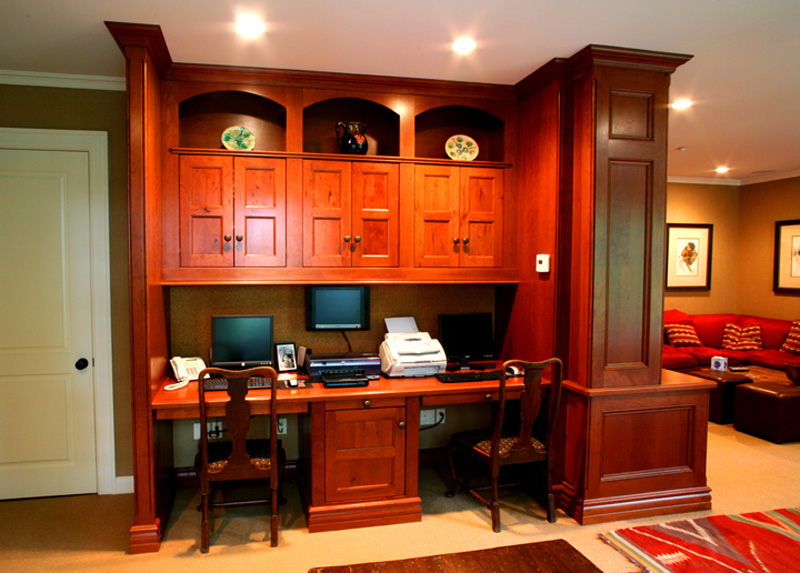
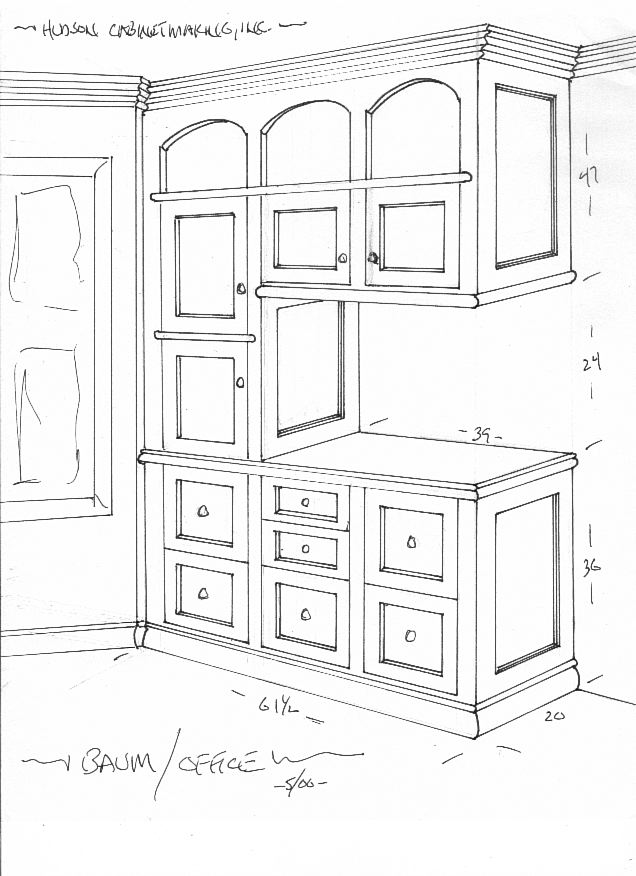
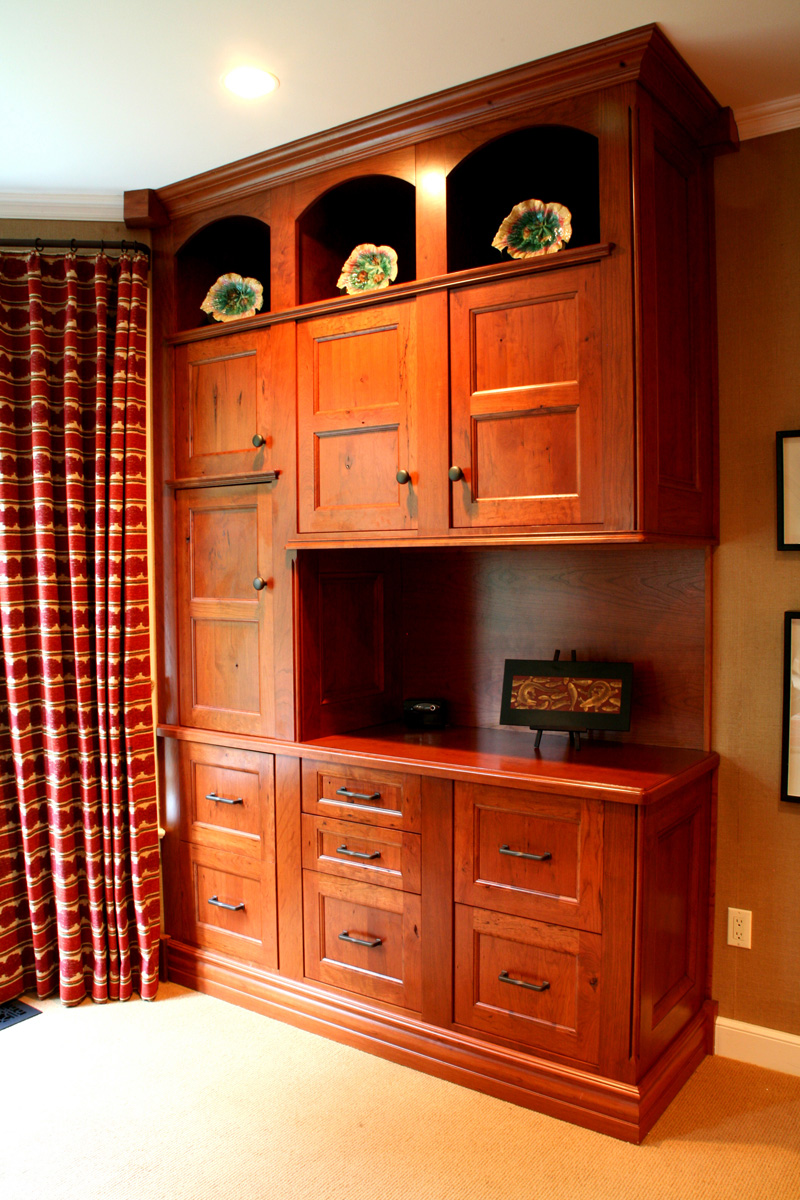
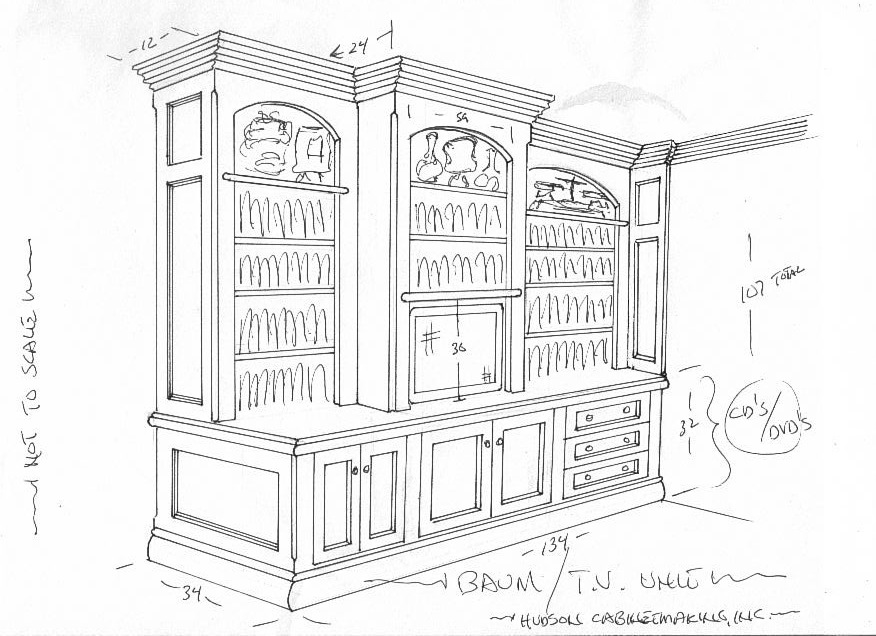
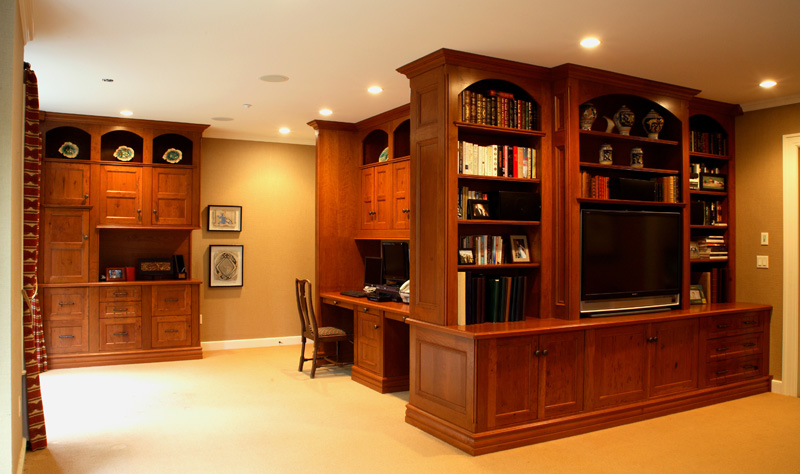
Our client's family (two adults and three children) wanted a room in which all their different activities could take place. Their TV and stereo components, video games, the computer(s), the home's business area, library shelving and additional storage (for all those small things that would clutter every surface if not put away)... were all incorporated into the plans for these built in cabinets... Our plan was to create a room that had a place for everything and look great at the same time.
Although they wanted built-ins that were richly appointed, they expressed their wish to maintain the appearance of 'hand wrought' craftsmanship. I knew they didn't want 'rustic', but perfectly straight-grained, 'select' boards and veneers wouldn't portray enough character for their tastes.
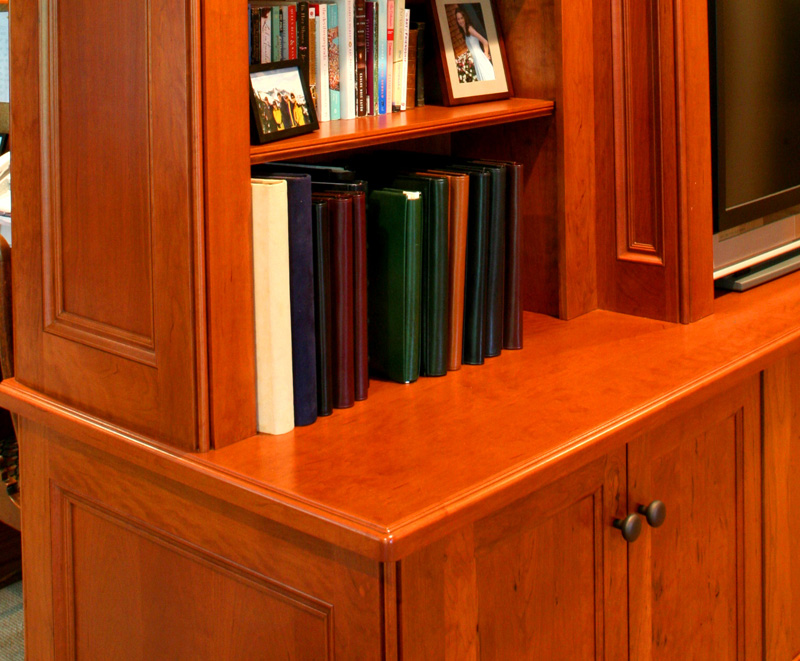
So... we decided use cherry but made sure to include some great looking imperfections, so you might get a sense of the actual trees from which this furniture was made.

10 Photos
Social Media:
Viewer Comments:
Posted By:D Brown
Beautiful job!
Posted By:THEDUDE
STUNNING! That is very classy. I'm thinking word of mouth will have you doing more of these!!
Posted By:Kilgore Trout
Russel - it may be me or the photo, but in your second photo are the handles on the three fronts level/parallel? It looks as if the top is a little high on the left, the center is level, and the lower one is off the other way - low on the left.

The work is great and shows good utility integrated with good design. The two are not often brought together so well. But that one picture just bugs me.
Posted By:Russell Hudson
Wide angle lens with the camera slightly left of center will skew the visual exactly that way. You can be sure they are on the money.
Posted By:brandon
Fantastic looking work. How did you finish the maple? I have been using Light Fast stains and they seam to dry blotchy. Was it a oil based stain you used?
Posted By:Russell Hudson
Cherry. Read the copy, it explains things.
Posted By:Edwin
I admire your craftsmanship, beautiful work, but (and there is always a but) what I do not like and never will like is the choice of a panel as a place for a pull or handle. In my opinion a panel is mostly a decorative filler for a bigger surface surrounded by a more stable and thicker frame. When I look at it, it just does not do it for me. Most of the time a panel is made thinner than the stile and rail system and therefore not as strong to be used as pull. If you would have chosen smaller handles and self closing slides (which you probably did), then the upper rails would be roomy enough for some smaller handles.
On all the other doors you did well with choosing the right places for the nobs and pulls.
Sorry about that, but I have my rules. The finish and the color is beautiful.

Posted By:Christopher Duncan
Fabulous design, brilliant execution! IMHO the placement you’ve chosen for the drawer pulls is the most aesthetically pleasing. On a job this nice, I can’t imagine that you used anything less than full ¾” thickness door and drawer panels floated in the frames with “spaceballs” (thereby compensating for any possible structural “vulnerabilities” stile and rail door/drawer panels may present in the long term).
The look on the whole is modern yet appears as if it’s been transported in time from a bygone era.
Cherry was a great choice for this project. Mind sharing your finishing process?
Posted By:Russell Hudson
@Edwin - the drawer face is not part of the drawer. I build a box, all 3/4", and attach the drawer fronts on site. I have a 1/8" spacer behind the panel and a bolt goes through the 1&1/8" front so you couldn't pull the knob off with a crow bar
@Chris - the doors and drawer fronts are actually one inch thick and yes, there are expansion balls surrounding the panel for movement
Thanks guys.
Posted By:chris griffith
Beautifully done! Cherry has always been my favorite to look at and work with.
Posted By:Tony
Very fine drawings and workmanship. Did you install on the carpet or did that go in after cabinetry?
Posted By:Russell Hudson
On the carpet, but removed the padding slightly beyond the cabinets' outside edge and then wrapped the base molding.
Posted By:Rob
Would you please share your finish schedule?
Posted By:Russell Hudson
I have a finisher I usually use. He sprays a sanding coat and two or three over-coats of lacquer. I don't think it was a conversion varnish. That's the extent of my knowledge. I hand him strong, seamless joints that are sanded as a single surface. The finishers job is easier and the piece looks better. This was a good client.
Posted By:KAP
Excellent use of grain - very nice.
Posted By:Chuck
Beautifull design and execution.
Posted By:Adam
Would you mind sharing how you made the edge on the counter top? What bit(s) did you use?

Thanks,

Adam
Posted By:Russell Hudson
The bit has a small cove at the top, a small step down from there and a larger quarter round to meet flush with the face at its bottom edge. It works best when the edge is at least 1 and 1/2" thick (height).

Add Your Comment:

*Enter the correct numbers into the field below:

Date of your Birth:

WalzCraft Original Saw