Cabinet Leveler Success Stories
Is a new, more expensive cabinet leveler worth the up-charge? For some cabinet installers who think it works better, the answer is yes. April 18, 2011
Question
Has anyone else tried the EZ-level cabinet levelers yet? I used them on my last job and they worked great. You would not believe how much faster it was to install base cabinets.
Forum Responses
(Cabinetmaking Forum)
From contributor S:
Regular Euro levelers do not require through-holes if you choose not to and they cost a fraction of his. I like being able to reach the rear adjusters from the front but that is not really an issue for us either.
From the original questioner:
I've used the euro-levelers before also and I like the EZ-levelers a lot better. Well worth the extra cost.
From contributor U:
It appears that the cost is $30.00 per cabinet, is that correct?
From contributor S:
$30 times six base cabinets - $180 for leveling cabinets. Also requires a sub toe and hole drilled through it. Notched toe kicks I quit doing that years ago, much faster to make a continuous toe kick on site or better yet use the Euro plinths and mount the toes to the plinth.
The sub toe and notch add a lot of time to the side panel processing time and it has a significant effect on material usage. For $180 I can buy the standard Euro feet and hire someone to level them! Or I can level them myself and go have a beer and nice meal after. The ugly holes he is showing are optional and there are nice little caps included with the plinth to plug the hole. We only through-drill the rear holes and surface mount the front ones.
From contributor R:
The cost runs about $22 because the cabinets are side by side and share a leveler. They do cost more but now I don't have to lay on floor to reach back Euro levelers.
Contributor S - the holes he is showing are covered with 1/4" skins. I make mine without toe board and nail it on after cabinets are installed.
From contributor Y:
On some installations I'll use half a dozen shims and other jobs I can use 40 or 50 shims. Most slabs in my neck of the woods are fairly level and walls plumb. I was on an old house yesterday that these levelers would of definitely paid off and made the granite man a lot happier. Might just have to keep these in mind and use them in difficult situations. Of course you'd need to charge for them, some customers would definitely appreciate the modern approach.
From contributor F:
You could also screw a level board to the back wall, set the cabinets on them and then you only need to adjust the front levelers. Now you don�t need to lay on the floor, no ugly holes, and about $20 in your pocket.
From contributor F:
We install all size kitchens and usually spend hours leveling. I tried the EZ-level levelers and wow they are very fast. (The first kitchen didn't save me much time cause we had to read the directions but about the time we started to actually level the cabinets we were done)!
The second kitchen was even faster. My customers think it's the coolest thing ever! Here's something else. We installed eight cabinets in a single run, got them perfectly level only to find that we forgot to run an electrical line. Usually this would be a big deal! But we dragged the entire run of cabinet out, fixed the problem and dragged them back into place and they were still level! So for you guys who think that $150 it too expensive I think they are golden.
From contributor R:
I think if they would try them once they might change their mind. They are not cheap but neither are good undermount slides which most top shops use now!
From contributor G:
I just have to say that I tried the EZ-level system and it is without a doubt the best system ever! The last kitchen I did cost $160. I would have paid twice that! I literally leveled the entire kitchen while my employees loaded up the table and chop saw!
From contributor J:
Below are
Blum levelers � not expensive.
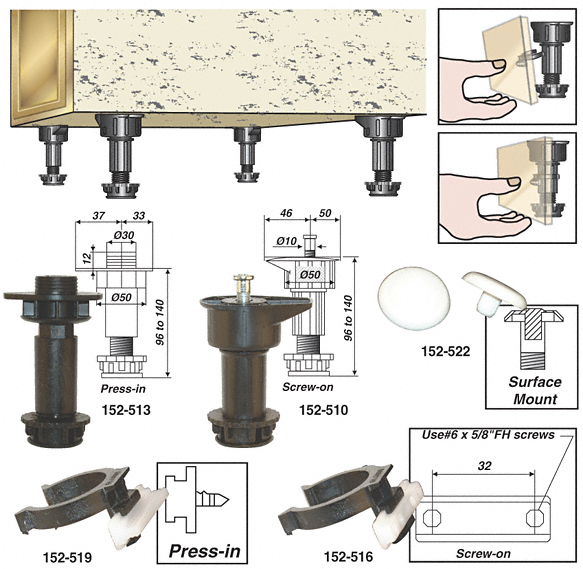
Click here for higher quality, full size image
From contributor D:
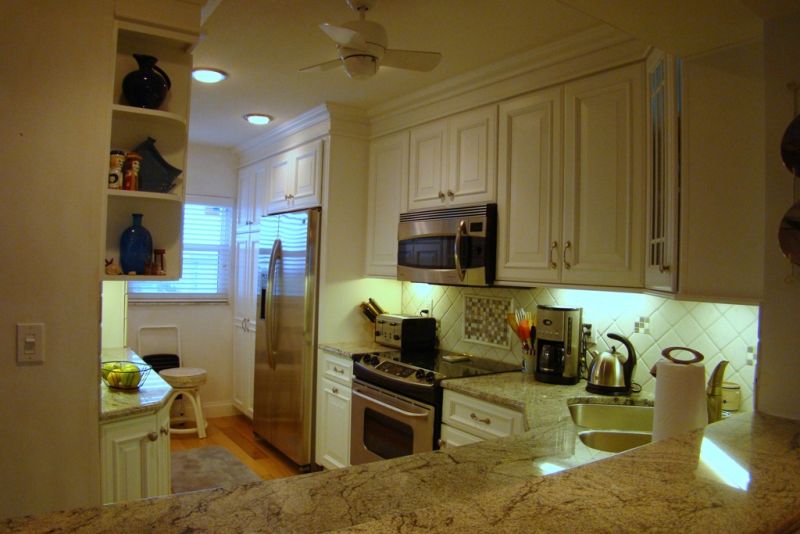
We had to resurface the entire ceiling on this one because it dropped over an inch from the window to the pass-through. Also, we used wall cabinets on the left side for both uppers and lowers which gave my client a lot of extra storage. Notice the double pantries one each side of the isle. We used DuraSupreme cabinets which in my opinion are awesome.
Click here for higher quality, full size image
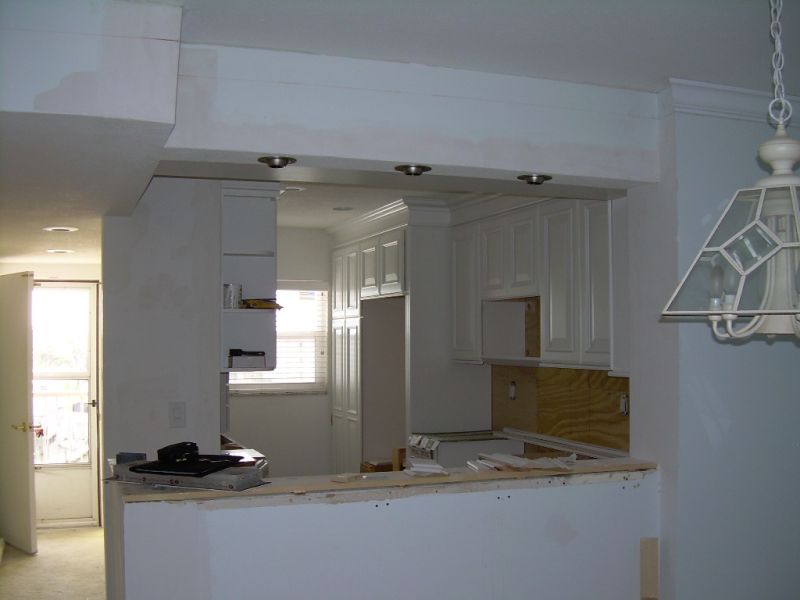
Here's the completed kitchen and the "before". We do lot's of condos and try to make them "appear" bigger.
Click here for higher quality, full size image
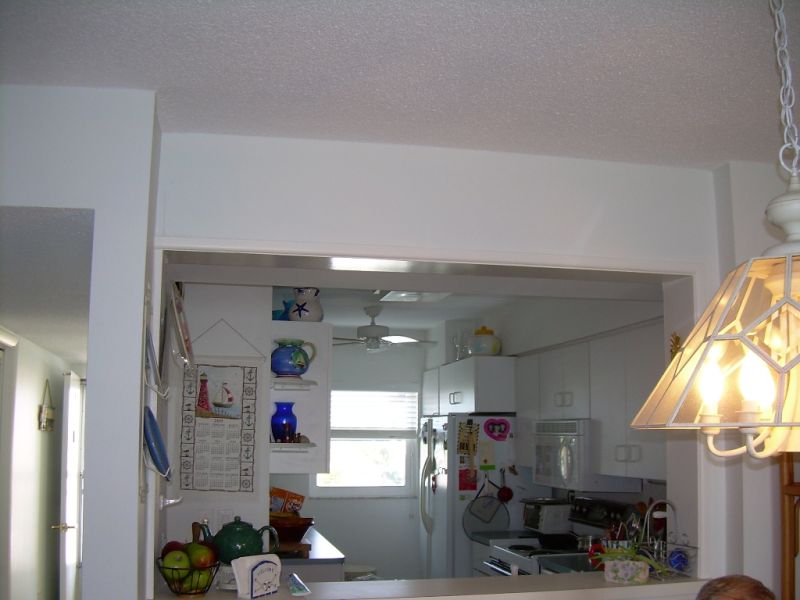
Click here for higher quality, full size image