Crafting Stair Tread Returns
Here's a long thread loaded with good information about how to craft returns on the end of stair treads. August 12, 2014
Question
One of the builders I work with came in looking to have some oak stair treads made up. He can't get them off the shelf as he needs returns on both ends. The one he brought had the single returns curved out to a miter at the front, well not really a miter I guess, but I�m not sure what exactly to call it. It seems like a good way to do it anyway? I figure I'll make up a template and shape the ends on my shaper but figured I'd ask here first in case there's an easier way I'm overlooking? Also, would you typically use biscuits or blind splines as it will be edge grain to end grain? It�s not something I do every day but doesn't seem too difficult, and I have a solid two days of labor included so I want to make sure they're made well.
Forum Responses
(Architectural Woodworking Forum)
From Contributor O:
In the '70's (1970's that is) I worked in a stair shop as a novice woodworker. One of my first jobs was to return oak treads. I probably returned several thousand treads in those first years.
We made them the traditional way - the tread was squared on the end with a radial arm saw. Then it was tipped up onto its corner, bullnose down, into a box jig on the tablesaw and the miter cut was made. Then the tread was taken to the bandsaw and the long cross grain cut was made from the back of the tread into the heel of the miter. A fence was clamped onto the bandsaw as a guide for the cut. As I got better at sawing and laying out, I skipped the difficult box jig step and just laid out the miter with a square and cut it, then made the cross grain cut. It saved a lot of time and a lot of lifting and handling.
The nosing for the returns was made by the 100 l/f on a shaper, cut to length, bullnosed on one end in the shaper, then mitered to length. The returns were then pre-drilled on the drill press with two holes for the nails to fasten it to the tread. The tread was laid onto the bench with a hefty stop block at the far end, yellow glue applied liberally on the cut end, return positioned, and clamped and then nailed with two 16d finish nails, sunk and filled. Once the glue was dry they were either belt-sanded or sent through the wide belt to flush everything, and the miter cleaned up and filler sanded off. There were exceptions for a few stair projects that had the balusters dovetailed into the ends of the tread and the return was then nailed on to hold the balusters in place - proper work well before I came along.
At some point in the late 80's I started to see treads with a curved miter of sorts. These were done on the shaper, often with a tongue on the tread and a groove in the return. Sometimes, it looked as if the first third was glued and the rest floated. I think this is probably all that is available now. However, I recently saw some tract house treads that had no returns at all, but were bullnosed on the overhanging end, so maybe the bar is being lowered yet again.
I am sure there are many guys in the trade that have never made a mitered return. I asked the old guys I learned from about wood movement and the nailed treads, but they grumbled and ignored me. Our stock widths were 10-1/2" and 11-1/2" wide. They mostly grew tired of my incessant questions into things they never questioned. There never seemed to be a problem over the years - I still see some of those stairs 40 years later and the glue line is cracked, but everything is tight.
One of the finer points is that the miter heel (1-1/4" from the tread nosing and 1-1/4" from the edge of the return) is also the point that should be directly above the riser/skirt (or bracket) corner below, and where the outer corner of the square baluster foot touches on the top of the tread. That corner below, the miter heel and the baluster corner all make a straight line. That is proper stair craft, and basic to good work, whether anyone knows or practices it today.
From the original questioner:
I've never had reason to think about it in the past since this is not something I've been called on to make before, but now that I have the end to edge grain thing does keep popping up in my mind. Then I re-assure myself that there must be 10's of thousands of treads out there with returns so it must not be that much an issue? So if I understand correctly you feel the mitered return is better than the curve? Since I have the time I'd rather make them as high quality as I can, even though nobody at the end is going to know the difference.
From Contributor M:
I return my treads in the same way as Contributor O�s 70's answer, with the exception that I cross-cut the back side on the TS with as large a blade as my saw will handle (12" in my case) fully raised then clean up the small un-cut portion with a single swipe of a chisel. I too make the return nosing in long lengths and as much as I hate to say it I just biscuit and clamp it on there. The radius�d return seems like something that has come about as a faster way to make them with a shaper or CNC but I don�t think it looks anywhere as nice as a true mitered return. I think Contributor O is spot on in that many of the finish carpenters of today and tomorrow will have never mitered a return in their career. I guess the issue comes down to if you have to match the radius.
From contributor J:
I mill all my returns (straight or curved) from wide boards and then rip or bandsaw them off one at a time. This allows me to mill the heel returns rather than having to cut and glue all the little mitered pieces. On occasion I've also milled the combined tread and scotia detail from one piece. In the 70's (1870's that is) the usual method for attachment was a spine and glue. I still prefer this and try to avoid the long nail which could end-up directly under a bored baluster position. I glue the whole return onto the tread with non-crystallizing glue and hope for the best. If you glue the whole thing on with hard glue, no spline and no nails, it may fall off in the Fall or a day in May. I believe this subject has been discussed here before but it's always good to review.
From contributor X:
If your treads won't show from the bottom side could you attach the returns with pockets holes/screws for the end grain-edge grain joint? Maybe it won't work, but just a thought.
From Contributor O:
I do the returns for curved stair treads much the same way as straight treads - mark it out and bandsaw right on the tread. The returns are made wide, sawn, shaped and bullnosed on one end (so I don't fiddle with the little miters), then bandsawn to width and mitered - again on the bandsaw. The cove molds under treads are done the same, mitering into the long piece under the tread nose and then self-returned on other end.
Yes, the nails can be a problem on treads where we don't know where baluster bores may go. The old guys I quizzed just said the carpenter had a family, and needed work to do. I would avoid pocket screws since I am old and curmudgeonly, but really just since I know the nailing is a good workable method. I would go to splines on wide returns - the outer end of a curved stair tread for instance. Glue the first third or so, and let the rest float, with a plugged oversized screw hole and screw or two to keep it snug.
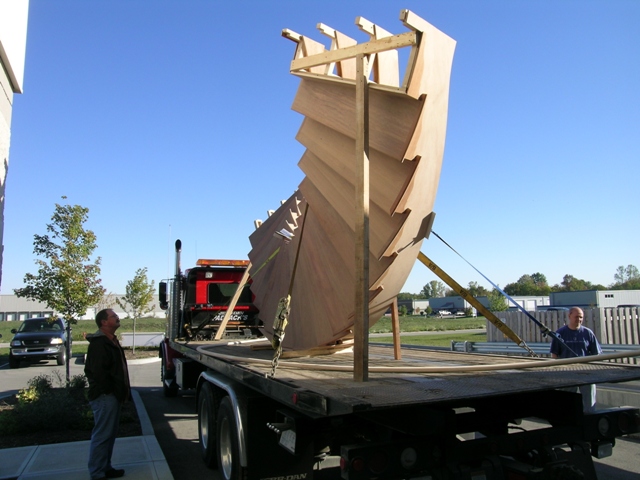
Click here for higher quality, full size image
From contributor C:
DISCLAIMER: I am not a stair builder and do not claim to be; I have infinite respect for folks like Contributor J who do this work. That said, I have built a few sets, both straight and curved. The crossgrain joinery on the returns has always bugged me, and I have seen my fair share of sagging or otherwise loose returns, usually on older stairs. On the last set I did (straight set), I decided to try a sliding dovetail fixed at the front. It came out neat and has held up well for a few years of New England humidity swings, but the machining was a bear. I would think it would be easier with a CNC center and might be a way to kick it up a notch on the quality side. However, I'm not sure anyone cares enough either on the producer or consumer side.
From contributor O:
Contributor X - that is a good idea that could work except in the historic case where the spindles are held in a dovetail slot by the nosing. We did a mitered curved and straight return job on an 1890 house that we re-worked. The original woodwork and stairs was grain painted pine. We remade the entire interior in walnut and other hardwoods.
The stairs were pretty easy once we got into it. I had an idea of how the job would be done but ended up doing it totally different after getting into it. They were winders and every curved end different. We shaped the outside curve nosings with simple templates on the shaper, bandsawed and edge sanded to a line the inside curve. We made a �� thick reverse template to pattern rout the treads finishing the end with a chisel. There was a dovetail slot near the mitered end and that helped. We used a saw blade in a tilting shaper with a sliding table to cut the miters. We could have also made a jig for the table saw but this was easy. The curved treads each had a different angle. For the straight treads the cut was made on a sliding table saw dropping the blade near the end and finishing with a chisel.
The old stairs were very nicely done and we almost hated to redo them. The curved tread ends looked like they were cut by hand then undercut so that the top visible line was tight. The dovetailed slots and spindle ends were hand cut and wedged in place. Like a lot of old work the innards were rough but the final product visible to the eye was precise and easy on the eye. For attaching the treads the old work was nailed with spots of hide glue. We ran some biscuits for alignment. The finish carpenter nailed them but not sure if he glued them in. The spindles had to go in at the job site. One advantage of nailing only is easy spindle replacement.
From the original questioner
Wow, some great responses here! I'm doing the whole set of treads so I don't have to worry about matching. I don't know the client only the contractor, but my feeling is this is not really super high end or historic in any way. I believe the only reason they're having me make them vs buying from the box store is because they need half of them to have returns on both sides of the tread. So in reality I could probably just slap them on quick and dirty with pocket screws and go, but I just wouldn't feel right about it. The dovetailed slot sounds great, but probably way overkill for this job, and I certainly couldn't get it done for what I'm charging. Something to file away for future use though! I'm still not sure if I'll do the ends with a miter or curve, may come down to how long it takes me to build a sled for the table saw vs. making a couple curved jigs for the shaper. At least I have a bit more info so I am better prepared to make a decision.
From contributor T:
I have used all methods mentioned including a plywood template that has right and left cut into it with a stop block on front. Clamp it on your tread, rough out with a jig saw and flush trim with a top bearing router bit. The inside radius left from the bit can be chiseled out or hit the returns pieces on the belt sander to match. We cut ours now on the CNC router and we do use biscuits and glue.
From contributor O:
The dovetail slot is overkill for most jobs. This was once in a lifetime job that we enjoyed but will most likely never repeat.
From the original questioner
First off thanks for all the helpful responses, as usual you guys have come through! So I took all the advice into consideration and kind of melded into a way I thought might work for me. I was skeptical about cutting clean enough on the bandsaw, firstly because I don't usually trust the bandsaw for these types of cuts, and secondly, because I don't trust myself to be good enough on the bandsaw to make these types of cuts.
To my surprise just using the bandsaw fence most of the cross cuts were good enough, though several had to be kissed ever so slightly on the table saw for a perfect glue joint. I did the miters freehand on the bandsaw and they all came out usable, frankly better than I had hoped! Most were well within a degree of 45! I cleaned up the joint using the disc sander on the loose returns. I glued them on using two biscuits per return, hoping that even if the joint starts to loosen over time the biscuits will keep them secure. Then it was through the shaper for the bullnose and done! Granted this is pretty simple work in the overall scheme of things but I'm still happy when things go well! By free handing through the bandsaw I saved quite a bit of time building the jigs � a bonus for sure.
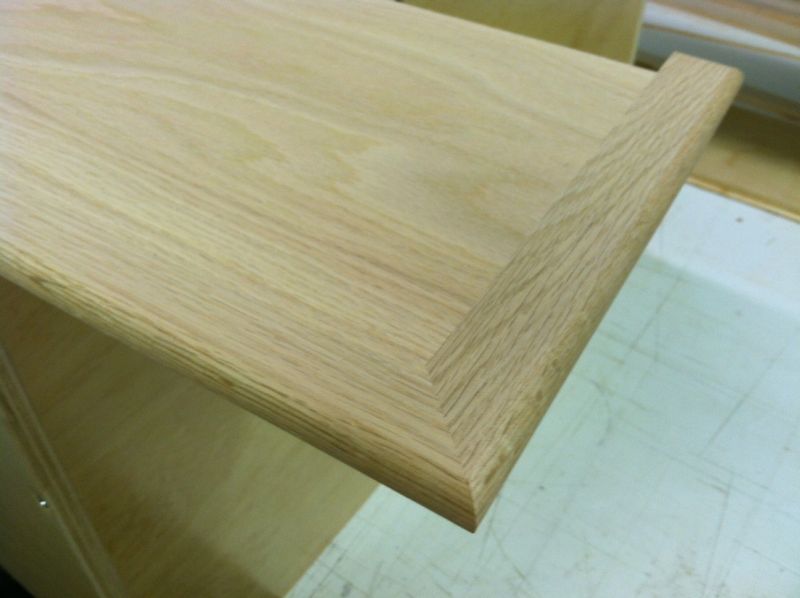
Click here for higher quality, full size image
From contributor A:
What width of return did you do on those treads?
From the original questioner
They are 10-1/2" wide treads with a 1-1/2" return. There's also a bit of overhang, (for lack of proper term), on the back of the tread of 1-3/8".
From Contributor O:
I learned that tread returns should be 1-1/4" wide to match the overhang along the front nose of the tread. This gives equal overhangs above the riser and the skirt, and is within code. The returned end on the return - the tail was also 1-1/4" beyond the back of the tread. Code says 1-1/4" is the maximum overhang, but I doubt any inspectors know or care.
From the original questioner
Good to know for future reference! He was specific with dimensions (though I require specificity anyway on stuff like this), so I made them exactly to what was spec'd. Since he's been around about twice as long as me I don't question too much. He picked them up today, I got paid, and everyone is happy!