Crown Moulding Jigs and Techniques
Another take on crown moulding, as pros and newbies compare jig systems with old-fashioned methods. November 19, 2008
Question
I build and install laminate closet organizers using frameless techniques. I have never claimed to be a carpenter, and I am in awe of the work you trim guys do. I have avoided crown molding but am being forced to add it to our offering to compete. I have seen crappy crown installs and need to learn how to do basic stuff to cap our units. I found a website for CutnCrown jigs that looks like a dream come true. Any comments on these jigs?
Forum Responses
(Cabinet and Millwork Installation Forum)
From contributor S:
Works as advertised. Definitely need the roller supports to hold up the longer pieces of molding. Also be careful when cutting - you really need to hold the jig firmly. You'll constantly have to refer to the instruction stickers on the jig to remember which way it goes based on the cut being made.
From contributor J:
From a quick look it seems like it basically just lets you cut crown right side up instead of the ole' upside down and backwards. If that's the case I couldn't see spending any money on it. More important than cutting the angles, which anyone can really do, is learning to cope your crown. I for one am terrible at it, and so have usually cheated and just mitered inside corners with various degrees of success. On my current job I started using the Copemaster, a little plastic jig that helps you cut copes. I have to say it's not a bad little jig for the money and gives me much better results than I've done with a coping saw. Still not as good as some of the talented finish guys can do, but it's definitely a step in the right direction.
From the original questioner:
Contributor J, may I suggest that you look more deeply into the CutnCrown website. The impression they give is the jigs help in terms of eliminating the cope issue. The testimonials, which obviously we take with a grain of salt, are almost religious in how these jigs avoid the human error in which direction to cut. The claims of first time users are incredible. And I am a total novice at this and will be using RTF moldings, which I think are more expensive to begin with. I am looking for the best crutch possible, especially since I will be doing crown maybe a couple of times a month.
From contributor J:
I just took another look at the site and although it's certainly an interesting product, it does what I assumed the first time. It basically allows you to cut crown somewhat easier and likely more precisely than upside down and backwards. For a beginner this could save you a lot of headaches and lost materials.
Having said that, once you start installing crown I believe you'll find that inside miters are not a good joint. It's nothing to do with how accurate your joints are, but how far out of whack the walls are. You're dealing with the variations of the framing, plaster, etc. which I believe makes the cope a superior joint.
Now if all you're doing is molding that wraps cabinets and doesn't meet a wall or ceiling, I think an inside miter would work well. And a jig like this will probably be worth its cost.
From the original questioner:
Thanks for clarifying regarding the cope aspect. I understand about the framing and mudding aspects, as I deal with them to some extent. Your description as to the extent of crown work I expect to do is accurate, just enough where the cabinets meet the wall. And since I control the design too, I am going to make it as easy as possible. Crown applied to ceiling and wall - no thanks! I'll leave that to you pros!
From contributor L:
Where are you located? If you're in a city of any size I'm willing to bet there's a woodworkers guild, or maybe a Rockler or Woodcraft store near you where you could take an evening class in crown molding. Heck, I think Home Depot and Lowe's even give some of those classes.
Crown isn't really that hard, especially if you're running it on square, flat surfaces. One class would get you there if you have any experience with a chop saw. Maybe you know a trim guy near you who might be willing to spend an afternoon in exchange for a discount sometime?
Just a thought. After all, you can always outgrow a jig, but a skill will stay with you.
From the original questioner:
Thank you. I guess the issue is timing and memory for me. I can get someone to show me. But will I remember it when I get to the site? Crown will be an occasional finishing touch, not everyday work.
What I think I am going to do is order an instructional DVD and make up some mockups to learn and practice a bit. The molding profile I intend to use is a 4" top mount from my RTF door supplier. I need to figure out the reveal, any measuring adjustments, inside and outside corners, and fastening. Since this is pre-finished molding, I am thinking about getting one of those 22 ga nailers I have read a little about. I have a small Paslode airless which I like for the occasional use I have for it. Any thoughts on nailers?
I have a 10" miter saw with a Forrest blade. I want to avoid a compound slider. Since I haul my material to the job, I have limited space for equipment.
I have been reluctant because it's new, it's upside down and backwards, it's left and right cuts, and all those angles on a chart. I just need to keep it simple, since I will be working with flat and square units. After I try this for a day, then I guess I'll decide if I should invest in the crutch of jigs.
From contributor L:
A 23g pinner would be a great investment, and is fantastic for crown. You won't need more than 1 3/8" length, but I like having the option of a little more than 1". I've got a Max that I like. I've used the Grex and Cadex and think they are just as good. I would stick to one of those.
Gary Katz has good CDs on the subject. I think once you actually run through a CD, or have a chance to do some crown with an experienced carpenter, you will find it's not as hard as you're thinking it is. Especially the type of crown you're doing.
Upside down and backward makes it sound daunting. What you can do is just make a diagram of how the crown needs to sit and tape it to your saw or your cut table. You can make your own crown stops and mark where they go on your saw and they will replace the jigs you're thinking about buying. You don't need a slider for crown - it actually makes it more complicated to set up to cut.
Long story short, just buy Gary's crown CD and it'll pay for itself in very short order, and you will have a new skill that will increase your value in the marketplace.
From Gary Katz, forum technical advisor:
No offense to anyone who uses these types of jigs, but honestly, this upside down and backwards thing is blown way out of proportion. In fact, it's a true blessing that we can turn crown molding upside down in order to cut it! The measurement marks for crown molding are always (except when you're running up a rake wall or cutting a self-return) made on the bottom of the molding. When we turn it upside down, the measurement marks are up, so we can see them clearly and guide the blade right to the mark. That's all the proof I need to know that there's order in the universe.
If you use a full-length crown stop, and if you mark the stop with a big L on the right side and a big R on the L side (I also have those marks on my miter saw fence), then you won't get confused about which corner you're cutting. And if you always move the material from your left side toward your right side, then you'll always be cutting the left hand end of the molding first. These are simple rules that make cutting crown very easy. Jigs only make it harder.
From contributor T:
Buy the good saw, not some jig, if you intend to do fair amount. Set up in the quiet and before you know it, the light bulb of understanding will flash and you're running crown. It's nice to have square/straight cabinets to run on. Crooked ceilings and walls take a little more practice. My wife ran this detail last week, while I ran a tripple (3 bullnose step-out, a built-in entertainment center out of sheetrock and bullnose). I agree with Mr. Katz. You can do it.

From contributor M:
I have to say that I looked at the jig mentioned above, and for the life of me can not understand why someone would pay money for it. I agree with the previous two posts that crown just takes a little bit of getting used to. The upside down and backwards, with a little practice, will become a natural thing to do. Given the choice, I would rather run crown than base any day. But I suppose that as long as people are afraid of it, I can call myself a "crown master," and charge up the wazoo to install it. I really do not mean to sound like a jerk, but in my mind, when you get right down to it, it is just a piece of wood. It is nothing to be afraid of. If the thought of miters really scares you, I would go to Home Cheapo, and buy a stick of MDF paint grade molding to go home and practice cutting into small pieces. That way you would only be out a few bucks, but gain some experience. In my experience, upside down and backwards will work in most standard situations, and those worried about cutting crown lying down, with a slider, should leave that for those wide pieces with no other options for cutting it. That is a whole different learning curve, but one that is not impossible. If your material is pre-finished, you will want to make sure that you have the proper blade for the material, and your saw. This will make an incredible difference in the finished product. Not all blades are created equal. Sometimes you get what you pay for.
From contributor R:
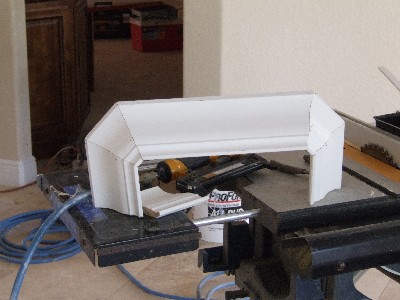
I personally have used the Cut N Crown Jig and I found it very useful. It is plastic and slides on the miter saw table so you must hold it firmly. It won't work with about 5% of moldings that don't have 2 spots on the front of the molding that is parallel to the back without making some furring strips. That's the only problem I've had. The joints look great.
From the original questioner:
I ordered Gary Katz's crown DVD. I look forward to learning a great deal from it. I visited Gary's website and am greatly encouraged by the promise of a systematic procedure. I had previously done a Google search for crown molding DVD and wasn't impressed with what came up. I am now comfortable with upside down/backwards based on some research and above suggestions for crown stops and labeling the saw for reference. Once I have reviewed the DVD, I will first practice with some cheap molding on some mockups, then I'll practice with the specific RTF molding I am thinking of using. Finally, I hope to figure out a system to precut most of the moldings before we leave the shop. I hope to avoid coping since any inside corners should be straight and square. If I still have a problem I can always try the jigs. But based on the input here, I am confident I will conquer the mystique.
Contributor T, that is a beautiful detail your wife did. Ironically, my wife also works on a lot of installs with me. I was wondering about how long it took for her to do that particular detail?
From contributor T:
Our little company trims and paints. This is 2800 sq/ft, 10 ft ceilings, 6 pocket doors, 38 bullnose corners and crown throughout. Trim and paint about two weeks, the detail posted is pre-assembled from the cut list, shot-in and then coped-to about 45 min or so.
From contributor J:
One last thing which may be of help. When installing your crown, use a little yellow glue on the joints. It will keep them closed and tight in the future.
From contributor N:
This baby works great. I have worked for years with crown molding. I decided to do a home for a fellow and only had two days to do the whole thing (4000 sqft 2 story). I completed it in 18 hours including caulking and paint. If you build your corners first you don't have to worry about how bad corners are built. If you didn't learn how to cut corners out, then you shouldn't be doing this anyway. The joints were all tight and after caulk and paint looked perfect. I was very impressed and have used it on many projects since. Anyone who says they can do it faster and better is smoking crack.