De-Nailing Salvaged Antique Floor Joists
There's no magic bullet for pulling hard old cut nails from antique hardwood floor joists — but there are lots of techniques. February 14, 2010
Question
I recently had the chance to salvage 125 year old white oak floor joists. I managed to get ~400 board feet in the form of 2"x10". The joists appear to have a mix of heartwood and sapwood, but I haven't had a chance to get into them too much. They have one edge filled with old square nails that held the flooring down. What is the best way to deal with them? The obvious approach of pulling them seems to work on about 80% of the nails. The rest tend to break. I've tried pulling them with the usual hammer/wrecking bar kinds of tools.
Forum Responses
(Sawing and Drying Forum)
From contributor C:
You can't bend those nails much without breaking them. I generally pull them with a pair of vise grips and a block under the back side. The top curve of the upper jaw contacts the wood block and you can roll the vise grips back and pull the nail at a very gentle angle. Also, you are not relying on the head to take all the stress of extraction, as you should be able to clamp onto the shaft. This technique works well for nails with broken heads too.
Also, after you de-nail that board, do not re-saw that side of the board from 8/4 to 4/4, as you will invariably bisect some of those nail holes. They leave ugly, black, cross-grain lacerations on your board, making the inner faces unusable. I would recommend ripping that section off the main board and re-sawing it into 1X2s with the nail holes presenting on the cut face. I'd love to see a couple pictures once you cut a few. I bet the growth rings are really tight and uniform. Nice catch!
From the original questioner:
Thanks for the suggestion. I've used vise grips in this way before when salvaging wood, but it's usually my last choice since it is much slower than other methods (at least for me). After some trouble with these brittle square nails, though, it was clear my usual approach would not be sufficient! Your point about not putting all the pressure on the head is a good one. I'll give the vise grips a try.
From contributor S:
I use a tool I call "nippers" to pull the old nails out. When a nail breaks off I use an old chisel or a screwdriver to excavate the wood around the nail so I can get a grip on it with the nippers. Try not to bend the nails. Pull them up a little, then get another bite on them further down and work them out. A handheld metal detector is a big help.
From contributor T:
I've used the suggested techniques with some success. Those square nails can really be tough. If you get some stubborn ones you can drill some small holes around them to make extraction easier.
From the original questioner:
I've actually got a pair of nippers (from my grandfather). They do come in handy on stubborn nails or headless ones when there's not enough room for the vise grips. I've tried drilling, as a last resort. I'm looking for an efficient method. There are a lot of these nails in that stack of wood, and I was hoping for the "magic bullet" that would make the job faster.
From contributor S:
There is also a tool that is like an air nailer without nails. The driver goes deeper than a regular nailer; it punches the nail through the board. From what I've heard it is fast.
From the original questioner:
Thanks for the idea, but I don't think it will work in my case. Since these were floor joist, the nails are in the edge - so would have to be driven about 10" to come out the other side! Also, being square nails, they have a tapered shank rather than a uniform shank. Thus, even if they were in the face of the board, driving them through would be especially destructive (unless they were broken off first).
From contributor L:
How long are these nails? How much wood would you lose by trimming the edge off?
From the original questioner:
Good thought... I haven't looked that closely at these for a while, but the nails were pretty substantial as I recall. I'm thinking 2.5"-3". In fact, they seemed a bit overkill for flooring to me. Since they did hold flooring down, they are angled, so they almost certainly have less than 2" in the wood.
I guess I hate to give up that edge after working so hard to salvage them in the first place (I took them from the first floor of a house with a basement before it was demolished). This approach might work for some of the pieces in any case, depending on what that edge looks like. Of course, if I find the nails are shorter than I remember, this becomes more attractive.
From contributor V:
When dealing with reclaimed lumber there is no silver bullet! Use punches, pliers, v-grips. Square floor nails are about 11/4 long. Pull all the nails and resaw into 1x10. The beauty of reclaimed is the character of the wood, nail holes and all. We de-nail about 25 thousand bf per month from beams to 1" resaw and make flooring. Use a hand held metal detector to check your work.
From the original questioner:
I was kind of afraid that there might be no secret nail-pulling technique. It was worth a try, though, and maybe there will be more good suggestions. I hope you have a little help de-nailing the 25k bd-ft each month!
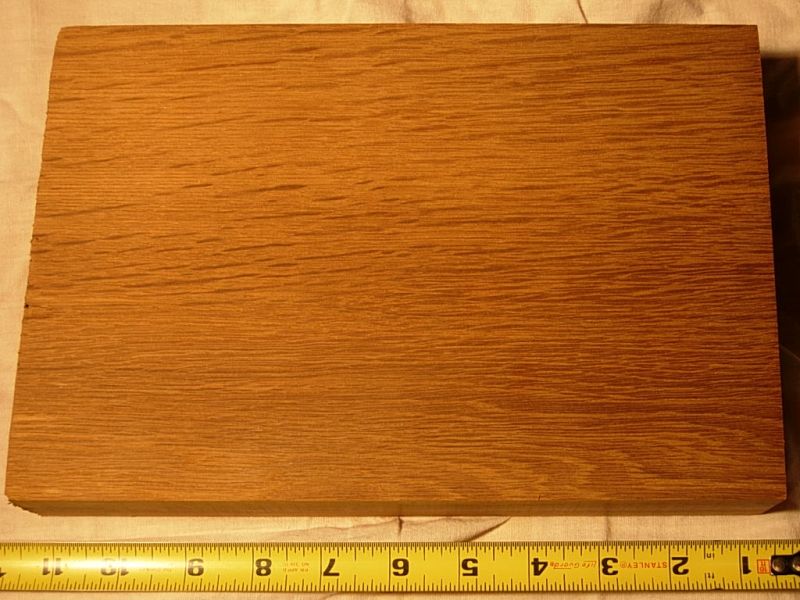
I haven't quite decided how to use that material yet, so I'm leaving it as is for now. Nevertheless, I am a little anxious to see it cleaned up. I planed a short cutoff just to see what I got. This piece was mostly heartwood with a nice warm brown color. In fact, I did a bit of a double take on what species it really was after seeing this color since I'm not used to white oak being that dark! It really is oak, though.
From contributor C:
You may have chestnut and not know it. Many people see chestnut and think it's odd looking oak. Chestnut was used at the turn of the century like we use oak today. Post a picture if you can.
From the original questioner:
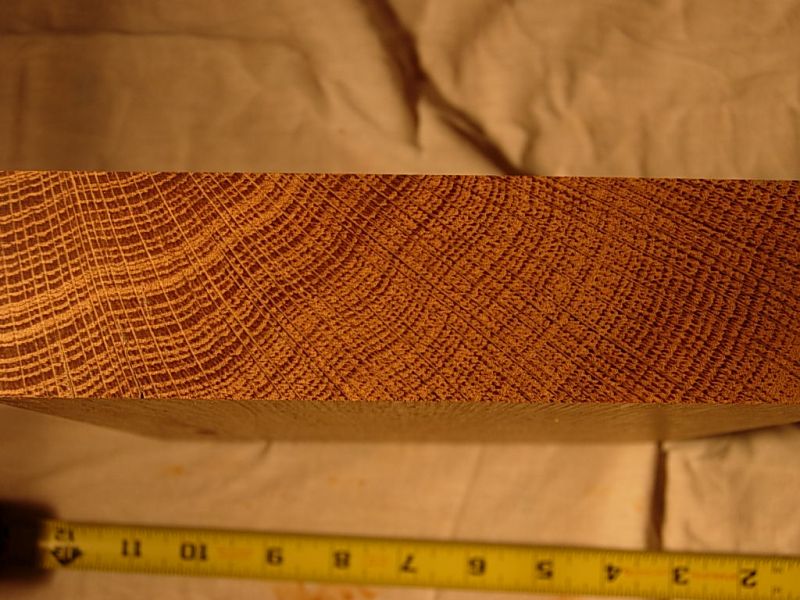
I'm pretty sure it's oak, but am happy to hear otherwise. This is a small piece I planed. I've included a few pictures since I'm not confident the grain will come through. The edge of the piece facing the camera shows a little ray fleck and the end grain looks pretty oak-like to me...
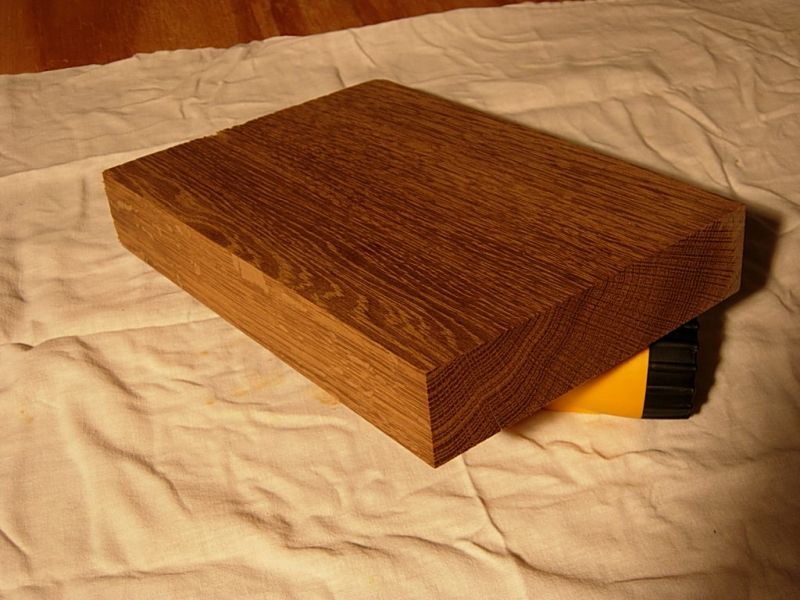
Click here for higher quality, full size image
Click here for higher quality, full size image

Click here for higher quality, full size image
Click here for higher quality, full size image
From contributor A:
Well, it is not chestnut.
From contributor V:
If the end grain is tight, it's white oak; if porous, it's red oak. From the picture it looks like white oak.
From the original questioner:
I thought it was white oak based on the grain and the fact that when this house was built, the only oaks that I think were around this part of Kansas were burr oaks. There have been many other species planted since then, but trees were pretty sparse in 1880 here. Other pieces do have much lighter sapwood, too.
From contributor C:
Definitely not chestnut. I would say what a shame, but that's some great looking oak - well worth the de-nailing. If they were mine, I would take all the flat sawn pieces and rip them into 1x2s and edge glue them into panels for doors, drawers and tops.
From contributor D:
I spent a day last November pulling square nails from 150+ year old pine 5x7 timbers salvaged from a barn. Between 5 of us we had out all kinds of tools. What seemed to work best was chasing the nail down each side with a drill about the width of the nail, then wiggling it up with a needle nose pliers. We focused on just pulling those nails to clear a path for the saw blade to cut these beams into two 2.5 x 7 timbers. The wood was used to make table tops for a hotel lobby constructed on the site where the barn had been, and the holes were considered character. It seemed much faster and less damaging than digging out the nails. The next week I bought two metal detectors. If you have a chance to watch the last 5 minutes of the Renovation Nation "Bamboo House" episode which came out in May '09, you can see us cutting those beams.