Drilling Long Holes in MDF
An MDF shelf made of two panels glued together poses a special edge-drilling challenge. October 2, 2007
Question
I need to drill a 7/8" diameter hole 9" deep in 2" thick shelving for hidden shelf brackets. The shelves are doubled up 1" MDF. My drill press doesn't have a throw anywhere near that long. I tried making a guide block using a stack of 3/4" x 2" x 6" long pieces of wood and using a ship auger bit, but it's not accurate enough. Any ideas?
Forum Responses
(Cabinetmaking Forum)
From contributor M:
Put it on the drill press, drill 3" deep (for example), then put a 3" block under the piece, drill 3" again, repeat, etc. until you have your depth. Or you can just raise the table up each time - same affect.
From the original questioner:
Thanks. I thought of that, but my bench mounted press is too small to get a 10" wide shelf under the bit, even with the table all the way down. Plus, the shelves are big and unwieldy - the longest one is 13'.
My guide block method should work, but for some reason, there was a ton of slop in the guide holes. I drilled them on the press with a 7/8" Forstner bit. I put a caliper on the guide holes, and they're exactly 7/8. However, the auger bit measures out at around .825". That seems weird. I'm wondering if I can make this method work if I can tighten up the tolerances...
From contributor O:
Step out of the box, if not too late. Not all holes are made by drilling. Put a 7/16" deep x 7/8" wide dado in each half of the shelf so when glued together, you have a square hole. Either stop your dadoes, or add a face piece on after laminating to cover the hole.
From contributor J:
Are the shelves already glued up? If not, you could run a saw kerf in each piece at the drill location, then glue them up. The bit would probably follow the path of the kerf. Assuming the hole is centered in the shelf, of course.
From the original questioner:
They're already glued up. Good idea, though! I just returned the undersized ship auger bit and bought one that's truly 7/8". I'll try that after lunch.
From contributor G:
CNC.
From the original questioner:
Can I borrow your CNC? I'll be right over.
From contributor A:
You could try a local machine shop; they may have the ability to help you out.
From the original questioner:
Yeah, the auger bit method is not working. It's going off course by as much as 1/4" during my tests. I was hoping for a method I could do on-site, since the bracket locations will depend on where the wall studs are. I'm not giving up yet...
From contributor S:
Is there such a thing as a twist bit that is 7/8"? You could start with a smaller diameter bit to drill straight, then slightly bigger, and work your way up to the 7/8" bit. A smaller diameter should be easier to direct than an auger bit.
From contributor P:
The Root Machines in models CH, CHX and C-311 will bore 11" to 16" deep. ExFactory and J&G Machinery are good places to look for such machines.
From contributor D:
Drill a 1/4" pilot hole using a dowelling jig. The auger bit will follow this hole.
From the original questioner:
How deep does the pilot hole have to be? The entire 9"? If so, I have the same problem getting the pilot hole drilled straight.
The Root machines look like the ticket, but even a used one would be hard to justify for the few holes I need to drill.
From contributor D:
The pilot hole only needs to be 3 or 4 inches. Drill using a dowel jig. Remove jig and drill the full length of the 1/4" bit. After 4 inches, the sides of the auger bit will keep you straight. I've drilled through 36" doors for electric locks using this method.
From contributor S:
When doing doors a few years back, we rented a machine for doing the mortised door locks. I am not sure how deep it goes, but it was at least 4 to 5 inches. You clamp it to the edge of a 2" thick door and route your mortise. Maybe you could bore a hole as deep as it would go, then finish with your auger.
From contributor T:
Unbolt your drill press base and reverse it on the bench and rebolt it with the press head over the bench edge. Then jimmy together something to hold the shelf plumb and still and in the right place. Then use the "3 inch at a time" approach.
From the original questioner:
I'm going to try the doweling jig. Question for you guys about auger bits. Mine has a screw point, which seems to give the bit a mind of its own. Do they all have that? Does it serve a purpose besides starting the hole?
From the original questioner:
I tried the dowelling trick. It didn't work any better than the other approaches I've tried. So far, I got the best results by using a Forstner bit in the drill press, followed by a 7/8" twist bit in a hand drill, which gets me to about 6" deep. I then used the auger bit in the 6" hole, and it was off by about 1/8" when it came out the other end. Better, but not great.
By the way, I found out the answer to my question about the screw tips on auger bits. They were originally designed to be used in a hand brace. The screw pulls the bit through the wood, so you don't have to exert downward pressure to make it work.
I'm thinking that using auger bits to drill through the "end grain" of MDF might not be a good match. Just like when you try to put a screw into it, the MDF splits. The bit's screw tip then follows the crack instead of going where it should. I wonder if I ground the screw tip off...
From contributor U:
You are better off using a twist drill. After you drill with the forstner bit in the drill press, finish the hole with the twist bit. You should be able to get one long enough with a 1/2" shaft. Be sure to pull it back often to clear the chips, but don't pull it out all the way - just back up a couple inches. Twist drill will drill a better straight hole than an auger bit.
From contributor Y:
I had a similar job a while back. I needed to drill mine in the field. My solution was to fashion two blocks that held my 1/2" drill parallel to a flat work surface. I used a sheet of MDF. The blocks that held my drill were 2 1/2 inches apart when I clamped them to my drill. I screwed a 2 1/2 cleat to the MDF a 90 to the shelf. I used a simple spade bit with an extension. Simply shim shelf up to get the bit in the exact center and clamp. Press drill over cleat and hold steady as you drill into shelf. I found that the hole stayed true with a steady, even hand and in and out to clear hole. My holes were 12 inches deep. Spade bits do come in longer sizes and would be more accurate than the small bit and extension. It worked great for me.
From contributor D:
The tempered faces of the MDF is what is deflecting your auger bit. The foerstner bit with an extension would be the way to go. The bit is guided by the edge of the tool, not the center, so it should stay on course. Next time, put your metal in the wall first, then cut grooves before glue up. We usually use a 1" square metal tube welded perpendicular to a 1/4" x 2" x 24" bar that is attached to a stud. Even if it's an existing wall, it has to be cut open and patched. You never know what they're going to put on that shelf no matter what they tell you. I want to make sure the wall comes down with it. Sorry the first suggestion didn't work for you. But I love the never say never attitude.
From contributor I:
Someone above mentioned gluing up 2 boards with dados to create a square hole. That would have been the better way to go, but since you've already glued the shelves up, you could use the same technique to make up guide for your twist drill. When properly clamped, it should make the hole dead plumb when you go to drill.
I assume you're after a "floating" look for the shelves where you'll be needing to do the same with the masonry (I presume) surface you're attaching to. If that's the case, you'll be in for a whole new set of problems where I don't think a drill press of any size is going to be helpful.
As long as you're close with your drilling and have some play in the hole, a thickened epoxy will be all you'll need for a level shelf.
From the original questioner:
Contributor Y, your method sounds interesting. How did you clamp the blocks to your drill?
Contributor D, I'm not drilling through the face of the MDF. I'm drilling through the back edge for floating shelves (see pic).
The shelves are made of 2 sheets of lightweight MDF laminated together. The rear edge of the shelving is also dadoed for a cleat that will hang on the wall (sheetrock over studs, except in the middle, where there's a masonry fireplace). The metal shelf supports consist of two 9-inch long x 7/8" tubes welded to a 1 1/2" W plate. The tubes are 24" apart. I plan to screw the supports to the studs, slip the cleat over the tubes, and slip the shelves onto the supports and cleats. The supports will only be used mid-span for the 3 shelves to the right of the fireplace. That span is just over 6'.
I have a Plan B in case this doesn't work. I have vertical supports like the one shown on the left of the picture that I would place under each shelf mid-span.
Whew. Lot of posts for a "simple" problem, eh? Thanks for all the help.
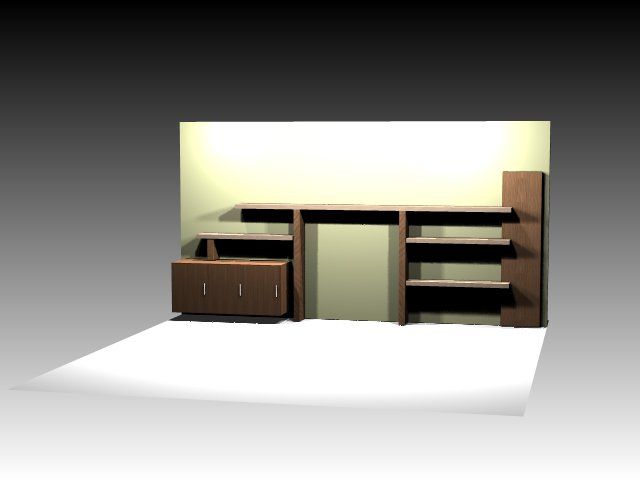
Click here for full size image
From contributor D:
I know how you're drilling them. You said you glued up two pieces 1" thick which would mean the glue joint would be harder than the surrounding area and the bit would drift up or down of the glue line. The point is going to look for the path of least resistance. Like nailing into soft wood where the nail has not been blunted. The point will follow the grain.
From contributor G:
Page 377, Hafele furniture/cabinetry catalog, shelf supports for invisible fastening of shelves with a wood thickness of 19mm or greater.
From the original questioner:
Actually, I read about the Hafele hardware on another thread here. It looks pretty cool, but it needs an elongated hole. I don't have a slot drilling machine or a chain mill. I found a 5" extension for Forstner bits. I'm gonna use that with the drill press.
From contributor Y:
I used a couple of 1 x 4 x 16 scraps of alder. I used my angle grinder with an abrasive disc and dished out the inside to match the curve of my drill. The top off my Bosch drill is flat and parallel to the chuck. I set the drill upside down on a 2x2 block and put each half of the guide blocks next to the drill. I then clamped them together with two 6 inch Jorgenson wood screw clamps. With clamps tight, there was 2 1/2 inches between the two halves. I cut another scrap to 2 1/2 and fastened it below the drill, leaving space below to go over the guide strip that I screwed to the tabletop. The drill with the hoder and the two jorgy clamps created enough mass to steady it to drill precise holes. I used a full sheet of MDF as a table top and the jig slid easily but very accurately. Just space the shelves up to the center and mount guide at 90 degrees from your shelf. Drill 1st hole in scrap stock and install a stop block at your depth. I drilled 32 shelves with 1 inch holes 12 inches deep with this setup. I did it on the job in about three hours. All my shelves had a dado in the back to hide the metal bar and I was able to adjust my holes to small variances in the supports that occurred after they were lag bolted to the wall. It was much cleaner to slightly angle the holes than to shim the bar straight and have to scribe the shelf for drywall imperfections.
From the original questioner:
I'm pretty sure I've got the hole drilling problem solved. Will jury rig my drill press as suggested by contributor T here, and use a Forstner bit with extension to get the depth. I'm amazed at the number of responses this has generated.
From the original questioner:
Finally got to install this thing. Installation went pretty smoothly. I know you guys were all dying to know how it turned out...

Click here for full size image