End Panels Inset into a Face Frame
Cabinetmakers discuss construction methods for a nice end-panel detail: panels set into a face frame, with a slight reveal. March 25, 2007
Question
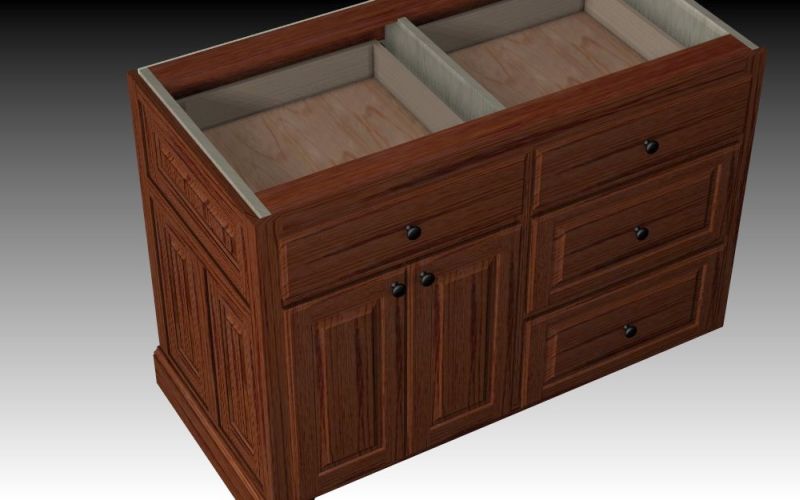
I was looking at some inset style kitchen cabinets recently. The finished end panels (cabinet ends upper and base) were inset into a face frame with a 1/16" reveal all the way around. I liked the look and would like to know the construction method.
Forum Responses
(Cabinetmaking Forum)
From contributor M:
I construct mine the same as I would the face frames and doors, except I usually make the stiles wider to have a scribe allowance against the walls. Also, depending on the color of the finish, I spray the plywood underneath the finished ends with the same finish as the finished ends have, so that if someone looks close at the reveal, they will still see the color.
From contributor K:
I build a face frame, then build doors one inch oversized for the opening I have created. I rabbet 1/2" all the way around the face of the door and insert it into the back of the face frame. This provides your reveal. You can also add a bead molding or a picture mold for a different look. I use a one inch scribe on my cabinet face frame to accommodate the end panel past the end of my cabinet. I just use a filler (spacer) at the back of the end panel.
Click here for higher quality, full size image
From the original questioner:
Thanks. I'm also an e-cabinets user. My use of the term "reveal" may be misleading. The frame and the door panel are flush with each other. The reveal I'm referring to may be better described as a 1/16" gap between the face frame and door panel. Having said that, let's see if I understand you. You build a face frame and a door, and rabbet the door to fit into the frame with a reveal. How is the door panel attached to the face frame, and is the finished panel now the cabinet side or is the panel placed over a plywood cabinet end?
From contributor K:
I use a pilot drill bit like the Kreg Pocket Hole Jigs use on a steep angle through the back of the door into the face frame. If I am using radius corners on the cabinet, then I have extra room and I add a nailer to the back of the face frame, then pocket hole the door stiles to this. If you need more room you can build the doors 1 1/2" oversize and have 3/4" to attach to the face frame. This looks nice because it makes the visible part of the stiles and rails smaller so it doesn't look like you just planted a door on the end of the cabinet. If you add the bead or a picture molding, then that really dresses the ends up. I apply the end panels over the cabinet end. This makes it easier to drill shelf pin holes and makes the interior of the cabinet look nicer.

Click here for higher quality, full size image
From contributor G:
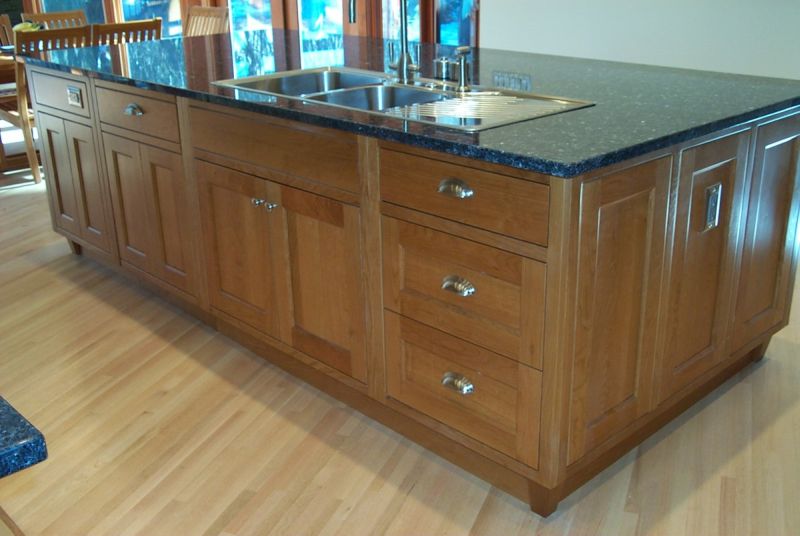
We make the frame 7/8" thick then rabbet the inside of the frame 1/8" deep by 1/2" or so, then mount 1/8" hardboard in the rabbet. Then we make the doors fit inside the frame with clearances. We did not want a 3/4" deep recess around these, as it would be hard to clean, so we glued 3/8" x 3/8" pieces inside the frame then rabbet the panels over them. We finish them apart, then assemble the parts with flat head screws through the hardboard. It is a lot of work but gave us the look we wanted.
Click here for higher quality, full size image
