Japanese-Style Black Finish with Red Undertones
Finishers pitch in with different takes on how to imitate an ancient Oriental lacquer finish for a custom job. March 9, 2008
Question
I have a client who is asking to have some cabinets built and wants a black painted finish with a red undertone to it, which I think is something done often in Japan. Is there a name for this type of finish, and could someone help me with the process? I assume it is a glazing treatment or something like that. This is not a distressed or rubbed off finish, but rather a multi-layered or toned finish, if that makes any sense.
Forum Responses
(Finishing Forum)
From contributor T:
One sample I would show your client would be diluted red dye sprayed on raw wood, then sealed, then toned with diluted black dye, then clear coated. I would use birch, since the finish will be so dark that any expensive species would be unrecognizable.
From contributor R:
If you can get a hold of Isabel O'Neil's book titled "The Art of the Painted Finish," she goes into pretty good detail on how to go about this type of finish. I've done this finish both ways, one with a black background and red on top and one with a red background and black on top. I suppose you could use a dye stain for the application, but the true finish is accomplished using lacquers and is called "Nageri."
I experimented around with the rub-through and found that wet sanding worked real good, but applying liquid stripper in a random pattern gave me the best results. I applied the stripper sparingly and let it dry. When it was real dry, I wet sanded the crinkled finish and it revealed great results. As a start you could spray on a red lacquer, maybe a burnt sienna type color, and when that is dry, follow it up with a black lacquer.
When everything is quite dry, try wet sanding the black, which will reveal the red color underneath. Take it easy with the sanding, because you don't want to sand to the raw wood (maybe on some edges it's okay).
Try some liquid stripper which you've applied with a brush, let it fully dry, and then wet sand the black color to reveal the red color. Be careful when applying the stripper so it doesn't bite too hard into the black color, and as I said, let it dry (overnight is good). Also, be sure to let the red color dry real good too before you apply the black. This is the kind of finish that just takes practice, but it will produce a fine look once you're done.
From contributor W:
I'd start with a fill, paint red, tone with a dilute black dye toner, top coat. A dilute black dye toner is basically a partial light filter. It will allow some light through to be reflected by the red below and give you a "black painted finish with a red undertone" - not distressed or rubbed off. Since there is apparently no desire to show the wood, you could also use a black glaze over a red base - might be easier if you're not up to snuff on spraying dye toners.
From contributor A:
I've done this one before.
Seal it.
2 coats gloss black pre-cat lacquer mixed with red dye.
1 coat clear lacquer in desired sheen mixed with red dye.
You need to use a really strong crimson red concentrate dye and do a few test panels to see how much red to put into the black and the clear coat.
From contributor M:
There are many different ways of doing these color finishes. I think contributor R is right on his finishing, but being your customer has no sample to show you, your best bet is to make up a few different red and black finishes. As was already mentioned, burnt sienna, the terra cotta color, is commonly used with a burnt umber glaze on some Oriental furniture. Another way to go is to use parts and sections of red and then others in black, followed by clear coats. Samples, samples, and samples.
From contributor B:
Also known as a NEGURO NHOURY finish, this is usually a black base with a red top. It can be accomplished with the following schedule. I've done this a number of times. It's relatively easy, but labor and time intensive, so charge accordingly. I've tried with WB products and it's nowhere near as good as oil based.
Black base:
1 qt of flat black oil paint
1/2 cup raw umber (grnd in oil)
1/2 cup semi gloss oil varnish or poly
1/4 cup paint thinner
10 - 12 drops of Japan drier
Red base:
1 pint of Bulletin Red Japan color (or a dead flat red oil paint)
1/4 cup paint thinner
5 - 7 drops of gold paint
3 -4 drops of Japan drier
For the base coat:
1) 1st coat: Brush on going with the grain. When dry, light sand with 320 grit and tack rag to remove dust.
2) 2nd coat: Brush on going against grain. When dry, sand and tack rag.
3) Repeat steps 1 and 2. When done, let dry for 4 - 5 days.
For the top coat:
1) Rub surface with 4-0 steel wool and wipe with a tack rag
2) Using a new China bristle brush, lay on first coat, going with the grain. Let dry at least 24 hours. Sand with a 400 grit paper and tack rag.
3) Apply a second coat (you can use a roller for second coat) going with grain. Let dry at least 24 hours. Sand with a 400 grit paper and tack rag.
4) Wet sand with a 600 grit wet/dry paper so that some base color shows through on corners, and/or "wear" spots.
5) Wipe dry and remove residue. Let sit for 2 - 3 days, and then apply 2 coats of oil base, gloss finish.
6) Let dry for at least 5 days. Then rub surface with the following in the following order:
- 600 grit wet/dry (wet), wipe dry and remove residue
- an auto body polishing compound (or 2000 abralon pad)
- an auto body swirl mark remover (or 4000 abralon pad)
- apply a good paste wax.
I said it was labor and time intensive, but results are impressive.
From contributor M:
Where did you get that home-brewed formula? That kind of finish definitely has got to be a commissioned job, where time, material, and money don't matter to the customers. It sounds to me like it's so outdated (poly and varnish) and the amount of time that it would take to complete the work is outrageous; today, it probably can be done in 3 days at the most. I think doing this finish one time would have been enough for me. It sounds different - I hope you got paid well for each job you did.
I prefer using simple and faster drying finishes, and using base color coats, stains, toners, glazes, shading stains.
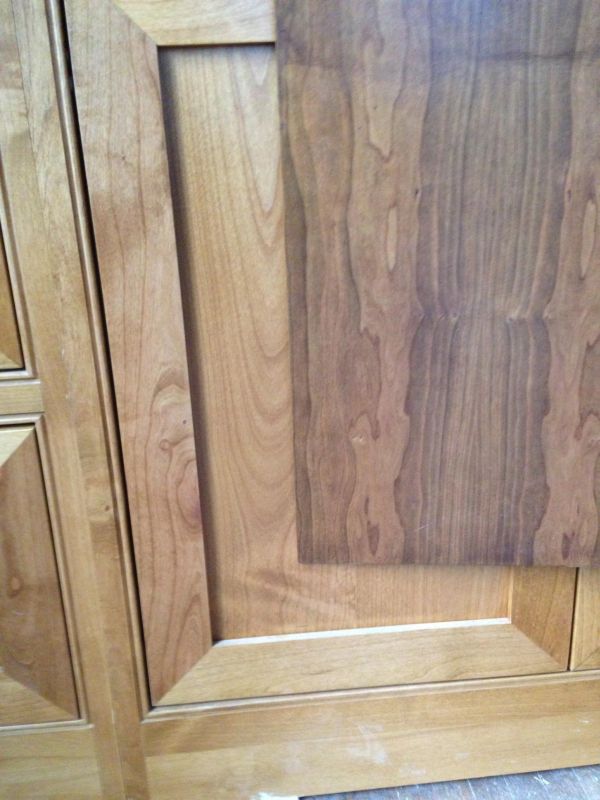
The attached photo shows a cadmium red lacquer toner as seen on the base. It was then clear coated in an acrylic gloss. The top was also coated with the cadmium red toner, and then clear coated. I then used a black glazing stain. I allowed it to dry and then clear coated it. Once it was dry, I glazed it again, and allowed it to dry, and then top coated over the glazed finish. If you look you can see red underneath the glaze, but it is very subtle. I could have also glazed the base to tone it down. The red stands out and attracts the eyes to the piece.
Click here for higher quality, full size image
From contributor B:
Contributor M, I understand your point of view, but to get this finish right, this is the schedule. You need heavy color solids content for both bases for both grain fill and color build, hence the Japan colors and paint layers. It also has to have a piano finish (smooth and glossy) on the mahogany, so again heavy solids build. Since this finish is used on pieces that are supposed to replicate centuries old furniture or its finish, you want a slight yellowing of the finish over time, hence the varnish finish.
Overall, in terms of using more modern methods, I agree with you. I was an early adopter of WB products, and am all for quicker and better (note I stated I've tried WB and it didn't measure up for this work). But in terms of quality of results for this particular finish, this is the way to go.
From contributor M:
I have second thoughts whenever I see a finishing formula with lots of base coats with paste pigmented colorants, and lots of clear coats, those multi mil finishes. I'm sure there are still some finishers around doing those finishes, but I haven't seen any in a long, long time. I would look for a faster substitute with less steps, even if it's not the same.
From contributor I:
Why substitute when the customer is willing to pay for what she wants, and the way to get what she wants is the old tried and true way, with old tried and true products?
From contributor M:
I would be very suspect in calling this schedule tried and true. There is a whole new world of finishing out there, and I doubt that this finish is that complicated that it must be done in the same way. I know that it can be done in much less time with the same look. I would think twice before I sell this job by doing it the "tried and true" way.
From contributor P:
If you think about contributor B's schedule, you can break it down to two coats of black paint followed by two coats of red paint with some sand-throughs. Then a couple coats of clear. The rest of the info deals with tinting, thinning, application, curing, and rubbing out the final finish. Seems pretty straightforward to me. If you prefer to use a different system other than oil-base products, then go with what you know. In a production environment, spray finishes would take less time while producing the same results.
From contributor B:
Contributor M, I am not trying to start a debate, and I agree with most of what you say. However, as contributor P points out, this isn't a production schedule. It's designed for a specific project based on a customer's specific stated wants. Are there other quicker, cheaper ways to accomplish this? Definitely. But when the discussion turned to Neguro Nuri, I provided a schedule to accomplish that specific finish. Since this finish has been around for about 400 years, and is still used today on handmade pieces that run upwards of $8000 for what we in the US call a "buffet," I'd qualify that as "tried and true."
From the original questioner:
Wow, great information. Thank you so much! I will try a couple of samples with different techniques and let the customer decide.
From contributor V:
You received a great deal of information, and I am sure there are many ways to achieve the look. I see this finish requested more often this past year as an accent piece for kitchen cabinets. For kitchen cabinets, I have recommended using a conversion system to hold up to the abuse and chemicals.
The process that I have used is:
1. Apply a clear conversion sealer
2. Sand with 320 grit
3. Apply the Becker Strong - Red conversion
4. Lightly sand for adhesion.
5. Apply the Becker Strong or Matador black conversion.
6 Sand through the black on the edges to show the red. Some shops will also sand through to the sealer on the sharp edges to expose the wood.
7. Clear coat with a non-yellowing conversion, either Becker Innovat or Amerivar.
You can do all of these steps in one day, and from a manufacturing point, keeping it simple is best. The Becker Strong has 79% solids by wt. or 66% by vol. This will provide a good coat for sanding. By using all conversion products, you will maintain the same expansion rate as the wood moves throughout the climate changes. For furniture pieces, you can do the same thing with lacquer or pre-cats.
From contributor M:
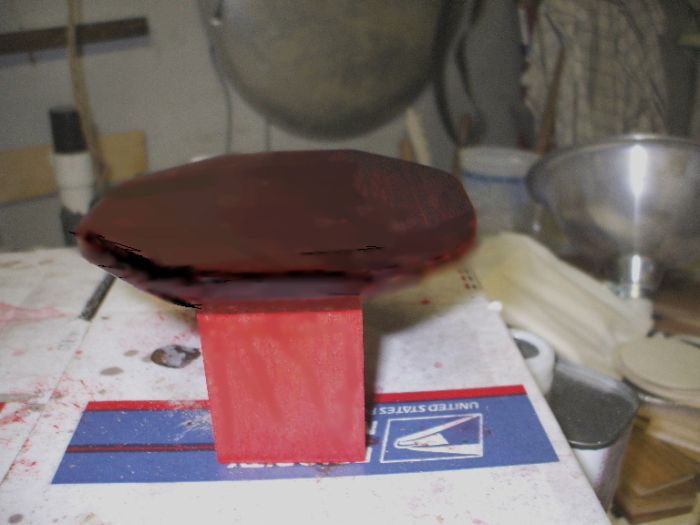
I glazed the red base with black, so you can see what it looks like with the red and the black colors in the finish. You could also use a black shading stain to add additional color.

Click here for higher quality, full size image