Question
I use Tee nuts to make an adjustable bracket for my slide out shelves using Blum Tandem slides. I am looking for a source of these so I can buy them a 1,000 at a time instead of individually from my local hardware store.
I've looked on the net and I can only find the kind that are barbed. The ones I have been looking for are called brad mounted. The base is flat (with no barbs) and have three holes drilled in them to nail the brads through. I end up grinding the sides flat so they will slide in a "T" slot. The thread I am looking for is 10-24 and the mounting hole is 1/4".
Forum Responses
(Cabinetmaking Forum)
From contributor A:
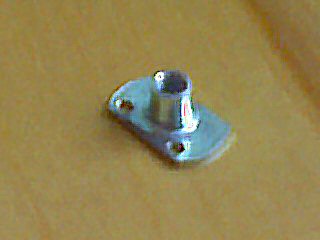
Can you post of drawing or image of your design?
Do you use 10-24 flat head machine screws to hold the slides? The only practical method we've found for adjustable slides have been 5mm line boring and system screws. I have no idea how many times you can screw a system screw into a hole, but at the end of the day wherever we leave the slides is where the stay. I don't foresee a customer moving the slides repeatedly in the future. Do you have any racking issues?
Each vertical rail gets a 5/16" w x 1/2" d slot in the center of the edge. Then you run a 1/2" x 3/8" keyhole bit through the slot to my "T" slot. This gives you a "T" about 1/4" t x 1/2"w with a 3/8" slot running the length of the rail. You put three or four pocket holes into what will be the backside of the rail, this way they are almost not noticeable. That makes the rail.
The modified Tee Nut is attached to the Blum slide with a 10-24 x 1/2" machine screw with a taper head so it centers itself in the hole. I put them in the lower hole which is more or less the center of the slide.
You then attach one of the front rails to your cabinet so its placement will work with the drawer not interfering with the operation of the door. Attach it to the side of the box using pocket screws and blocks to keep it a consistent distance from the FF. Put the slide with the Tee Nuts into the slot and then put the other (back) rail onto the T-Nut of the backside of the slide, tighten the screw, measure to make sure it is straight up and down and put in the bottom pocket screw. Move the slide up the rail to the next pocket hole and tighten it, put in the pocket screw. Do this for each pocket screw or make a spacer from the front rail to the back rail to keep both rails parallel to each other. The reason the rails are 4" short is so you can add or remove slides.
