Question
I know that many of the posts on the Cabinetmaking Forum are geared toward improving production. I don't see a lot of that here, but the finishing room is usually the choke point in most shops. Is the lack of attention because most of us are cabinetmakers first and only finish because we have to? If any of you have ideas on equipment or process that will help us be more efficient, please post them.
Forum Responses
(Finishing Forum)
From contributor J:
I asked when I first found this site if people here were professionals or homeowners, and I was torn a new one, sort of speaking. A lot of people were very offended. The way people were finishing shocked me. One post I am thinking of was about spraying a sealer, waiting a day for it to dry, spraying a couple coats of lacquer, waiting a day for that to dry, then flipping it over and doing the same to the faces the next couple of days. If I finished like that, I would be out of business.
I am a full fledged finishing shop. The requests and timelines I get sometimes are so ridiculous that the people here would just laugh and say it was impossible. For example, I had to finish a 60 door kitchen, painted, from scratch including the cabinets, masking everything off and sanding them, in one day. And believe it or not, it was ready to be picked up at 9 a.m. the next morning, and the customer was floored at how beautiful it was.
I did about 30-40 lft of wainscot including all moldings, the base and top rail closed grain mahogany everyday for about two weeks to get a showroom completed by the deadline. With only one snafu - I tinted a few panels too dark one day and they had to be replaced.
My chemical supplier told me the other day that I was the most critical of his products. I found this offensive, but nonetheless, I need the products I buy to perform at the levels I expect them to.
I should, with no problems, be able to finish a kitchen full of doors in either a painted or stained finish in a single day. That is just the doors I am talking about, and some of the kitchens have 120-150 doors painted and glazed. This is just finishing of course - prep takes some time as well, and I see it as the most important part of any job.
But to answer your question, I have tried to offer help here, but most simply regard me as someone who must do sub par work (with the amount of time it takes me to do things, it most certainly cannot be of any great quality). But if you drive down Fifth Ave. in Manhattan starting at Central Park, heading west to 50th Street, my work is or was in more than half of those stores. Million dollar homes on Long Island, and companies have flown me all over America to remedy the problems their finishers have caused.
The reason the finishing shop is the choking point in most finishing shops is the chemicals they are using - crap from Sherwin Williams or Home Depot, Lowes, ML Campbell. I can understand that people use what they are used to and comfortable with - it is easy that way and if you try something new and it fails, it becomes a lot of work to fix it. And a lot of people just don't know how to fix it. In the finishing shop there is no measure twice, cut once. It's more like you better know what you're doing from the beginning or you'll be doing it over.
The nice thing about high end work is that rich people always have money and there are quite a few who still know quality and are willing to pay for it. No matter how fast I complete a job, I am always more interested in the quality. The shop I'm at now is geared to high production flat line finishing for hotel and commercial clients. Quality should still be the primary focus. The last thing I want to hear from my bosses or owner is "It should make it for 1 year." That is not why I became a finisher and I expect things I do to last a long time.
There are finishes that cannot be done production. Try doing a production Trompe L'Oeil, for example. It just isn't going to look very good if you don't spend the proper amount of time and have the talent to do it.
A properly set up finishing operation, as in dust free, air makeup, formulating, etc., is also required in addition to enough room to move. If I can't lay out rows of doors on nail boards to spray in one session and flip them and spray the other side while the first side is just flashed, but instead were to spray one at a time and place in a rack till the next day as I see so many places do, then you won't get anything at the speed of production.
Then, chemistry is of utmost importance.
Now, let's talk just plain common sense. I recently talked to a guy, a well versed finisher as far as I can tell, who keeps hiring inexperienced or cheap labor, because "lots of people are unemployed right now, and they are a dime a dozen." Yet he is frustrated that in the last 10 months he has run through 15 people, he fires or they quit, and they just don't understand or follow his instructions. So he gets them cheap, then spends his time trying to train, only to have to do it over and over again. He has to work long hours and most weekends to keep up and/or make up for it. Now I have to ask, "Just how much has that cost?" Keep doing the same thing over and over and expecting a different result is the definition of what?!
There are so many tips and tricks to good finishing in addition to having a solid knowledge of woods, materials, chemistry, that it might be impossible to relay in an email forum in a way that would bring to you anything. Short of suggesting you crack the books, hire a consultant, or ask only specific questions which can be answered effectively, my suggestion would have to be: the shortest distance between point A and point B is to hire a professional finisher. You can always let them get you all set up, learn from them what you can, and then let them go, as many before you have done. Or run the numbers and take an honest look at just what it costs you when you try to do for yourself vs. recognizing finishing as a profession in and of itself.
"Techniques to improve production" isn't a common topic on the forum and there's a whole lot of issues that all play a role. The best place to start making recommendations to improve your production rates is to understand how you're doing things now. If you provide details of the finishes and finishing products you're using, how they are applied, dry times, recoat windows, how pieces flow through the process, how much room you have to allow pieces to dry between steps of the finish, what steps are used for different finishes, what types of spray equipment you're using, what sort of carts and racks you're using to move pieces between the sanding, spraying, and drying areas, what types of sanding equipment you're using, what's the floor plan for these areas and how do the pieces flow through them, are there any structural/building issues that impede work flow, how many people in the finishing department and what are their duties, are there any skill issues in the finishing department that slow work down, etc.
By understanding how your operation currently works, how it's laid out, the products and equipment you use, and skill levels of finishing personnel, it'll make it easier to identify improvements that can be made. Simple changes in some of the processes can speed things up or it may take investments in equipment, personnel and training, or even floor space.
First I ask all doors, drawers, and everything two sided be dropped off. My helper and I sand all this and I get a setup going in the booth. I can fit about 40-50 pieces in my booth at once. I set up horses and put a 2X6 across them that are 12 feet long. And I put the doors face down on these. I prime all the backs with a white primer. I hear white vinyl primer is popular. But the build isn't good enough for this, it doesn't dry fast enough, the paper clumps up way too easily, and the few times I have reluctantly tried it I had fisheye issues. So I would use Beckers Mazza white or similar from another company. All the companies I deal with seem to have one comparable to the Mazza.
I prime the backs 2 or 3 coats, wait about 5-10 minutes, flip over, then prime the fronts. All the time the rest of the cabinets either have been or are being delivered, my assistant is masking sanding and getting it all ready for me.
After I finish priming the fronts, my assistant and I scuff the doors both sides with 220 and make any necessary repairs we may have missed in the preparation.
I then make the paint using the lacquer. They usually call for an off white color. I use 844 colorants titanium white for the base, a quart to five gallons, and then whatever other colors I need to get to where I am going.
Spray the back twice with the paint, wait until it is dry, adjust the color if needed (this is why I do the backs of the two sided stuff first). It is never noticeable if the backs of the doors are slightly off, and of course if it is noticeable, I then need to re-spray them, but I can almost always get the color close enough. I then wait about 15-20 minutes, flip them and spray the fronts twice. Wait for this to thoroughly dry; depending on temperature, it is usually from 10 to 30 or 40 minutes.
When they are dry enough, my assistant goes around with the glaze (made using mineral spirits and japan colors to match what the sample calls for, which usually consists of some variation of burnt umber, raw umber, drop black, or French yellow). He has a 2 inch chip brush and the thick glaze in his hand and brushes the glaze into every corner. I then come from behind with a rag soaked in mineral spirits to wipe the whole door front down and a dry rag to clean the whole thing off. He gets way ahead of me and it is better that way, as the glaze has time to dry before I come and soak it all down again. It stays in the corners better when it has time to dry.
When he is done wiping it on, he goes behind me and wipes off all the edges and any possible streaks I may have left on the surface. When I am done I go behind him to make sure he didn't miss anything.
When we are done, I spray a coat of clear on the face and wait for it to dry. Flip over the doors, and since they are usually covered with glaze fingerprints, I just have to wipe them down using a wet, then dry rag. And in most cases this is good enough glaze for the back. I spray one coat of lacquer on the back. Let this dry for a few minutes.
We both then go around scuffing the fronts and backs of the doors, leaving the backs facing up. I topcoat the backs, wait until they are dry, about 15 minutes flip, spray the fronts, then immediately stand them up along the wall so they can dry and are out of the way.
I then move on to finish the rest of the two sided items before I go on to the cabinets, and finally the crown, base, panels, range hood, and all other miscellaneous parts. After all the painted parts of the kitchen are finished, the cabinetmaker then drops off the stained island and I finish that in the same method, two sided parts, then cabinets, then everything leftover.
And just a side note. I almost always make the samples for these kitchens so I write down what I have done to make it easier when I have to duplicate it on the real thing. As for staining something, I try as much as I can to always start with a pre-mixed stain from Mohawk, a wiping stain. The popular ones I use are medium walnut for all the browns and medium red or dark mahogany for all the reds. I stain the wood with these, seal with a high build sanding sealer twice, scuff. Then to get the color and consistency required, I mix in a cup gun, lacquer thinner and a small amount of the necessary japan color. This is where experience comes in. You need to know what you're doing for this part to get to the right place that you want to go. I tint the wood with this, make everything even and consistent and spray a coat of lacquer on top. If need be I tint a little more or change the color to adapt, then tint a little more, then another coat of lacquer, scuff and a last top coat.

What's the difference between Japan colors and Mohawk's concentrated pigmented colors or even SW concentrates?
I see no difference in using Japans, UTC or derivatives, but not concentrates as a way of coloring glazes. Concentrates just do not work well, but cannot remember why. I think it was because they dry like lacquer stain and were unworkable.
The reason I like making glaze this way is for the simple fact that it is ready to coat within minutes of application and leaves no gooey mess that attracts debris, hence I needn't have to apply a scuff coat to smooth things out.
I will caution that until you grasp the concept you may believe that glazing this way is for crap. As there are different ways I employ removal and application, either way you simply cannot screw up, as it's simply a matter of wiping off with MS and starting over. There are times I work with a prep guy who has no concept whatsoever how to apply a base coat from which I can manipulate a glaze smoothly. In this case I remove my glaze with a 3m pad in the direction I want my glaze to ultimately go by using enough pressure to effectively scuff and create a layer on which I can work. And no, the base color does not change and there are no scuff marks to radiate through. Staying with the pad I will feather/refine the effect intended for that particular piece. You can regulate your tack time simply by adding more or less xylene.
From contributor E:
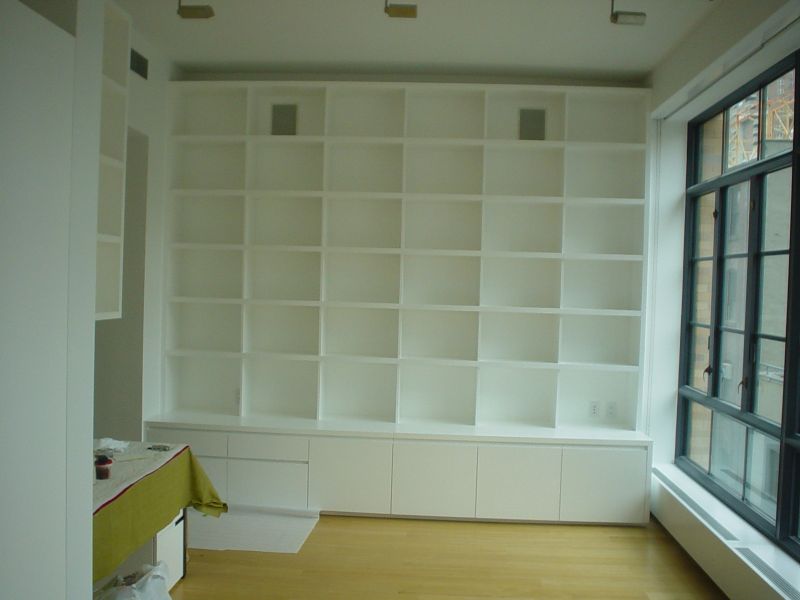
Nice work. I assume you had the material set up to dry slow and you were moving fast. The underside of the horizontal framing at each cross looks like fun ;)
I know some guys like to use pedestals and Hafele racks and some like to use nail boards. We do a combination depending on the size of the job.
As far as our finishing schedule, we use mainly conversion varnish, so a typical painted/glazed job would get 2 coats of pigmented CV, then glaze, then water white CV topcoat. With my lead finisher and a helper we can normally do a set of cabinet doors in a day, not including prep and sanding. As far as products go, we are pretty much stuck with Sherwin Williams due to a lack of availability of better products in our area. We buy the best products that they offer. Their local chemical coatings store does a good job for us doing all of the color matching of stains, pigmented, and glazes. We use different types of spray equipment depending on the job, including a Graco AAA, Asturo and Iwata HVLP guns on pressure pots as well as gravity guns for little one-offs. We have a 36" Supermax brush sander and an 8" fladder head mounted on a pedestal sander.
Comment from contributor S:
Finishing room velocity is developed through efficiency, organization and precision.
The customer has appearance and quality expectations. Additionally, the professional finisher should study the efficacy of a coatings potential to meet environmental and usage demands of the product.
My involvement for thirty years in production finishing has taught me that seldom does a coatings manufacturer make a finish that doesn�t perform to the standards for which it was designed. Much too often I find that lack of knowledge undermines the finishing departments performance, then training, oversight, schedule design and adherence, and equipment.
There is a distinct difference between Professional Finisher and Applicator. You should know the difference. The Professional Wood Finisher owns a Gram scale (and a back-up) and measures colorants to the decagram and can adjust for wood color and texture variation in seconds. For this, multi-step color applications are the mainstay for anything but the lightest dye stains. The terms step samples, wash coat, basecoat, ground coat, pore fillers, dye stain, pigment stain, gel stain, wet glazing, dry glazing, brush glazing, scratch-glazing, dry brushing, emulsifiers, Toners, Gilding, Primers, Surfacers, Sealers, distressing techniques and independent distressing schedules, Top Coats, Polishing Schedules, and Finish Standard Schedules and Formulas are not just words but meaningful choices with a preparation middle and outcome consequence. We haven�t touched upon the myriad of coatings choices either.
One schedule may have ten steps but move rapidly and accurately from application-drying-application-drying, etc. while another may have only four steps but which may require many corrective steps and leaves one unsure of the final product until the final product is completed.
I know for a fact that there are dozens of colorant and coatings professionals available at almost any time of the day that are willing to offer advice on schedule design, performance and application strategies but unless your finishing department has an underlying philosophy of precision and efficiency you won�t be talking the same language and their advice may be of little help.
In my company, the finishing department�s mantra is �perfection�. We run twenty-four distinct standard finishing schedules and can operate six different schedules simultaneously. 95% of our finishes are multi-step and we have five finishing booths and ten spray guns. We use HVLP and Air-assisted airless, and use manifolds to change from 6 degree flat on up to 75 degree semi gloss. We routinely have gilded projects alongside of 95 degree acrylic polyurethane polishing schedules. We accomplish this with five co-workers, one manager and one color and finish designer. 80% of our finishes are custom with 50% of our finishes having custom schedules. We manufacture 10 mil of product each year and our total finishing costs are about 5%.