Question
I don't do much laminate work, but I have a large L-shaped countertop to make with a solid wood edge .75" x 2.0". It�s an irregular "L", but all straight cuts, no curves. Normally I lam the top and then biscuit the wood edge on and clamp it, leaving it a bit proud of the laminate surface.
Balancing the router on the front edge of the wood with a pattern bit to make the edge flush always feels unstable. Is there a setup I can make or buy for routing from the topside without cutting into the laminate or conversely, without a lot of hand sanding because I didn't cut close enough? I've tried it a few different ways and none has seemed ideal. What is the best way (details, please) to route the edge flush?
Forum Responses
(Laminate and Solid Surfacing Forum)
From contributor E:
Like This?
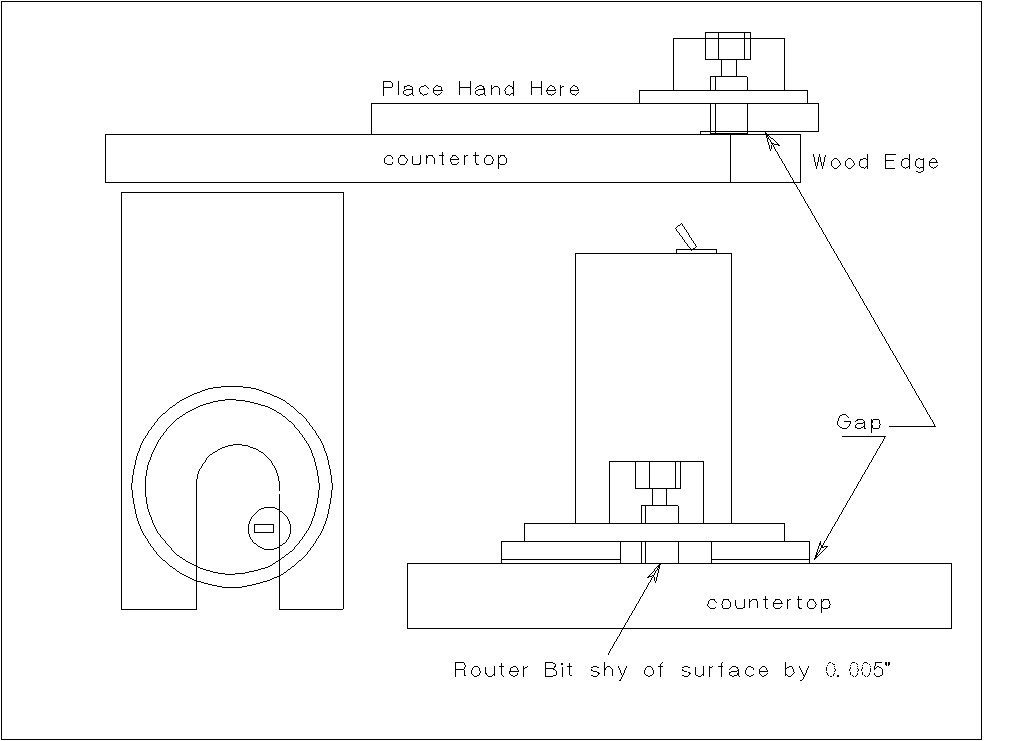
Also, if you really want the laminate to flush up to the wooden edge rather than go over it, Wilsonart has a wooden edge system that works pretty well. I don't like the gap between the wood and the laminate.
In either case, I want the wood to be flush with the top of the laminate surface and have that .75" transition at counter edge. I once made a sled like Leo suggests. It was a quick affair and I will definitely make a new one, and to better tolerances - maybe out of .5" acrylic or something like that, so I can see as I go. I simply didn't know if there was some magical solution that hadn't occurred to me.
As for laminating over the wood, you see it here in the south all the time. I just finished a job where I did it that way. It turned out great. I posted on here about a month ago asking how best to deal with inside corners. I ended up just using a chamfer bit and routed right around the corner. It was a clean cut (although rounded in the corner) but looked just fine.
After unclamping the work, take 1" or wider masking tape and tape the edge of the laminate where it meets the hardwood edge. Then put a second strip down next to the first strip of tape, effectively doubling the amount of laminate now covered with tape. I usually tape it back about 3 inches. Then I take an orbital sander with a 100 or 120 grit paper and sand the edge flush to the surface. You'll know when you're flush when you see the masking tape disappear at the edge of the hardwood. You have to pay attention to what you're doing though or you will burn through.
I usually peel the tape and re-tape it for a final sanding at 150 or 220 grit. Do this on a test piece first and get the feel for the sanding process.