Positioning Drawer Fronts
Cabinetmakers swap ideas for the jigs and methods they use to set drawer fronts onto drawer boxes. September 21, 2005
Question
Has anyone come up with a good design for an adjustable jig that positions a drawer face (with overlap) while it is being attached to the drawer? I am looking for a jig that will adapt to different height and width faces and allows for an adjustable overlap. How is everyone positioning the faces without re-measuring for each drawer? Any help is appreciated.
Forum Responses
(Cabinetmaking Forum)
From contributor P:
We set them up with spacers for the lateral gaps, a straight-edge for vertical alignment. I drill a pair of 5/16 holes, then use dowel centers to transfer a center mark to the drawer face, drill pilot holes, and then attach. After final tweaking, I add two lock screws. It�s fast, adjustable, not expensive, and effective.
From contributor J:
I took 13/16 stock about 2' long 6" wide, put a piece of 1/2" on top overlapping enough to compensate for your overlay and glides. I then drilled a 3/8" hole on each end through my assembly table so I could drop pins in to hold in place. I then lay the front face down, pushed under the overlapped 1/2" and the box on top. Then I took a piece of 3" sq. x 1/2" and glued a 2" square on top, trimmed each side so I had 1/32 differences for a variance in the boxes, and used this to adjust the sides.
From contributor O:
Spacers and double sided tape works fine for me.
From contributor W:
To the original questioner: Have you seen drawer front adjusters? They're from Hafele, and you drill a 20mm hole about 7/16" deep in two places on the back of the drawer front, insert a special steel dowel center into the hole and approximately align it and press it against the drawer box in place. This leaves a small dent in the front of the drawer box where you drill a 3/16" thru hole for an 8-32 machine screw.
Replace the dowel center in the drawer front with the drawer adjuster device and screw the front onto the box with the 8-32 machine screws. Snug them up and push the front around on the box to get it aligned then screw it tight with wood screws from the inside and your done. In the time it took me to type this response, I could have had two fronts done.
From contributor E:
I like the 20mm buttons, too. If you can establish a few standards, you can dispense with the positioning dowell. For example, always centering buttons vertically on the front and 3" from the edge. That way, you only have to figure out where to drill holes in the drawer box. Drill a larger diameter hole than you need for the 8/32 bolt, and there is plenty of adjustment in case you're a little off.
From contributor W:
Put a dab of hot melt glue on the drawer, and position the front. Let it cool for 15 seconds and then open the drawer and screw it in place.
From contributor P:
20 mm drive-in adjusters work well, but if you strip out the little 8-32 threaded piece there could be trouble. It puts the brakes on the entire installation until you dig the thing out. Also, they don't work well with a stile/rail front. The adjusting screws give you the same range of adjustment, and same ease of index-marking (dowel centers go into 5/16 holes on the box front rather than into the 20mm holes in the fronts), for about a penny apiece.
From contributor K:
Custom bottom and side offsets drove me to design a jig 15 years ago that looks like the drawing. It measures 16"w X 40"l and has adjustable bottom and side fences. Start by holding face into position and mark bottom and side overlays with a pencil against installed drawer boxes in cabinet, then using pencil lines adjust jig starting with all bottom drawers. Readjust for middle and top drawers as needed. Prep drawer boxes with 5/16" adjustment hole then attach faces using 1 1/4" flat head screw and cup washer. I tried washer head screws and switched to cup washers because of the better bite
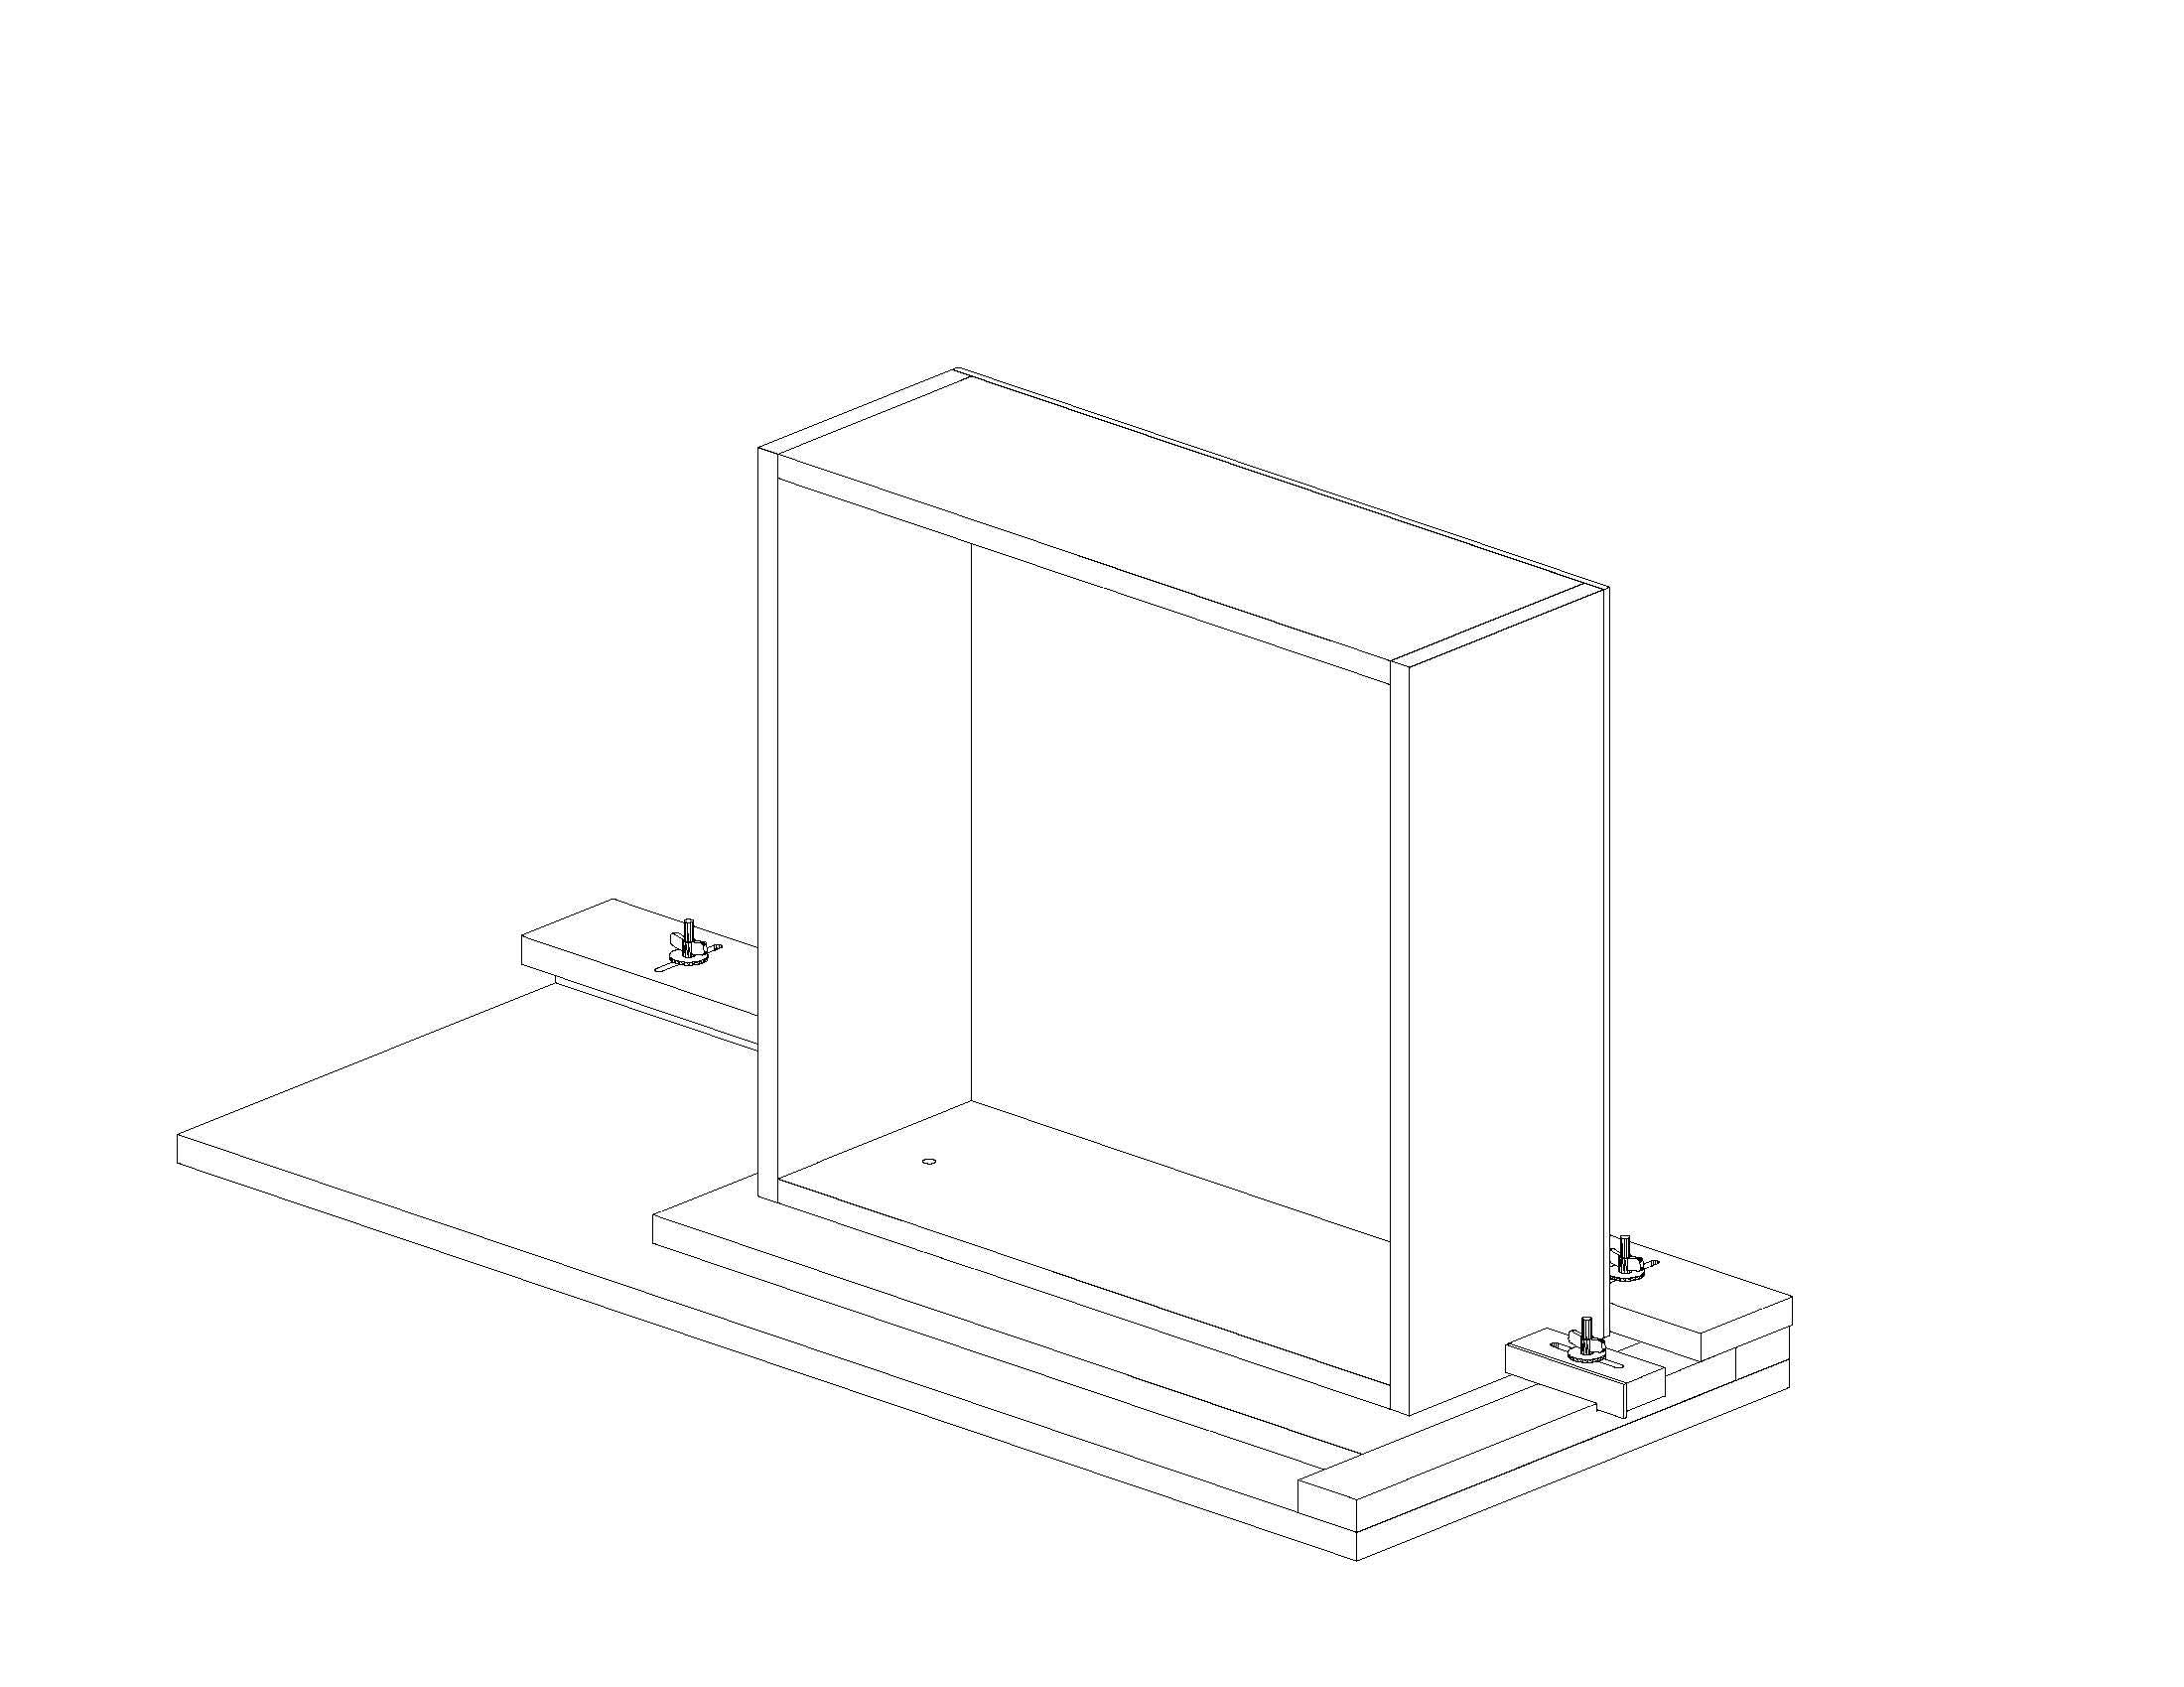
Click here for full size image
From contributor W:
To the original questioner: Are you doing euro or ff boxes?
From the original questioner:
What I did was built a jig that had spacers equal to the overlay on the bottom and one side and fastened some 3/4" on the outside of the spacers to act as a stop that positions the drawer face. I clamped this jig against the bottom and one side of the drawer front, placed the drawer face on the stops and screwed it in from the back side.
This worked ok and I was able to leave the drawers installed in the cabinet. It would be nice to make an adjustable jig that can be used on all size drawers. I like all of your ideas and will have to try them out.
Contributor W - They are face frame cabinets with overlay doors and faces.
From contributor C:
Assuming you're always using the same type of hardware, this is so easy. Put a drawer in the cabinet, line up the front where you want it, and secure the front to the drawer. Then take the drawer out and use this drawer to make a jig. Since this is what you're going to use to make your jig, make sure you get it right. Remove the drawer slides from the drawer while you make this jig.
Take a piece of plywood as big as any drawer front you'll ever use. Lay the drawer face down on this plywood, and run a piece of solid 13/16" thick down the left end and across the back (along the drawer front's bottom). Then add another layer that actually contacts the drawer box down the left side and against the drawer bottom. All you have to do then is place the drawer front face down and against the fences to the left and back. Set the drawer box on top and push it against the fences and then screw it on.
I fought all kinds of things, and this is quick. Occasionally something won't fit quite right and I'll have to make minor adjustments, but it works most of the time. My regular hardware and full extension hardware both need 1/2" on each side, so I can use the same jig no matter what hardware I use. I just have to remember to set the full extension hardware up 1/4" up from the bottom of the drawer and everything always lines up.
From contributor W:
Contributor C is right on the money. When we were doing ff jobs we never mounted drawer fronts on the cabinet. If all of your reveals are the same (they should be the same for all of the drawers) just lay the DF face down on a table, place the drawer on top with the proper spacing and screw the drawer on. If you are not using rails between drawers then you should start. If you are then what I described will work most of the time without having to adjust a thing. Just screw the drawer onto the front and slip into the hole. We use the hotmelt method for our euro cabinets because there is a different reveal for the drawers.
From contributor D:
I would suggest using Grass Zargen sides and you will never have to adjust again. We go through over 100 drawers a month and very rarely have to do any adjustment. I can assemble a whole drawer in the time some spend to attach a face.
From the original questioner:
To contributor D: What model of the Grass Zargen slides do you use? Is there a US distributor? I checked their web site but didn't see one. I use Accuride slides now and use jigs to drill the screw holes but there always seems to be one or two that end up out of position a few mm. I am not sure of the quality of the Accuride's compared to other brands.
From contributor B:
Drill the hardware holes in the drawer fronts but not in the drawer itself. Line up the front on the already hung doors with spacers and screw the front from the front side to the drawer and install screws from the backside. Then take out the screws through the hardware holes and re-drill the hardware holes through the drawer and mount hardware.
From contributor C:
The best way to get the front right the first time and every time is to use a sliding dovetail. Also, make sure the drawer slides are cut into the front and get away from the staple on fronts.
From contributor P:
I build frameless cabinets. 1/4" reveal from top of drawer front to top of cabinet. It's the same between drawer fronts, in the case of a drawer bank. Install the drawer fronts before the countertop and before the cabinets are installed in the home.
To get that 1/4" reveal at the top:
Use 5" x 20" (approximately) x 3/4" thick particleboard. On the bottom edge, use a 3/4" x 1/4" thick strip glued and pin nailed. Let the 1/4" thick part overlap the front of the top stretcher of the cabinet, and then screw the 3/4" p. board to the top stretcher. This guarantees a consistent 1/4" reveal at the top.
The side reveal is 1/8", or a 5/8" overlap of 3/4 cabinet sides. Use the same approach as for the top, only now the strip is 1/8" thick. Screw this to the side of the cabinet. (A finished end panel will later cover that end to hide the screw holes.)
The first drawer front installed is the top. I work down for 2nd and 3rd (or more) drawers, simply using a 1/4" spacer between them. Double sided tape holds the front in place after positioning against the stops, then screws from the back.
From contributor R:
To fix drawer fronts to a drawer box I drill four screw holes to take No. 8 screws in the drawer box front. Where access permits I would present the finished drawer front to the drawer box, fitted with its runners and in the carcass and hold both together, in the desired position with G cramps fitted with rubber faces to prevent marking. Then simply screw the front to the box using a battery drill.
This is fine for the bottom drawers in a carcass when access is possible from above. In cases where access is not possible or on the top drawer when the top has been fitted simply screw in some No. 10 screws into the No. 8 screws and leave them protruding through the front by a short distance. Then present the finished front to the carcass and with a gentle thump by hand the protruding screws will mark where the fixing screws are to enter the rear of the drawer front. It helps if this tiny mark is enlarged a little with a centre punch or similar. Place the drawer front, face down on a bench and remove the heavy No. 10 screws from the screw holes in the drawer box. Remove the drawer box from the carcass and place down on the front with No. 8 screws in position and locate directly over the marks left by the centre punch.
Drive in all four screws in and return to carcass. In most cases with little need for adjusting if some care is taken. Begin with the bottom drawer and work upwards. It may seem a little long winded but in practice works well. Fixing drawer fronts should not be a problem and should take little time.
The comments below were added after this Forum discussion was archived as a Knowledge Base article (add your comment).
Comment from contributor M:
Drawer front alignment and fixing can be awkward. The quickest method that I have found is to use a pre-made stool to give the bottom drawer front height, and then apply double sided tape to the drawer bottom and side clips. Position the drawer front in the required horizontal position and pull the drawer onto the front by pulling the drawer box forward. Remove the drawer and front carefully and screw the front on. You can now use the bottom drawer to support your next drawer front.
