Radius Shoe Molding
Determining radius of cabinets in order to match molding. July 20, 2004
Question
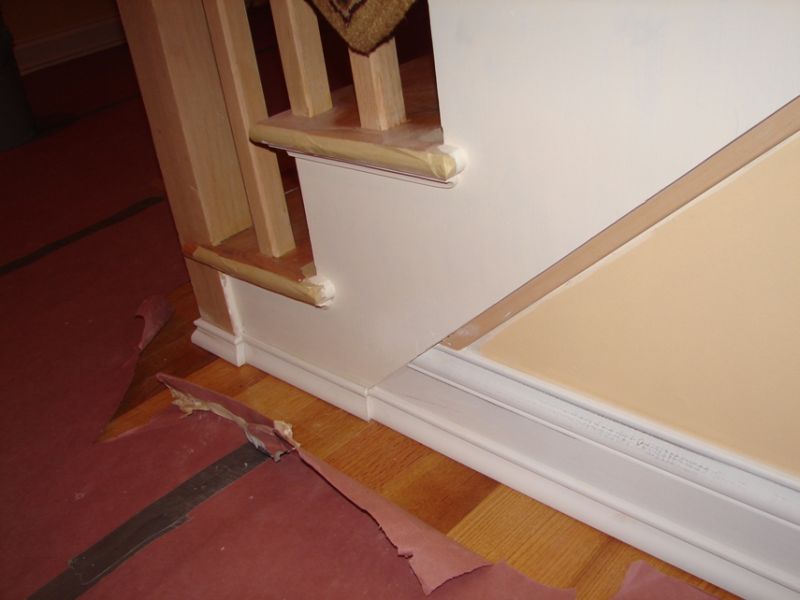
Any suggestions on making a shoe molding to go around radius cabinets?
How are you making templates of the installed cabinets? My client tore out the floor in his kitchen and redid it, so now he needs a shoe molding to go around the cabinets.
I'm thinking a 1/4" plywood template. Anything easier?
Forum Responses
(Cabinetmaking Forum)
From contributor D:
What is the radius? Type of wood used on cabinets?
From the original questioner:
Finding the radius is my downfall. I'm not sure how I can measure off of the cabinets to find out what the radius is. I figured I could just take a piece of 1/4" ply and keep cutting it until I meet the radius and make a jig off of that.
It's going to be cherry.
From contributor D:
Did you make these cabinets?
From the original questioner:
Nope. They're 13 year old existing pieces of crap in a 1.8 million dollar home. He tore out the whole kitchen floor, and now needs this base shoe, since it didn't have it before.
From contributor D:
That explains why you don't know the radius. I would take some cardboard to the jobsite, some trammel points, a utility knife, and of course a tape measure. Start with a radius close to what you think the radius might be, cut it and try the fit. Go bigger or smaller next try and so on till you get the right fit, and place the trammel points to your tape measure, burning an inch to get an accurate reading. Don't forget to add the inch back to your reading.
From the original questioner:
If I use the trammel points and then cut the cardboard, how am I supposed to reuse the trammel points? Is there any way you can draw something and post it?
From contributor D:
Trammel points are adjustable. They slide along a wooden stick - nothing more than a large compass. They are found at woodworking stores.
Start fresh on a new piece of cardboard, and so on till you get it.
From the original questioner:
But if I lay out a radius that I think it is and cut the cardboard, how am I supposed to reuse the trammel points again after the piece has been cut? Do I just bring several pieces of cardboard?
From contributor J:
If you want to do it without a lot of cutting, you can grid it out. Set up a square on the floor and measure each inch from square to radial point with a tape. I recommend a tailor's tape for this. Then go to the shop, take a plank and put pegs in at those points you got, steam and bend or laminate the shoe up, whatever.
From contributor D:
You got it.
From the original questioner:
Can either one of you draw a radiused cabinet and show me how exactly this is done? I'm a visual person, and it doesn't help that I haven't done a whole lot of radius work.
From contributor D:
Get it close and then use a short pencil that fits between cabinet and floor to scribe it. This would be the outside of the base shoe if not any thicker than 3/8", assuming you are using a standard #2 pencil. This is the quickest way.
From contributor B:
Wire, tubing etc!
From contributor P:
Templates can be made by using 2" strips of 1/8" plywood. You just glue them together at the ends around the radiused piece.
From contributor R:
I'd take some paper and tape and cover the floor around each curved piece. Get the paper right up next to the toe kick.
Now take a pencil stub and trace the curve on the paper. Label the paper "this side up" and "piece name" so you don't get them mixed up. Transfer the line to heavy cardboard stock and re-label everything.
Go back to the shop, make jigs from the cardboard templates and laminate the shoe mold on the jigs. Use a flexible glue (PVA) so that you can bend the molding a bit if needed without cracking it. Rigid glues will crack under the least amount of flexing. Since it will be nailed in place, springback is of no concern.
Obviously, any profile has to be done after glue-up and cure.
From the original questioner:
I used construction paper today and made my template. On the cabinets that are a semi-circle, it measured 48" across, so I assume the face of the cabinets are at a 24" radius. Since the toe kick is 3" in, I would take 48-3=45 divided by 2 which will give me my radius.
From contributor G:
I've always made them with a template, too, but I think I'll change that tune.
And if you have a Construction Master Pro (or if you're better at math than I am), you can figure the radius without a template.
From anywhere along an inside or outside radius, place a straight edge of known length (that will be the run) against the radius and then measure to the furthest point of the arc (that will be the rise). If it's an outside radius, then you have to center the straightedge so it's an even distance to the arch from both ends - that even distance would be the rise. I'll draw a picture and post it later. I sure needed one when I learned the technique.
From contributor E:
You should be able to guess at the radius. If the cabinet has roughly a 24" radius (easy to check), the kick is offset 2", that leaves a 22" radius + -, close enough for a very flexible shoe molding. I could guess the radius close enough at a glance.
From contributor K:
Did you ever consider steaming the shoe molding? I don't know why this wouldn't work. The toekick will act as the form. Just steam the molding for an hour, then nail around the radius. You can precut a scarf joint on both ends to continue with your straight runs. I just finished steaming these 8" cased openings and I do small moldings to a fairly tight radius all the time.

From contributor S:
Wood Magazine (I�m sure they didn�t discover it) had a formula that will give you the radius of an arc (R) with only 2 measurements. It is in issue #149 (June/July 2003, page 6).
You need 1/2 the length of a line (L) across the curve and the distance from that line (H), which is in the center of the line at L, to the peak of the radius.
The process is very easy but you might need to see a drawing to make sense of what to measure what you need.
I don�t have the software to make you a drawing. I hope my English skills are sufficient enough to solve this problem for you.
Take half the length of the line (L) and multiply it by half the length of the line (L), then add the distance (H) times the distance (H), then divide this sum by twice the distance (H).
In algebra it would be written as: (the * means multiply)
Radius(R)=((L*L)+(H*H)) / (H+H).
Example:
L=12, H=6, (the line is 24 units long, the rise is 6 units);
R=((12*12)+(6*6)) / 6+6
R=(144+36) / 12
R=180 / 12
R=15 units
This even works for arcs more than 180 degrees, but why would you need this then?
Full circle:
L=0, H=30, full circle (L=0), 30 units across;
R=((0*0)+(30*30) / (30+30)
R=(0+900) / 60
R=900 / 60
R=15 units
From contributor G:
Here's the actual formula. You can plug in the rise and run numbers and do the math... but I still use my Construction Master Pro. Enter the Rise, enter the Run, push the Convert key, then hit the Diagonal/Radius key and I don't have to worry about reaching the end of my limited universe.
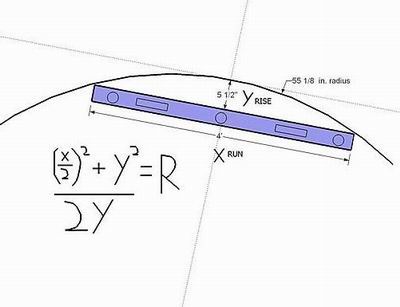
From contributor S:
That is exactly what I meant - your (X/2)^2 is the same as my (L*L) as L is X/2.