Question
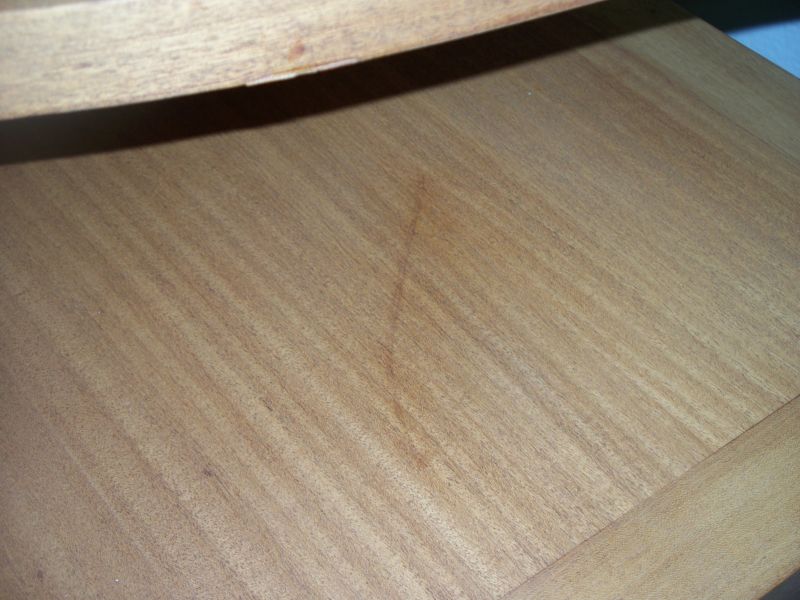
This oak veneer table is a Red Lion I just stripped, barely sanded at all, and stained (I haven't finish coated it yet). I have this problem with an indentation now. The surface is completely smooth but as you can see, as soon as I put the stain over it, bam! What causes this and how can I get rid of it without having to sand? The veneer is very thin and really choice.

Question
(Veneer Forum)
From contributor J:
Can't help with the scratch, but you might like to know that that's not oak.
About the scratch - try steaming it out with droplets of water and a pencil-tip soldering iron. If that doesn't work, you will likely have to faux it. Or - explain to your customer that scratches are part of the character of antique furniture.
If it is a scratch where some of the wood has been removed, sanding makes sense. This would lower the surrounding wood surface until it matches the level of the bottom of the scratch. Now you should have a smooth surface again.
But I would consider my second idea before I started sanding. Sanding is permanent! If it is an indentation where the wood has been compressed, sanding would not be my choice of repair. Making the assumption that the wood fibers were not damaged during the compression, I would try the following.
1) Spray distilled water on the surface.
2) Let it set for a few minutes so the water has a little time to be absorbed into the fibers.
3) Use a clothes iron and a clean cloth to heat the area. Cover the area with the clean cloth (to prevent direct metal to wood contact). Apply the iron over the wet area and move it slowly around (think small circles) so you don't accidentally get an imprint the shape of an iron on the wood.
4) Don't leave the iron on too long. You risk burning the wood. Remove the cloth and check often until you get the feel for doing this.
5) When the indentation looks like it is gone, stop ironing. It might even be that the indentation is now raised above the surrounding area.
6) Let it dry. Let it dry. Let it dry.
7) Carefully sand the entire area.
Note step #6. If you sand it while the wood fibers are still wet, you may get a smooth surface. But when the wood dries, the fibers will shrink a little. Then, some areas may sink down again. This should be part of Sanding 101, but I remind you anyway. You might try practicing on some scrap.
And that doesn't look like oak to me either. It looks like a light-colored sapele (aka ribbon mahogany) that has been quarter-sawn. That said, I am guessing that it is a veneer surface instead of solid wood. So, any sanding must be done with extreme care so you do not sand all the way through the veneer.
