Troubleshooting Snipe on a Jointer
An introduction to the wonderful world of jointer knife and table adjustment. October 15, 2010
Question
When jointing 30 inch boards, my jointer is taking off 1/16 inch more material at both the front and back of the board in the first and last 4 inches. After the first 4 inches and before the last 4 inches, it's perfectly straight. What is causing this?
Forum Responses
(Solid Wood Machining Forum)
From contributor J:
This is called snipe, and most planers do it. I've never heard of anything you can do about it as far as tuning the machine, but would be interested to hear if that's doable. If you put a bit of upward pressure on the piece as it passes through, that will help on one end anyway.
From contributor P:
Snipe on a jointer is caused by the outfeed table being set too low or too high relative to the cutter head. Snipe on both ends does not sound like a jointer to me.
Snipe on a planer is caused by a multitude of scenarios dictated by which machine you have. It can be the bed rollers are set too high, chip breakers or pressure bar not set properly, etc. Some cheap machines simply do not have the frame rigidity and will snipe. Tell us what machine you have, make, and if it is a jointer or planer.
From the original questioner:
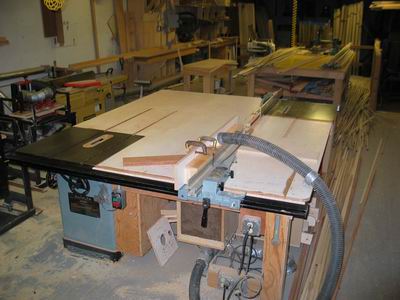
I'm using a Delta 6" jointer (37-275X). Using an accurate straight edge, I've determined that the tables are coplanar with each other and the knives sit slightly higher than the outfeed table.
From contributor R:
Sounds like you have diagnosed your own problem. The outfeed table needs to be adjusted perfectly in line with the knives. Adjust the table with a small straight edge maybe 12� long from the outfeed table. Adjust the table until you can feel the knives ticking off the straight edge but not lifting it. It is important to make the last adjustment of the table up to eliminate backlash, so if you miss it you have to go back below and start over. Assuming the tables are coplanar, high knives would result in visible snipe on the tail end, low on the leading end. Also make sure you are rotating the head 360 degrees when checking the alignment. As one knife will always be high, adjustments must be made to the high knife, unless you are jointing, which is fairly easy to do on this type machine. (Jointing the knives is not for the faint of heart, or careless. If you are interested, check out Ferier's Cabinetmaking and Millwork from your local library. He provides a good description of the process.) Jointers do not dimension, so unless the piece going in is dead straight or flat to begin with, measuring means little.
From contributor F:
Welcome to the frustrating world of jointer setup. You need to study jointer knife change 101. This task will become faster and easier over the years. Once you read up on the methodology, do your best to set all the knives even with the top of the outfeed table with each knife at top dead center in the cutterhead.
Now, take a couple boards about 30" long and make a test pass on one edge of each board. Hold the two jointed edges together. If there is a gap at the center, you can correct it by raising the outfeed table ever so slightly (sneak up on it). If the two jointed edges are convex and roll on one another, you need to lower the outfeed table ever so slightly.
Adjusting the outfeed table after setting the knives is a finer point you don't see in most books. You expect to have the machine work perfectly after setting the knives, but in my experience it seldom does, in spite of my best efforts at setting the knives perfectly.
Also, after jointing, a fair bit of work on the knives. Their tips will blunt and you can again benefit from a slight outfeed table height adjustment to put things more towards perfect with regard to the straightness of your edges.
I think that "joining your knives" with a sharpening stone from the outfeed table is a bit out of your league at the moment.
From contributor D:
1) Use a good dial indicator.
2) Keep your knives sharp. Many small errors in setup can be overcome, but a jointer simply will not perform properly on hardwoods without sharp knives. I have also found that really high quality knives stay sharp longer and thus require fewer setups; well worth the extra cash. Although right now you may need to practice setups, so scratch that.
3) Do it first thing in the day, when you are really sharp.
It is a major pain to learn, but eventually you will get it. After 19 years, I can swap out a set of 8" knives in about 30 minutes.
From contributor G:
Good advice from all. Prior to setting your knives, set your infeed at zero, and bring your outfeed to the same level using a straight edge, preferably a long one. Once your knives are set, I have a mark which I cross reference with a square, so I rotate the knife edge to the straight edge, then tighten it up (easier if seen). Lower the outfeed a smidgen, as mentioned earlier, so the knives just tick the straight edge (which is only sitting on the outfeed). Tighten outfeed. Run your board. When you run your test board, watch where it runs over the outfeed table. If it doesn't go from the infeed to outfeed on a level plane, look at the first 1-2 inches, then adjust the outfeed to solve. Last time I did mine, yesterday, following these instructions, I needed to raise my outfeed to have the board come across level.
From contributor I:
Setting the knives slightly higher than the outfeed is correct. Slightly higher means .001 to .0015. Measure with your trusty dial indicator with a 3/8 or larger button tip.
From contributor F:
The reason a lot of us set our knives as carefully as possible and then readjust the outfeed table is because even with painstakingly slow and careful tightening of the gib screws, the knives shift. In my experience, the knives always shift higher. Anyone who can set all the knives in a jointer within .001"...