How to Make an Elliptical Jamb
Advice on various approaches to laying up and gluing an elliptical door jamb. December 9, 2013
Question
(WOODWEB Member):
I'm looking for photos or video on how to make an elliptical jamb and casing. I've never done this before but would like to take a shot at it. I've seen people using the W&H or similar to make the casings but not the jambs.
Forum Responses
(Architectural Woodworking Forum)
From contributor L:
Make an MDF form and use it to shape glued laminations around it. You will have to account for spring back or make the laminations very thin on the order of 1/32" to 1/16".
From contributor P:
I may be wrong on this, but it would seem to me that you want to use plastic resin glue to minimize spring back.
From the original questioner:
Never tried that but have read it's good for this type of application. I've used epoxy with good results. Have you done any of this kind of work? I always like to learn new things and seeing how something is done is a big help to me.
From contributor P:
I have done lots of radius work. But no jambs. I don't think this will be particularly difficult - I would do it as contributor L describes.
From contributor L:
An epoxy or something like UNI bond 800 would work well for the laminating. It will not stop the spring back, but it may reduce it if you are letting it cure long enough. I don't really recommend using PVA on stressed laminating. Oh I've done it, plenty of times. And never had a problem. But the potential is there.
Always let the glue-up dry at least overnight in the jig. Unless you have an RF glue drier - then you can do as you wish.
From contributor L:
I want an RF glue drier. They are a substantial time saver when you are doing lamination work. Instead of waiting 2 hours minimum to overnight you can get it done in minutes.
From contributor K:
I have used epoxy for those that I have done. You should give your long and short axis to get better advice, but unless it is a really hard turn at the spring line, 8 plies should be enough. Even then, I like to carry the outer 1/3 of the bent head down on the back side of the straight jamb with an overlap about 6". This will take away the natural tendency for the spring-back, once it is connected and shimmed.
From contributor D:
I now stay away from epoxy since I learned it likes a thick glue joint, and my norm is to clamp the heck out of everything, starving the epoxy joint. Plastic resin glue is a good choice, but keep it and the wood well above 70 degrees.
You can avoid all the guesswork with springback by making what I call a brick-laid elliptical head out of sawn stock, and then adding a shop made veneer to the exposed face.
In my area, the lumberyard glues up a large blank of solids and then saws out the face, then the outside on a large bandsaw. Sand it a bit and ship it. The joints look terrible if it stains, and even if it paints, they telegraph - then look terrible.
Stack shorter band sawn segments to get the jamb width built up, all with staggered ends (brick-laid). Glue as you go and clamp carefully to your pattern. Clean the glue and sand a bit, then apply the face veneer. Skin/sand off one ply of some 1/4" ply to make two-ply bendy stock, and use a few layers of that as cauls to help spread the pressure.
The beauty of this method is obvious - no guesswork - no springback. You can be making the heads over here while the casings are made over there. Everything is predictable. Along with death and taxes.
From contributor A:
The only time we have ever had delamination issues with epoxy is when someone forgets or doesn't know to sand the veneers. As long as you run the veneers through the widebelt with a 60 grit belt, there should be no concern about glue joint thickness. The abrasion effectively creates the thick glue joint, and gets rid of the smooth surface that epoxy dislikes.
I would describe proper epoxy glue lines as barely visible versus an invisible PVA glue line. We will always use epoxy for its broad range of temp and working times. We provide the same clamping pressures regardless of the glue.
I'm simply trying to avoid any fear of epoxy issues in this thread. Plastic resin glue is good stuff; however, we rarely use it.
Personally I believe spring back cannot be controlled by the adhesive. It would be interesting to do head to head comparisons of epoxy versus plastic resin versus PVA. Not that we will ever have the time for that exercise.
From contributor D:
The problems I had with epoxy was in solid wood butcher block type tops. We would clamp them up very tight, starving the joint. We were also coating both fresh surfaces and letting them wet out. We occasionally had open joints in a day or as much as several weeks. When examined, there was almost no glue. Less pressure was not an option. We changed to plastic resin glue and all was fine, as long as the temp - glue and wood and air - was above 70 degrees. Anything less, and there would be problems with adhesion.
I do not like dealing with springback and the variable it introduces. Glue type is not a real solution, so I developed methods that either do not rely on multiple layers (brick-laid jambs) or have enough plies of the correct thickness and radius to where springback is not a problem (handrails).
My motivation is not to introduce a fear of epoxy, but on the other hand, I see lots of people using epoxy because it "is the best glue" - using it in difficult situations where they fear aliphatic or plastic resins glues would not hold. As we know, the glues we use will hold if applied properly under the right conditions, yet epoxy kind of gets called upon for marginal situations, then may get blamed for failing.
From contributor P:
I have found the plastic resin glue to be very good for minimizing spring back when gluing up curved panels. I don't know about resin but it is a lot better than PVA glue.
From the original questioner:
Here's a photo of a job I looked at. From the floor to the peak it measures 80 3/4". The width of the opening is 5' - 3/8". The wall thickness is 5 1/2". I don't know what the radius of the corners are. This is to be paint grade. What am I looking at in the way of labor to do this? Two-three days or one week plus?
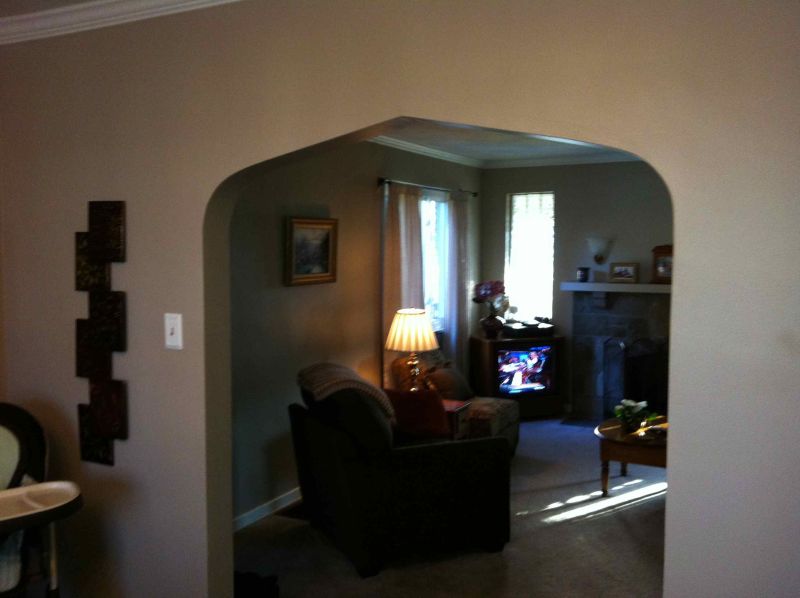
Click here for higher quality, full size image
From contributor D:
You may want to get your terminology correct before cutting wood. That is what we would call a Gothic arch. The better ones are arched between the peak and the sharper radii. Elliptical is different from your photo. How do you plan to measure this? As for labor, yes.
From contributor B:
Use bending poplar to make your jamb - 7 plies. The two inner plies should be the column poplar, the five outer plies should be the barrel poplar. You will need to make up an inner and outer clamping jig. If you know someone with a CNC, they can cut the clamping jigs for you if you give them a template for the opening. They can also cut your trim template if you are using a Hussey to make the casing.
From the original questioner:
I'm aware this is a Gothic arch. Maybe I should have noted that the customer doesn't really care for it and is okay with the peak being flattened as you would have in an elliptical shape. Easier to do, I would think, than a Gothic arch.
From contributor P:
Brick lay the jamb and use plastic resin glue. Sand, then glue face veneer. Sand off one face veneer on some 1/4" ply so it is flexible enough to use for a caul. I would add that if you have a CNC, put in dowel holes and dowel for easier glue up. If you are going to do the gothic shape, this would also be preferable for the point in the middle.
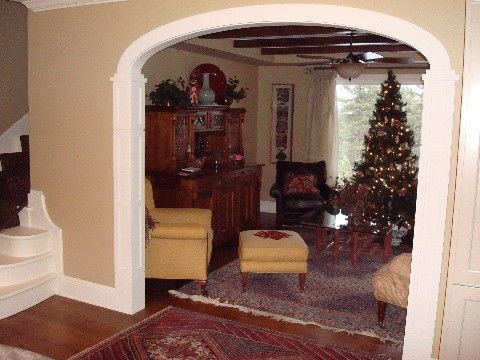
From contributor M:
I made the jamb and trim for this elliptical opening for a client a few years ago. Not too technical of a process with satisfactory results.
Using soft maple I kerf-bent the finished face of the jamb, varying the kerf spacing closer together at the tight radii and spacing out a bit more as the curve loosens. I just used Titebond III to glue the back 1/8" thick lamination on while the finished face was bent over a form. This worked well but I might opt for epoxy if I were to do it again to minimize springback of the tight radii on the ends. After glue dried, I jointed the jamb edges and glued 1/4" pieces on to cover the saw kerfs. When that dried I just used a flush trim router bit to flush the edges to the faces. That and a little sanding did the job.
I'd guess the brick-laid process mentioned would be about the same amount of work and eliminate any springback issues, but could require more sanding to get an acceptable finish face. It is a fun project to tackle and fulfilling when complete.
Click here for higher quality, full size image
From contributor M:
Well, this is embarrassing! While I've used the process described in my previous post for a number of paint grade curved millwork projects, the elliptical jamb in the attached photo isn't one of them. After reviewing a few other photos from the above mentioned project I (painfully) realized that the very tight radii of the ellipse required using a combination of bent lamination for the soft part of the curve and solid wood, bandsawn to shape, for the tight curved ends.
I apologize for posting misleading information but I figure its best to try and un-ring this bell quickly.
From the original questioner:
Nice work. I'm leaning towards the bent lamination technique but I'm undecided on which way to make up the form. First thought is to make a pattern from 3/4" MDF and then flush trim more MDF to stack together to get the width needed for the form to accommodate the jamb width (in this case about 5 1/2").
Second consideration is similar to above, a hollow form where there's a 3/4" MDF pattern on the outside with studs in the middle. Then skin the form with some 1/4" material to give it a continuous surface.
From contributor P:
How are you going to form the point in the middle?
From the original questioner:
I'm not - the customer doesn't like the gothic arch so if I can't get a true ellipse in there, I'll fair the curve at the top. This is not a steep arch so it should work.
From contributor N:
Since it's paint grade, I would bandsaw the curved parts from glued up poplar blanks, then sand smooth. Poplar's cheap and no springback worries. If the rough opening is still rectangular, you don't even have to worry about sawing a curve on the backside. This technique is particularly useful for an elliptical door jamb. When you saw it to fit the door, it's not going to change shape. We use liquid urea resin glue for bent lamination work.
From contributor M:
Either of your form building ideas sounds workable.
When I lay out form pieces, I cut out a strip the thickness of the lamination stack to end up with clamping cauls for the outside of the curve too. Unless your laminations are really thin, you probably don't need the 1/4" face material on the form if you use 3~4 ribs going the long way or put blocks in between ribs about 4" apart. I don't think the laminations would "pillowcase" into spaces between the form parts. I drill holes in strategic places in the form faces for clamping; closer together at the tight curves. Dry clamping the whole thing will help work out the bugs. Sorry if I'm telling you stuff you already know.
From the original questioner:
I may go with a hollow form and (if I have to) skin it with 1/4" bending ply.
From contributor M:
I took a few minutes this afternoon to draw a SketchUp model of a hollow form design similar to ones I've made in the past. I think the images show all the important features from the previous discussion. A big part of this working is how tight the small curves are and how thick and what species of wood you use.
With a form made to the shape you want to end up with, do a test run to find out if the plies are thin enough. It can be surprisingly tough to get wood strips to bend as tight as needed, so I hope you get it to work.
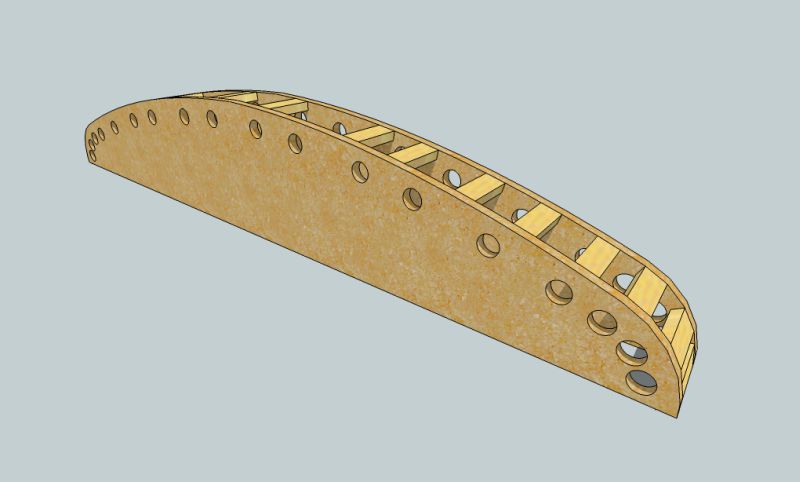
Click here for higher quality, full size image
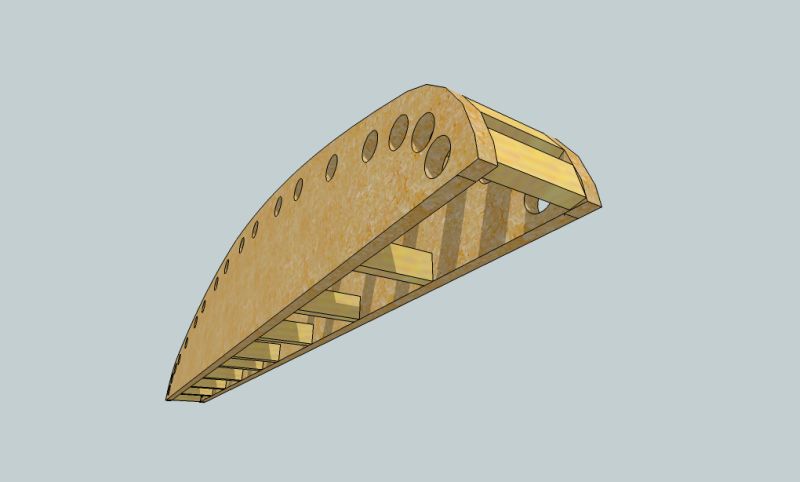
Click here for higher quality, full size image
From the original questioner:
That's exactly what I was trying to describe, so thanks for sharing the drawing. I'll be using poplar for this milled to 1/8" or so. The ends I plan on bringing down 6-8" (as someone previously suggested) for ease of clamping and joining to the straight leg of the jamb.
While we're talking about ellipses... I've seen a few jigs from Woodhaven, Micro Fence and Router Buddy (I think) that offer the ellipse cutting option. Are these worth the money or should I stick to making my own?
From contributor P:
For me it is easier to draw a series of arcs that approximate the ellipse - CNC doesn't like ellipses. At least mine. You can make your own jig to draw or cut an ellipse. A poor man's CNC is to draw the jig and print it out in a tiled format, full size, with a grid line to tape the sheets back together to form the pattern.
From contributor M:
For large ellipses I've used the method described nicely by Rick Christopherson. It's plenty accurate for millwork and is quick and simple to do. I like the idea of using wire so it doesn't stretch while drawing the line. I once spent a bunch of time making a large jig for drawing ellipses but it wasn't any more accurate than this string method and it just takes up space in my shop.
I'd lay out the ellipse on a sheet of 1/4" mdf to make a pattern for making the form. Draw a line for the finished jamb face on the mdf and then offset 3/4" bigger (for the clamping cauls) and 1/4" smaller for bending ply if you plan to use it. Cut close to the lines with a bandsaw or jigsaw and then sand it to the money for a very true pattern. Tack the 1/4" pattern to the 3/4" form material and trace, cut close and then flush trim with a router to produce the form ribs. Make sense?
Looks like you're getting well prepared to take on this project. Cool. Something about producing curved millwork that is a little bit like magic and quite rewarding.
From the original questioner:
Yeah that's what I was thinking as far as the form building goes. I may opt to get the Woodhaven jig in the interest of time but I could make my own I suppose.
From contributor V:
If merely making a jamb, there is no need to worry about spring back. You have all that framing to shim to.
From contributor O:
Here's one I did awhile back. Each situation is different.

Click here for higher quality, full size image