Question
I've got a big job coming up with all MLC white lacquer. I have sprayed a couple small cabinet jobs with it, but this will be a complete home. I know that pigmented lacquer takes longer to cure. What is the amount of time I need to allow before putting doors back together? Any tricks I should know?
Forum Responses
From contributor A:
Typically, I would let it dry for a full 24 hours before messing around with it. If you're doing the bed and bath doors, screw two pieces of 3/4" plywood to the bottom of the door so it stands vertically. That way you can spray both sides at one time. Sure has been a huge time saver/headache reducer.
Are you using Clawlock, too? That stuff is awesome.
But if you have the place to let them stand, then you really have a good thing going.
Please tell me about the dimensions of the bases you are making for these doors. And tell me some details about the logistics that you have to plan in moving them about, before you spray and after.
Do you walk around the doors while you spray or are you stationary and turn the doors on a turntable?
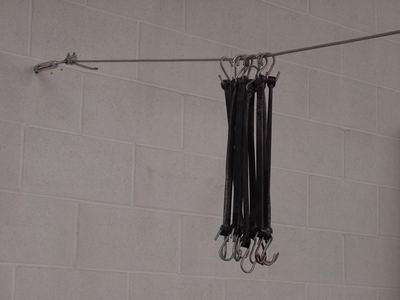
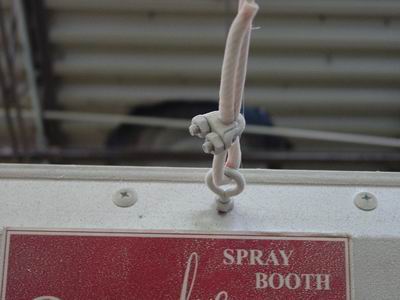
I use the hard rubber bungee cords to hang my doors from.
I drill the 35 mil hole and hinge my doors. I then take an eye hook, fully closed, and screw it into the hole where my hinge screw goes. One in each side of the door, so a total of two eye hooks. Then I take the door and hang it on the stiff rubber bungee cord and away I go.
That way I can finish both sides of the cabinet door and not have to put any holes into the door from mounting when finishing.
Clawlock is a Primer and works very well. I'm not too impressed with the undercoater. I think that Clawlock covers better. You will need to thin it out, though, as it is very thick.
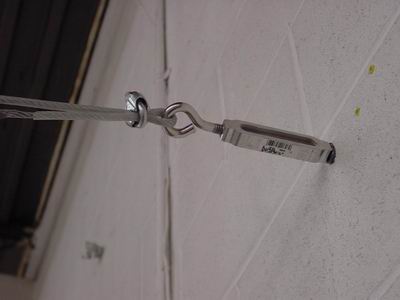
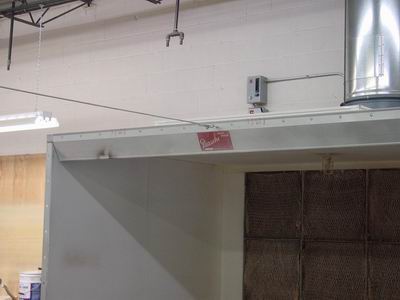
You don't need to have a spray booth to tie a cable wire from one end to the other. You'll just have to epoxy the machine thread into the concrete wall on each end.
P.S. If you're going to do one side at a time and put it in your rack, you'll need to let it dry for more than 12 hours to assure it won't leave any impressions in the lacquer. Flipping lacquered doors over is a bit different than painted doors. Keep in mind that if you get so much as a pin size hole in the painted lacquer, you'll see it. I love painted finishes, but they are such a pain to make flawless.
Yes, you do have to steady the piece as you're spraying it. I spray all of my edges first and then spray the front and back. For smaller pieces, you'll have to hold the top or the bottom as you're spraying so it won't go flying around. For the tiny bit of hassle, it works great and really cuts down the time of spraying.
You really have to dial your gun properly so you don't get runs. I got some when I first started this method, but with a little bit of practice, it will go fine.
I also have a "Finishing Tree". I took casters and screwed it to the bottom of two pieces of 3/4" 24"x24", then I made a rectangle box to stand straight up. Approximately 7x7. I then screwed pieces of 3/4" x 2 x 18 on each side to act as "branches" and worked my way around the "trunk". I made it about 7 ft tall. Make sure the base of this trunk is wide enough so it won't tip over. I learned the hard way!
Another advantage to doing it this way is that you don't get overspray on the back side like you do when you lay it down and do one side at a time. Even if you flip end for end, you still end up with overspray with your last coat.
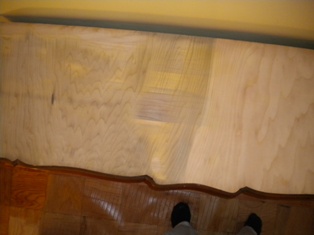
All of the items you see in the pictures are Home Depot items.
When I do spray shelving, I take two pieces of 3/4" x 2 x 12 and staple it to the back side of the shelf so it stands up and I can spray both sides of the shelving.
Hint: When you manufacture your cabinetry, always try to find a way to finish things with the back off. It makes a world of difference in the finishing process. I always build with a separate back that gets screwed on after the finishing is done.