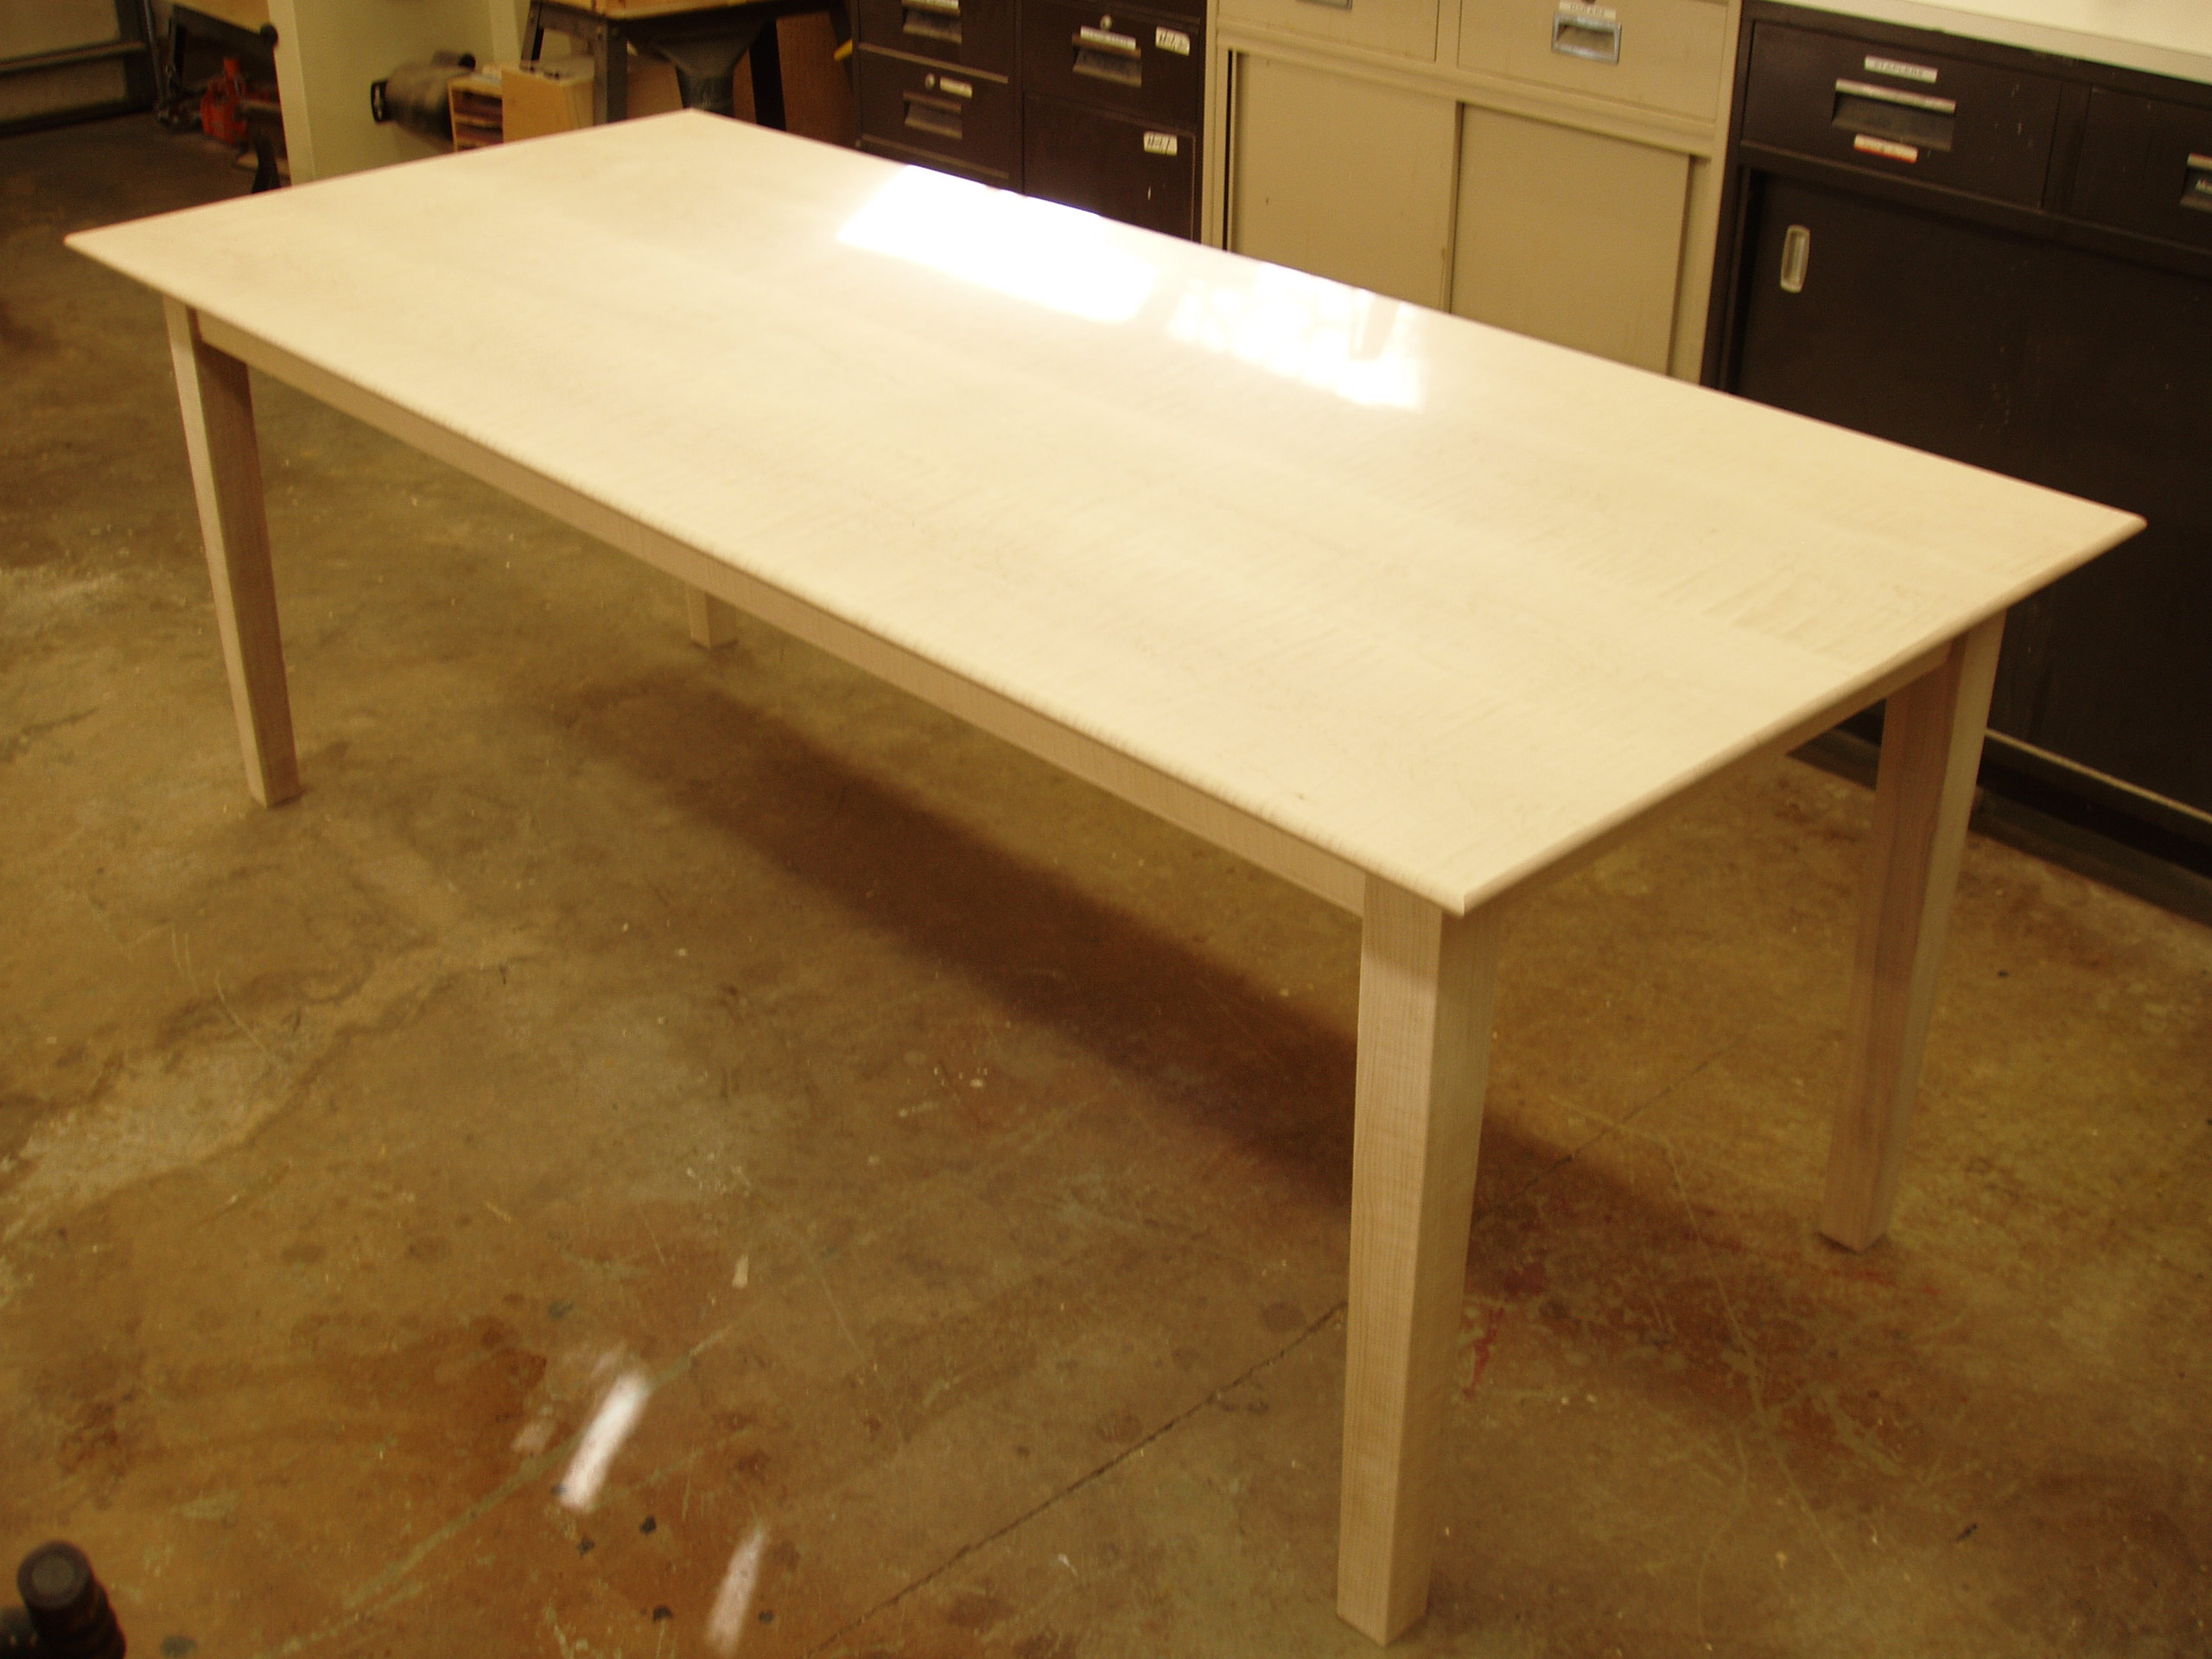
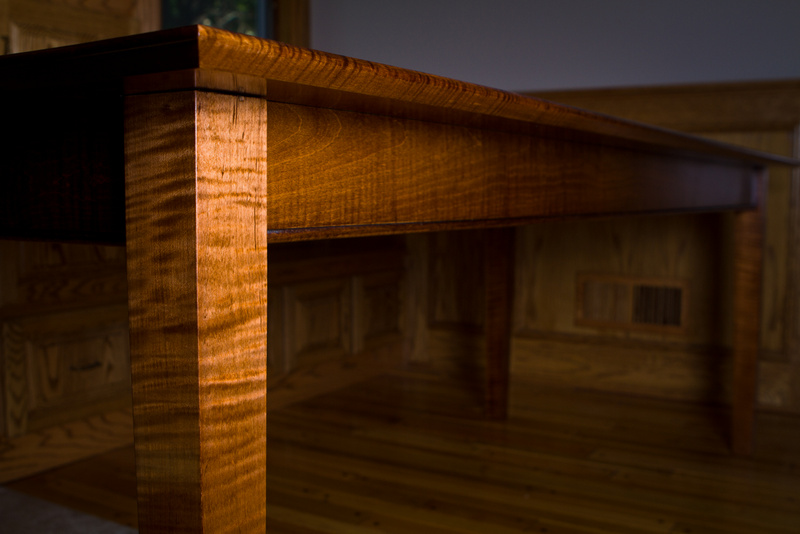
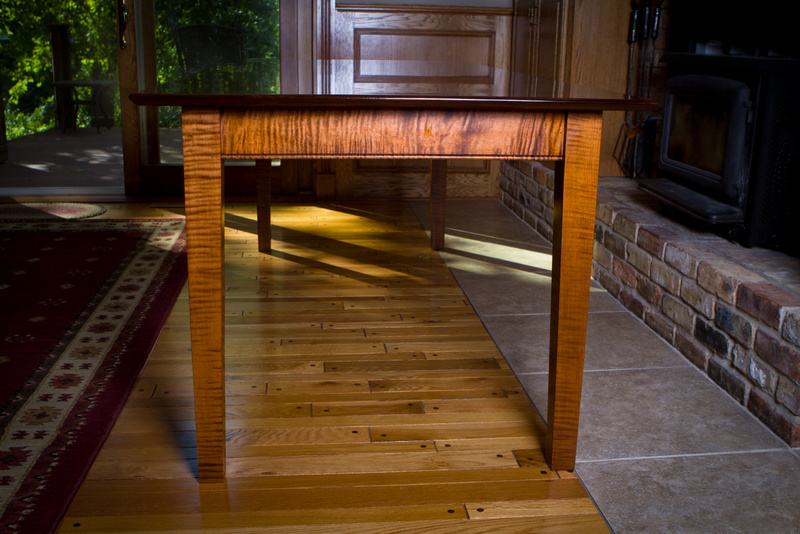
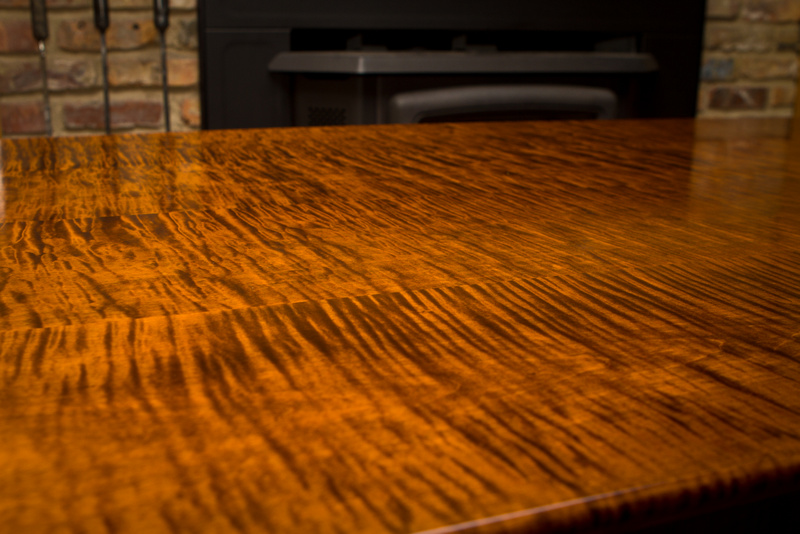
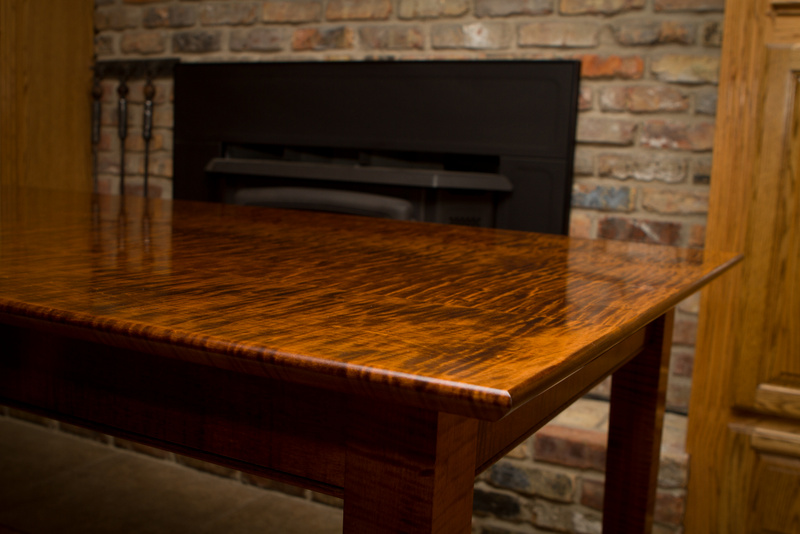
Maple Table I completed. 7 by 3 foot. Finished with dye, oil, and Waterlux Varnish. Pictures do not show the true chatoyance.
Viewer Comments:
I assume that the top is veneered. Did you use a vacuum? What substrate did you use? Beautiful job.
A closer look shows it to be solid, no?
Quite nice Brad.
Top is solid wood. Talk about being nervous when using power equipment on this slab.
That top could make a lot of real nice guitars. Do you have any more of that maple?
Looks great - Did you treat the maple before using dye?
Not sure what you mean by treating the maple?
I used a water based dye. I diluted it by about 80%. So it looked like weak tea verses dye. Put on a coat, let it dry sanded it almost all off. Put on a 2nd coat full strength dye, again sanded that till most of the color was gone. They applied the last coat full strength.
Very nice table.and finish. What color dyes and brand did you use ?
I used Lockwood's water dye.
Hi Brad, could you explain the reasoning behind dyeing then sanding it back and re-dyeing again. Was it to reduce the grain raising or to somehow enhance the overall color.
It sure looks beautiful, amazing what Mother Nature can do.
Brad
Hope you will tell us the color of the dyes, used on your table.
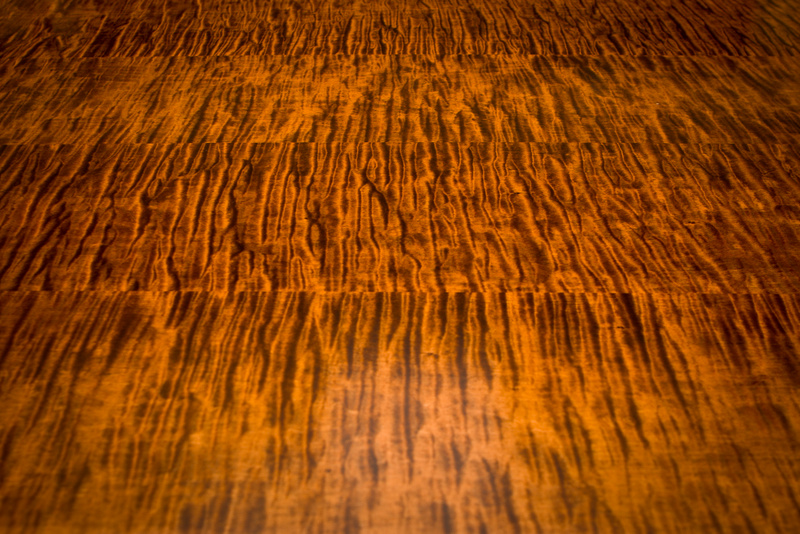
Okay I looked it up to refresh my lacquer soaked memory. Lockwoods #42 Standard Brown Mahogany stain water powder. I mixed it 1/2 gram to 100 ML of 80% distilled water 20% denatured alcohol. First coat I diluted it with more water to look like a light tea. Applied that, let it dry and sanded it almost clean again, then applied dye full strength, sanded almost clean, then 3rd coat of dye. Be very careful to avoid streaks, it will show big time in the finish and it's tough to see at the dye level. I took a seminar on wood finishing. The reason being to apply the dye this way is the maple will blotch really easy. First coat is a wash coat. It is darkening the "valleys" in the curls. So you are building up darker stain in the bottoms of the curls and on the final and 3rd coat of dye you are applying a single coat of dye more or less. That was their story. Then I did Danish oil, lightly just to get the color I wanted. If you skipped this step it made a large difference. Then Waterlox. Not a fun product to work with for this type of a project. I would not use it again. My own personal bias. Also customer has complaints of smells yet after 2 or 3 months now.
So hopefully that answers your questions. It looked wonderful when done. I hated to see it leave my shop.
One more note. When I moved this out of the shop and the sun hit it. Man the top looked a inch deep. The 3D of the curls was something I had never seen before on something like this. Really cool.
Nice top. Is the grain vertical (quarter sawn) or is it flat? Does grain orientation make a difference in curly hard maple? Is it sapwood or heartwood?
Still curious as to why you applied the dye stain and then sanded it off and applied it again and then re-sanded.
Did you wet the maple with warm water to initially raise the grain prior to dyeing or were you sanding off the dye stain because it was raising the grain.
Looks beautiful Brad - nice job.
Brad, you detail your dye recipes well, but what tone of Danish oil did you use? Natural for to pop the grain, or Danish oil of similar color to the mohagany dye? Also, what was your sanding schedule?