| |
 |
|
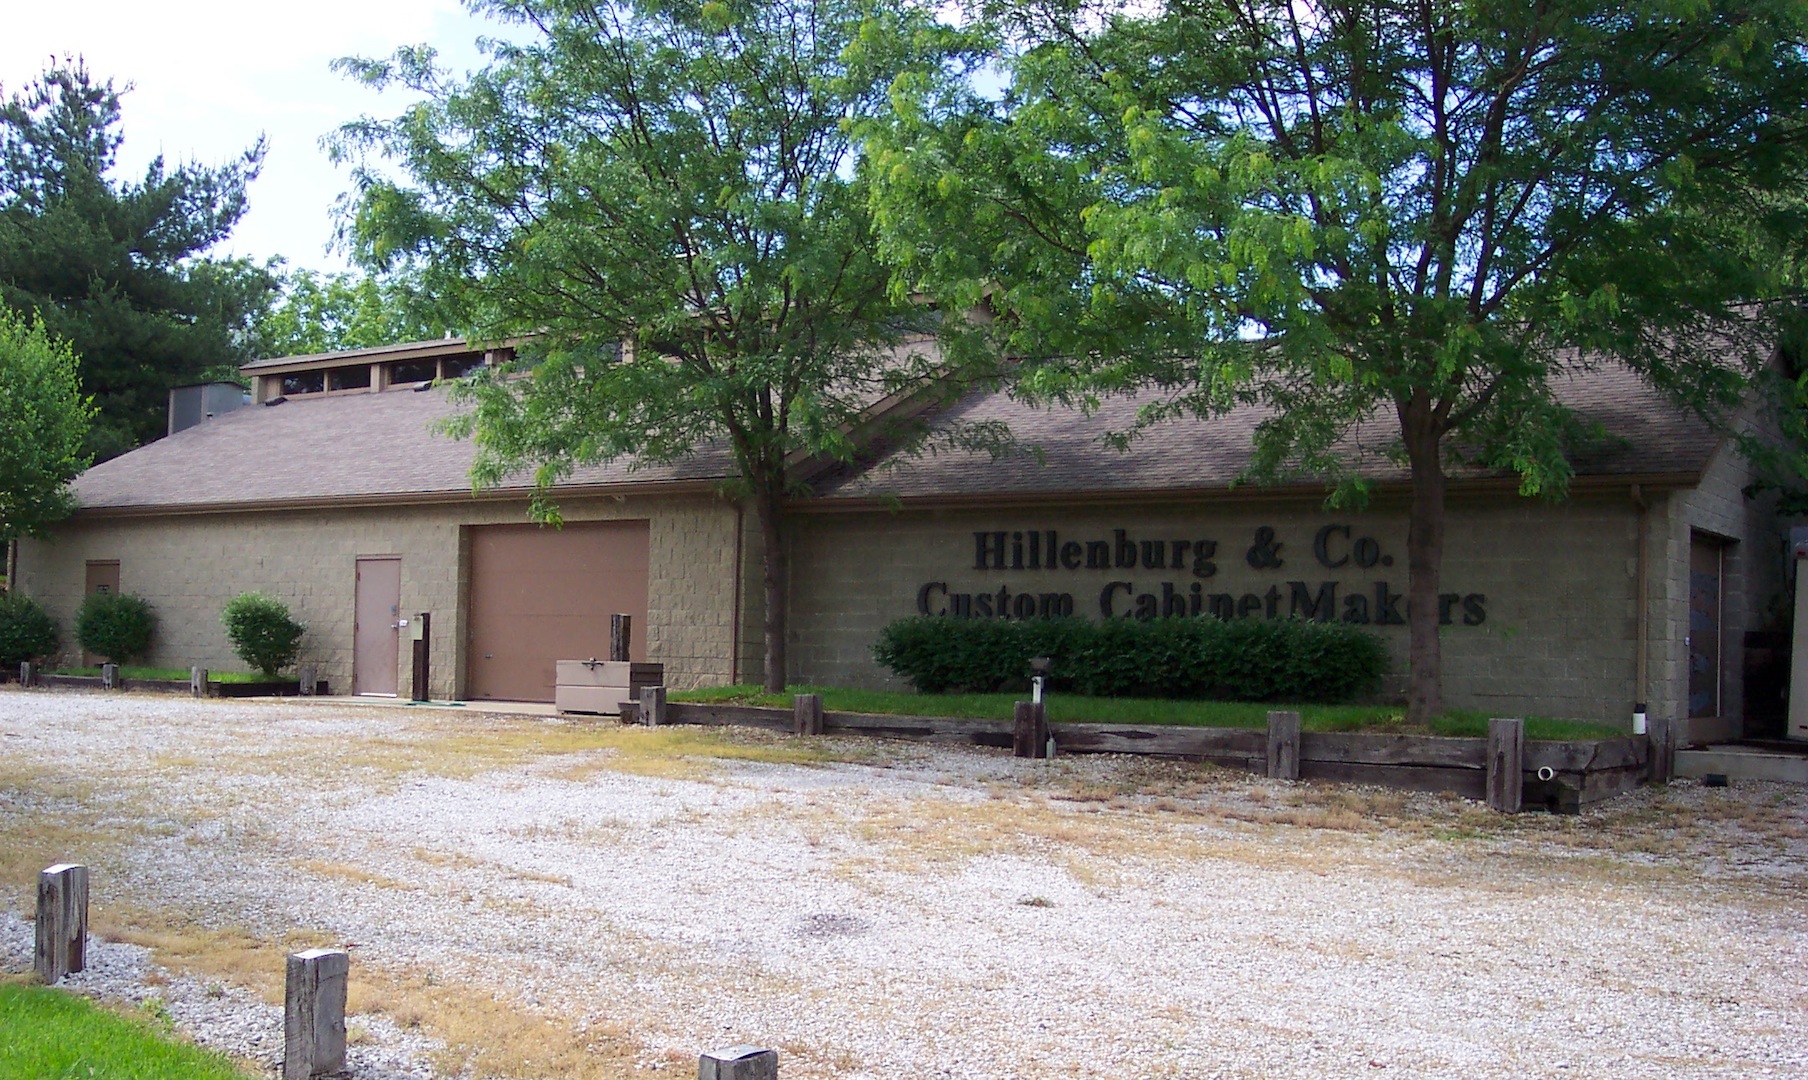
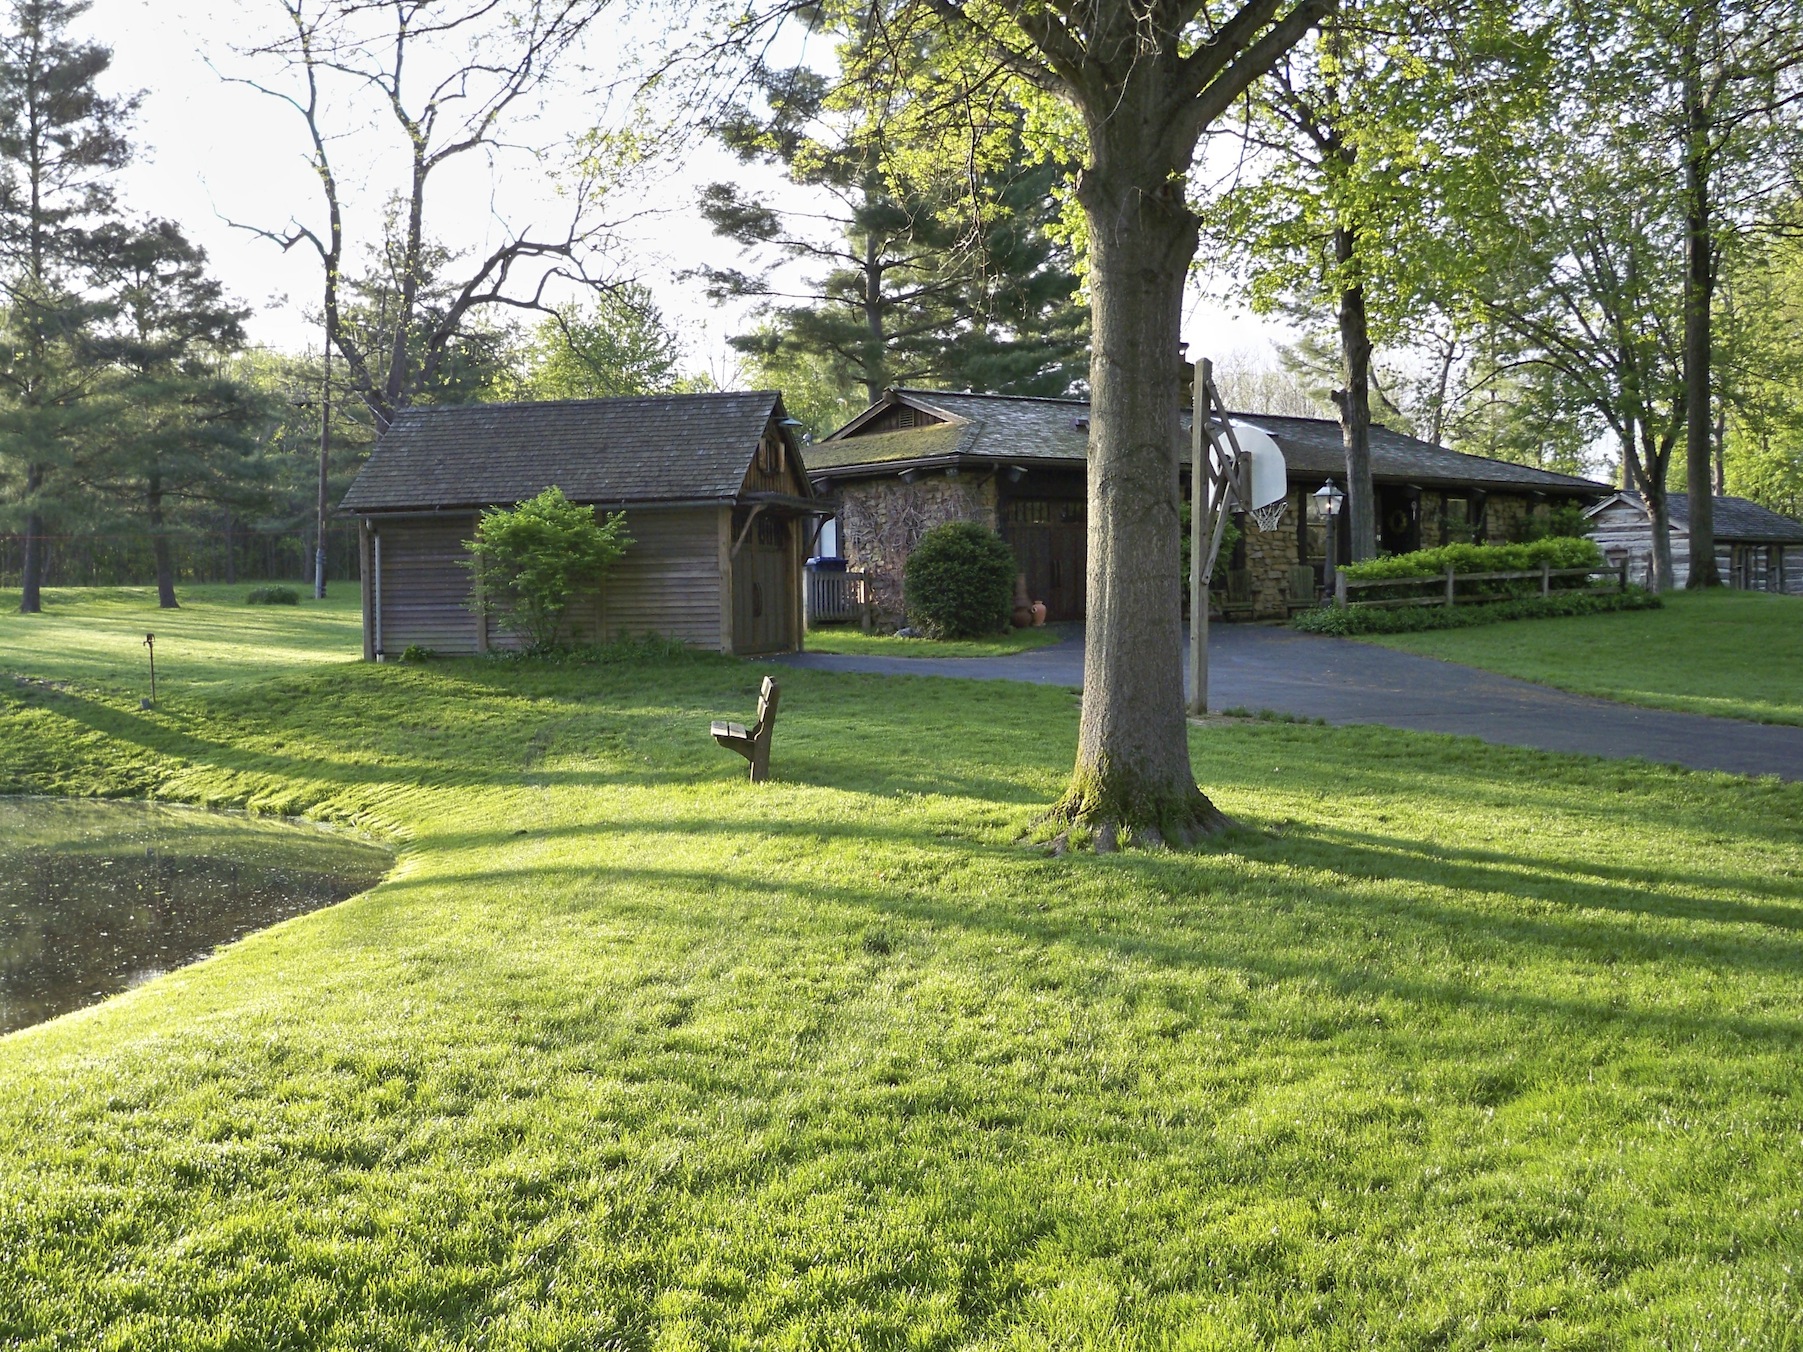
...Front of my shop. It is on 2 acres beside a 4 lane highway in a rural setting. Also on the 2 acres is a 3780 square foot Storage building - I lease out 2/3 of it and use 1/3 for my storage.
|
| |
 |
|
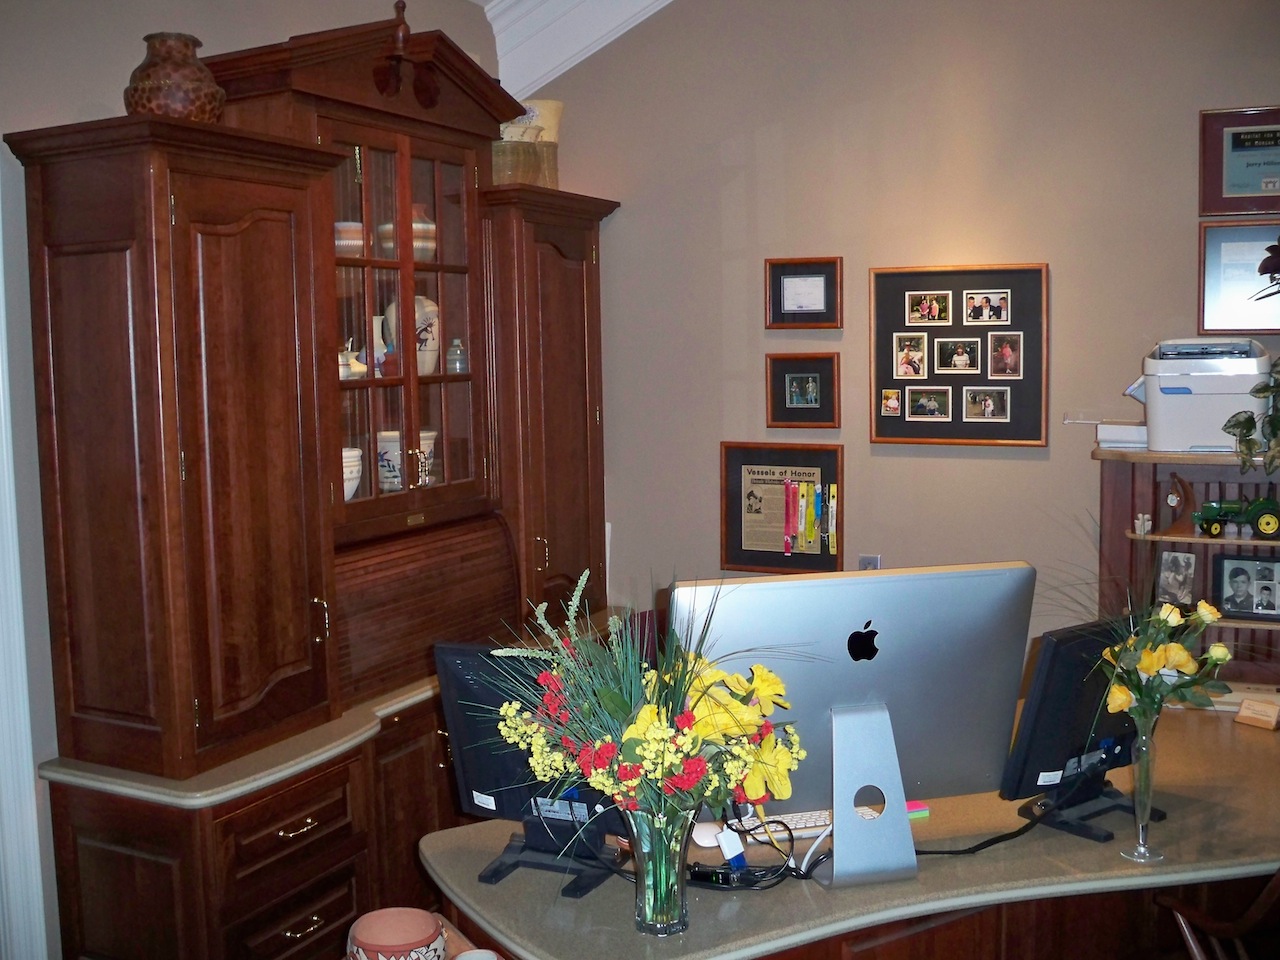
...Office.
|
| |
 |
|
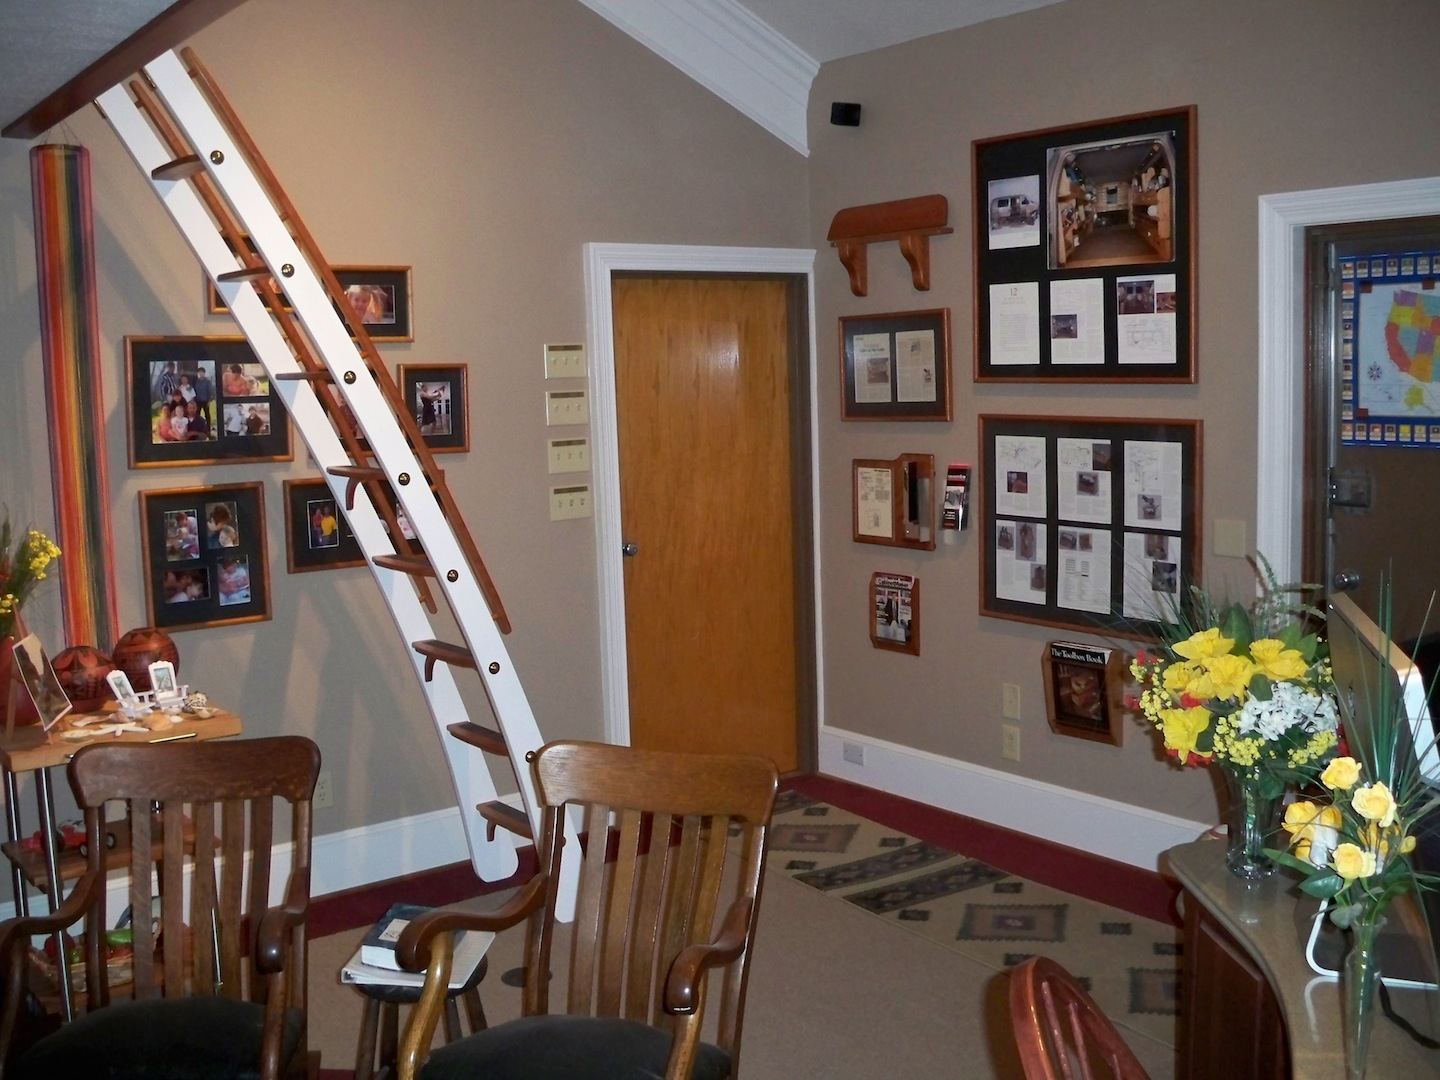
...Office. I sold a lot of balcony ladders like the one pictured. It is hinged, and when not in use, the ladder can be raised horizontally - it's base sets on the hinged cherry shelf that is shown on the opposite wall. For a better description go to the project gallery post; http://www.woodweb.com/galleries/project/posts/4367.html
|
| |
 |
|
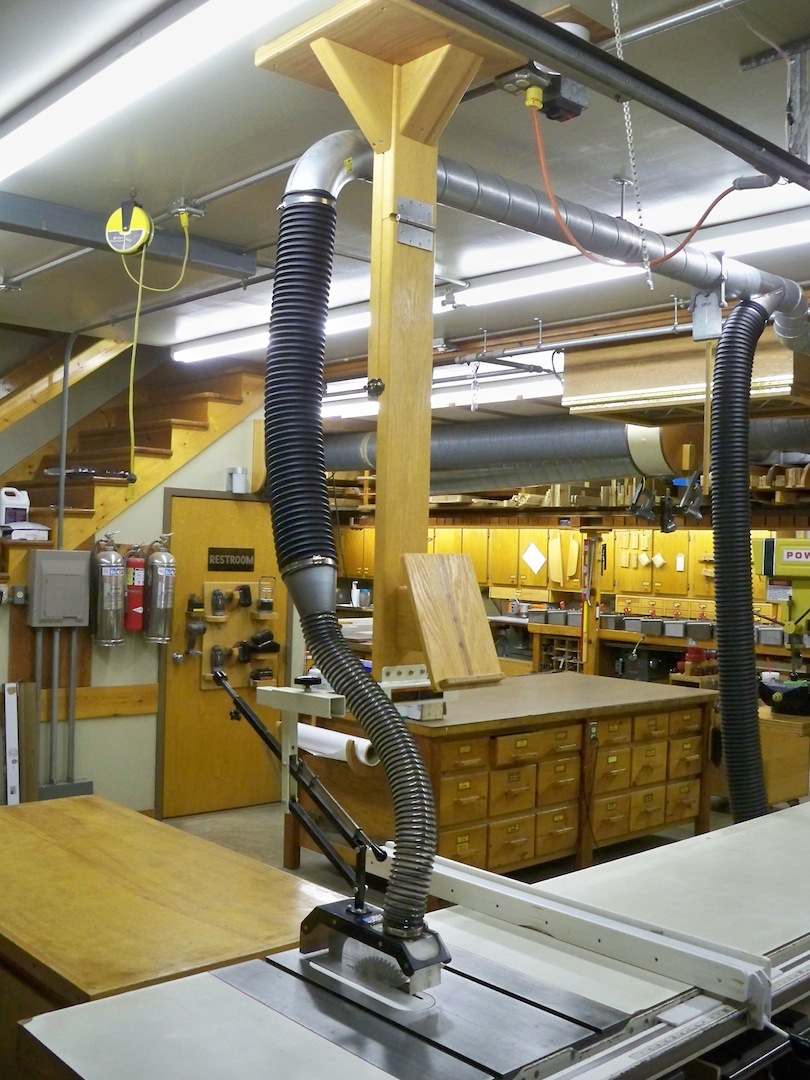
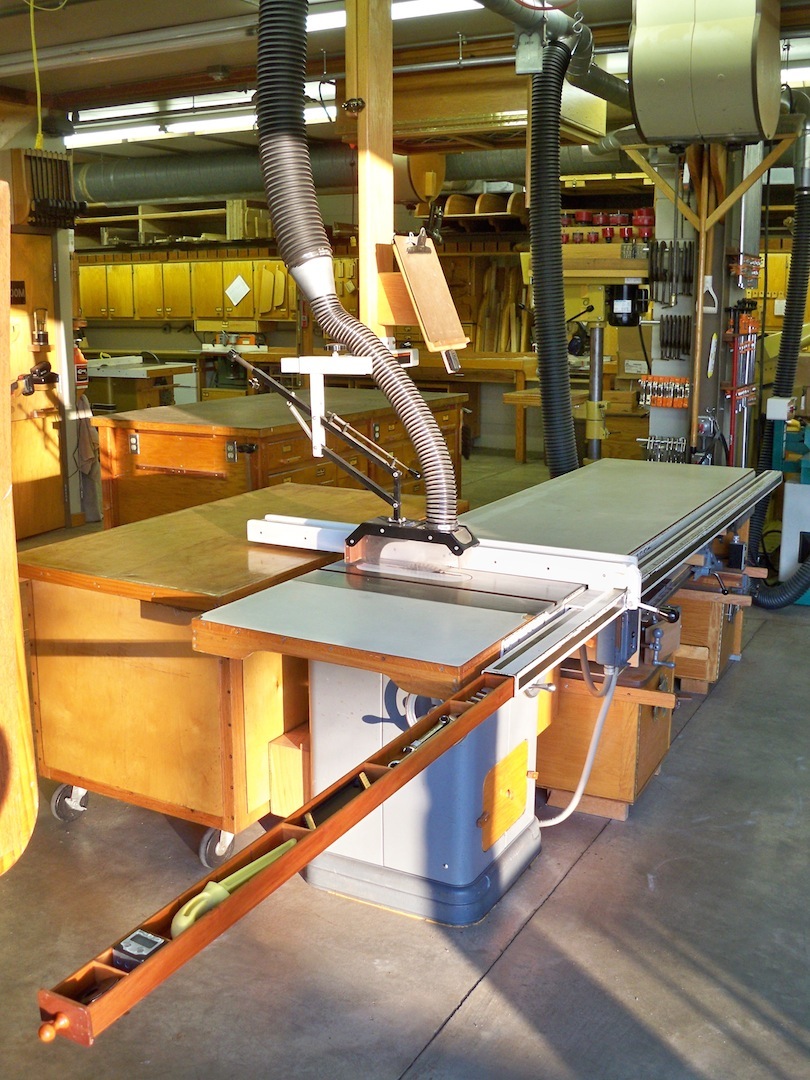
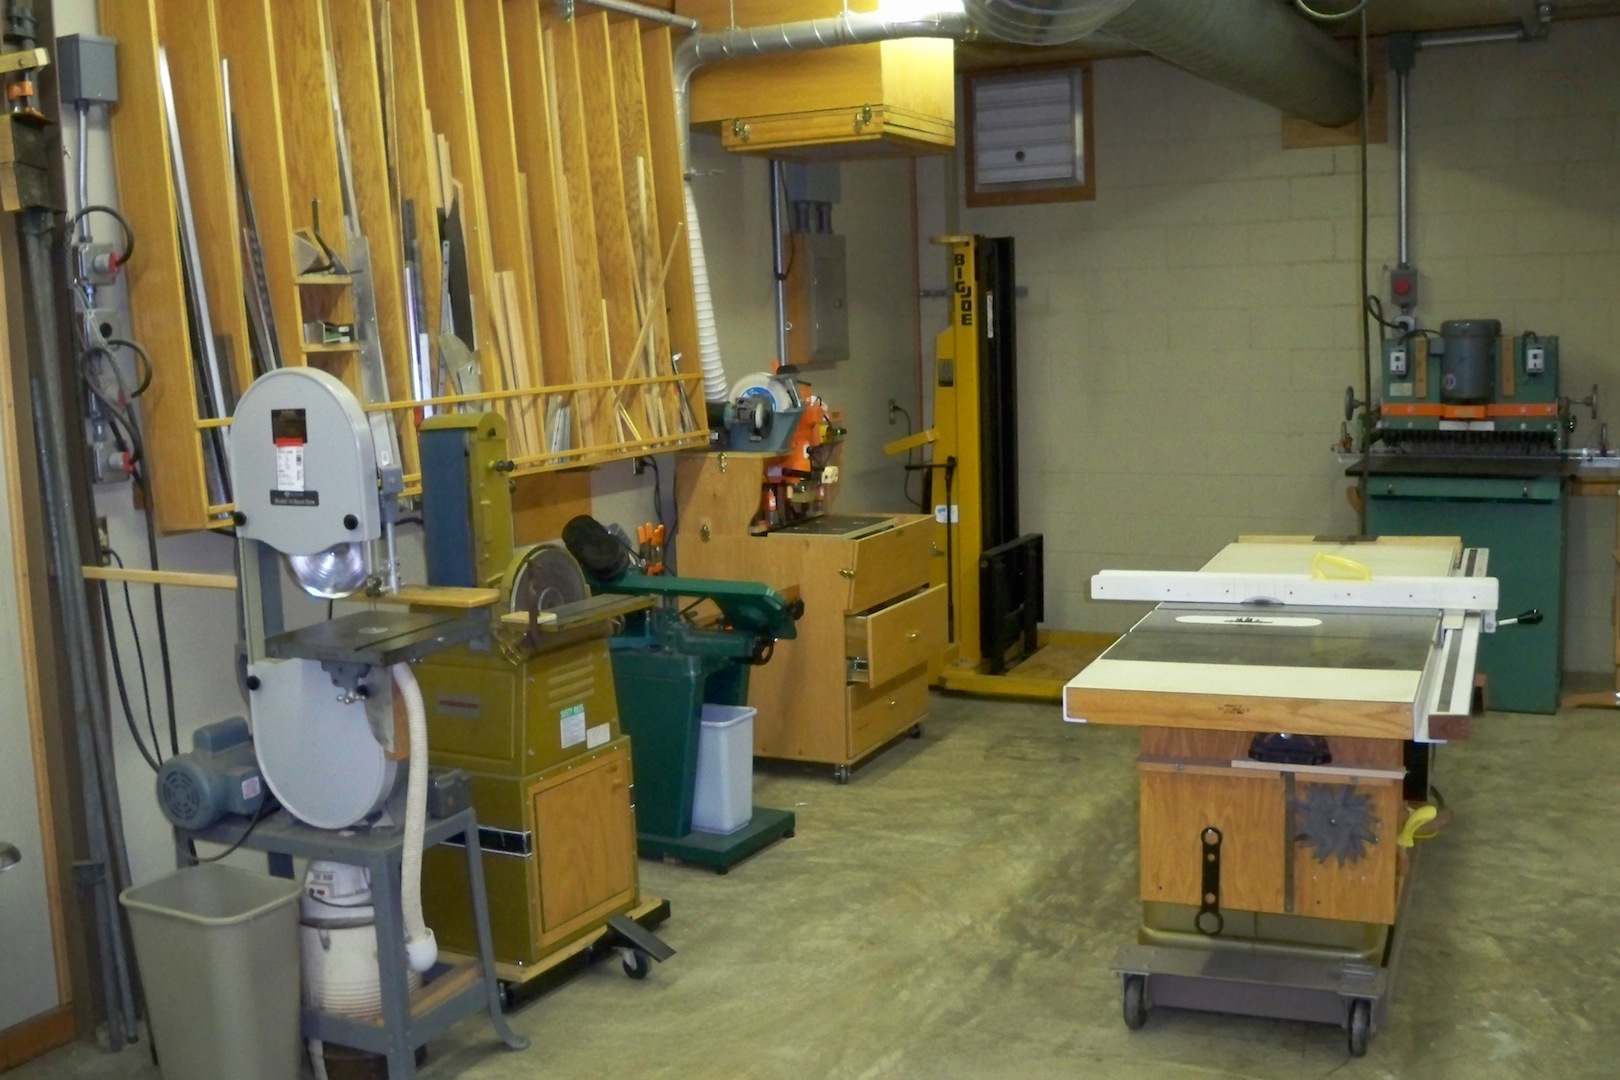
�Unisaw with Biesemeyer fence that will cut to 84". This fence caused the wow factor to play out every time a customer came into the shop.
|
| |
 |
|
...Biesemeyer vacuum/guard above Unisaw that hinges up when in the way.
|
| |
 |
|
Biesemeyer vacuum/guard in up position.
|
| |
 |
|
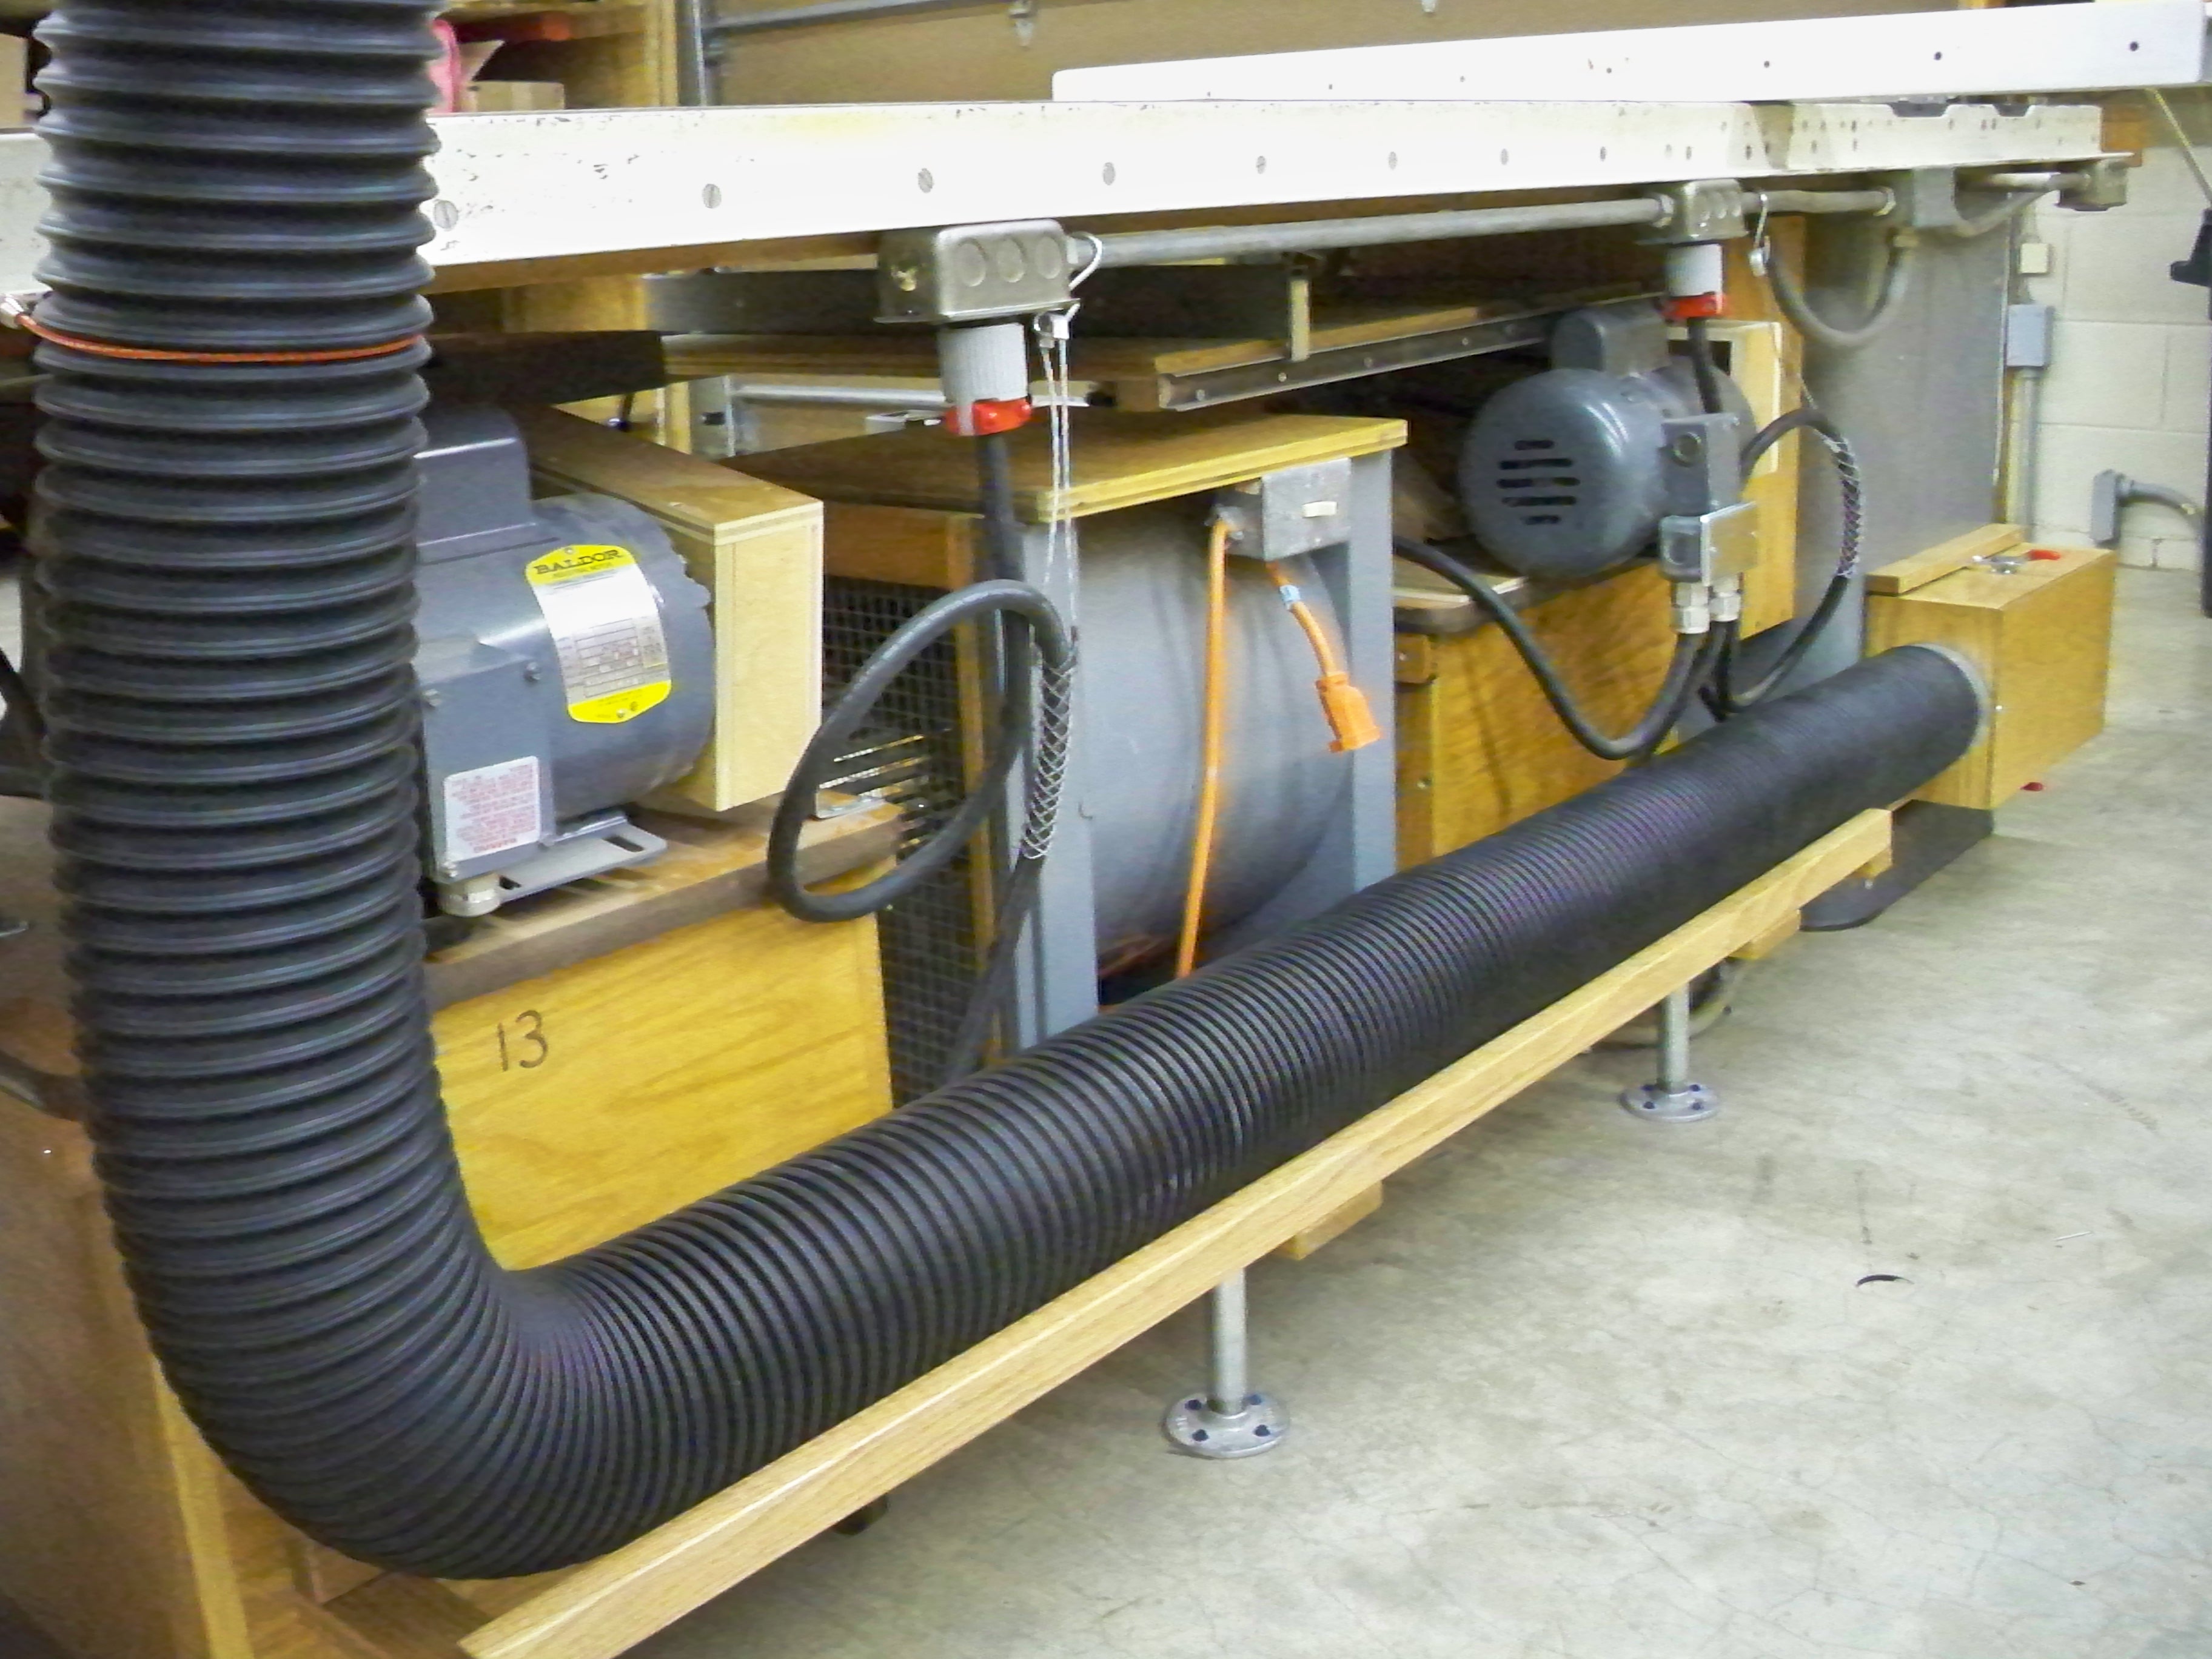
Backside of table saw island.The Unisaw's cabinet's base is attached to the shop's vacuum system with 5" flex duct.
|
| |
 |
|
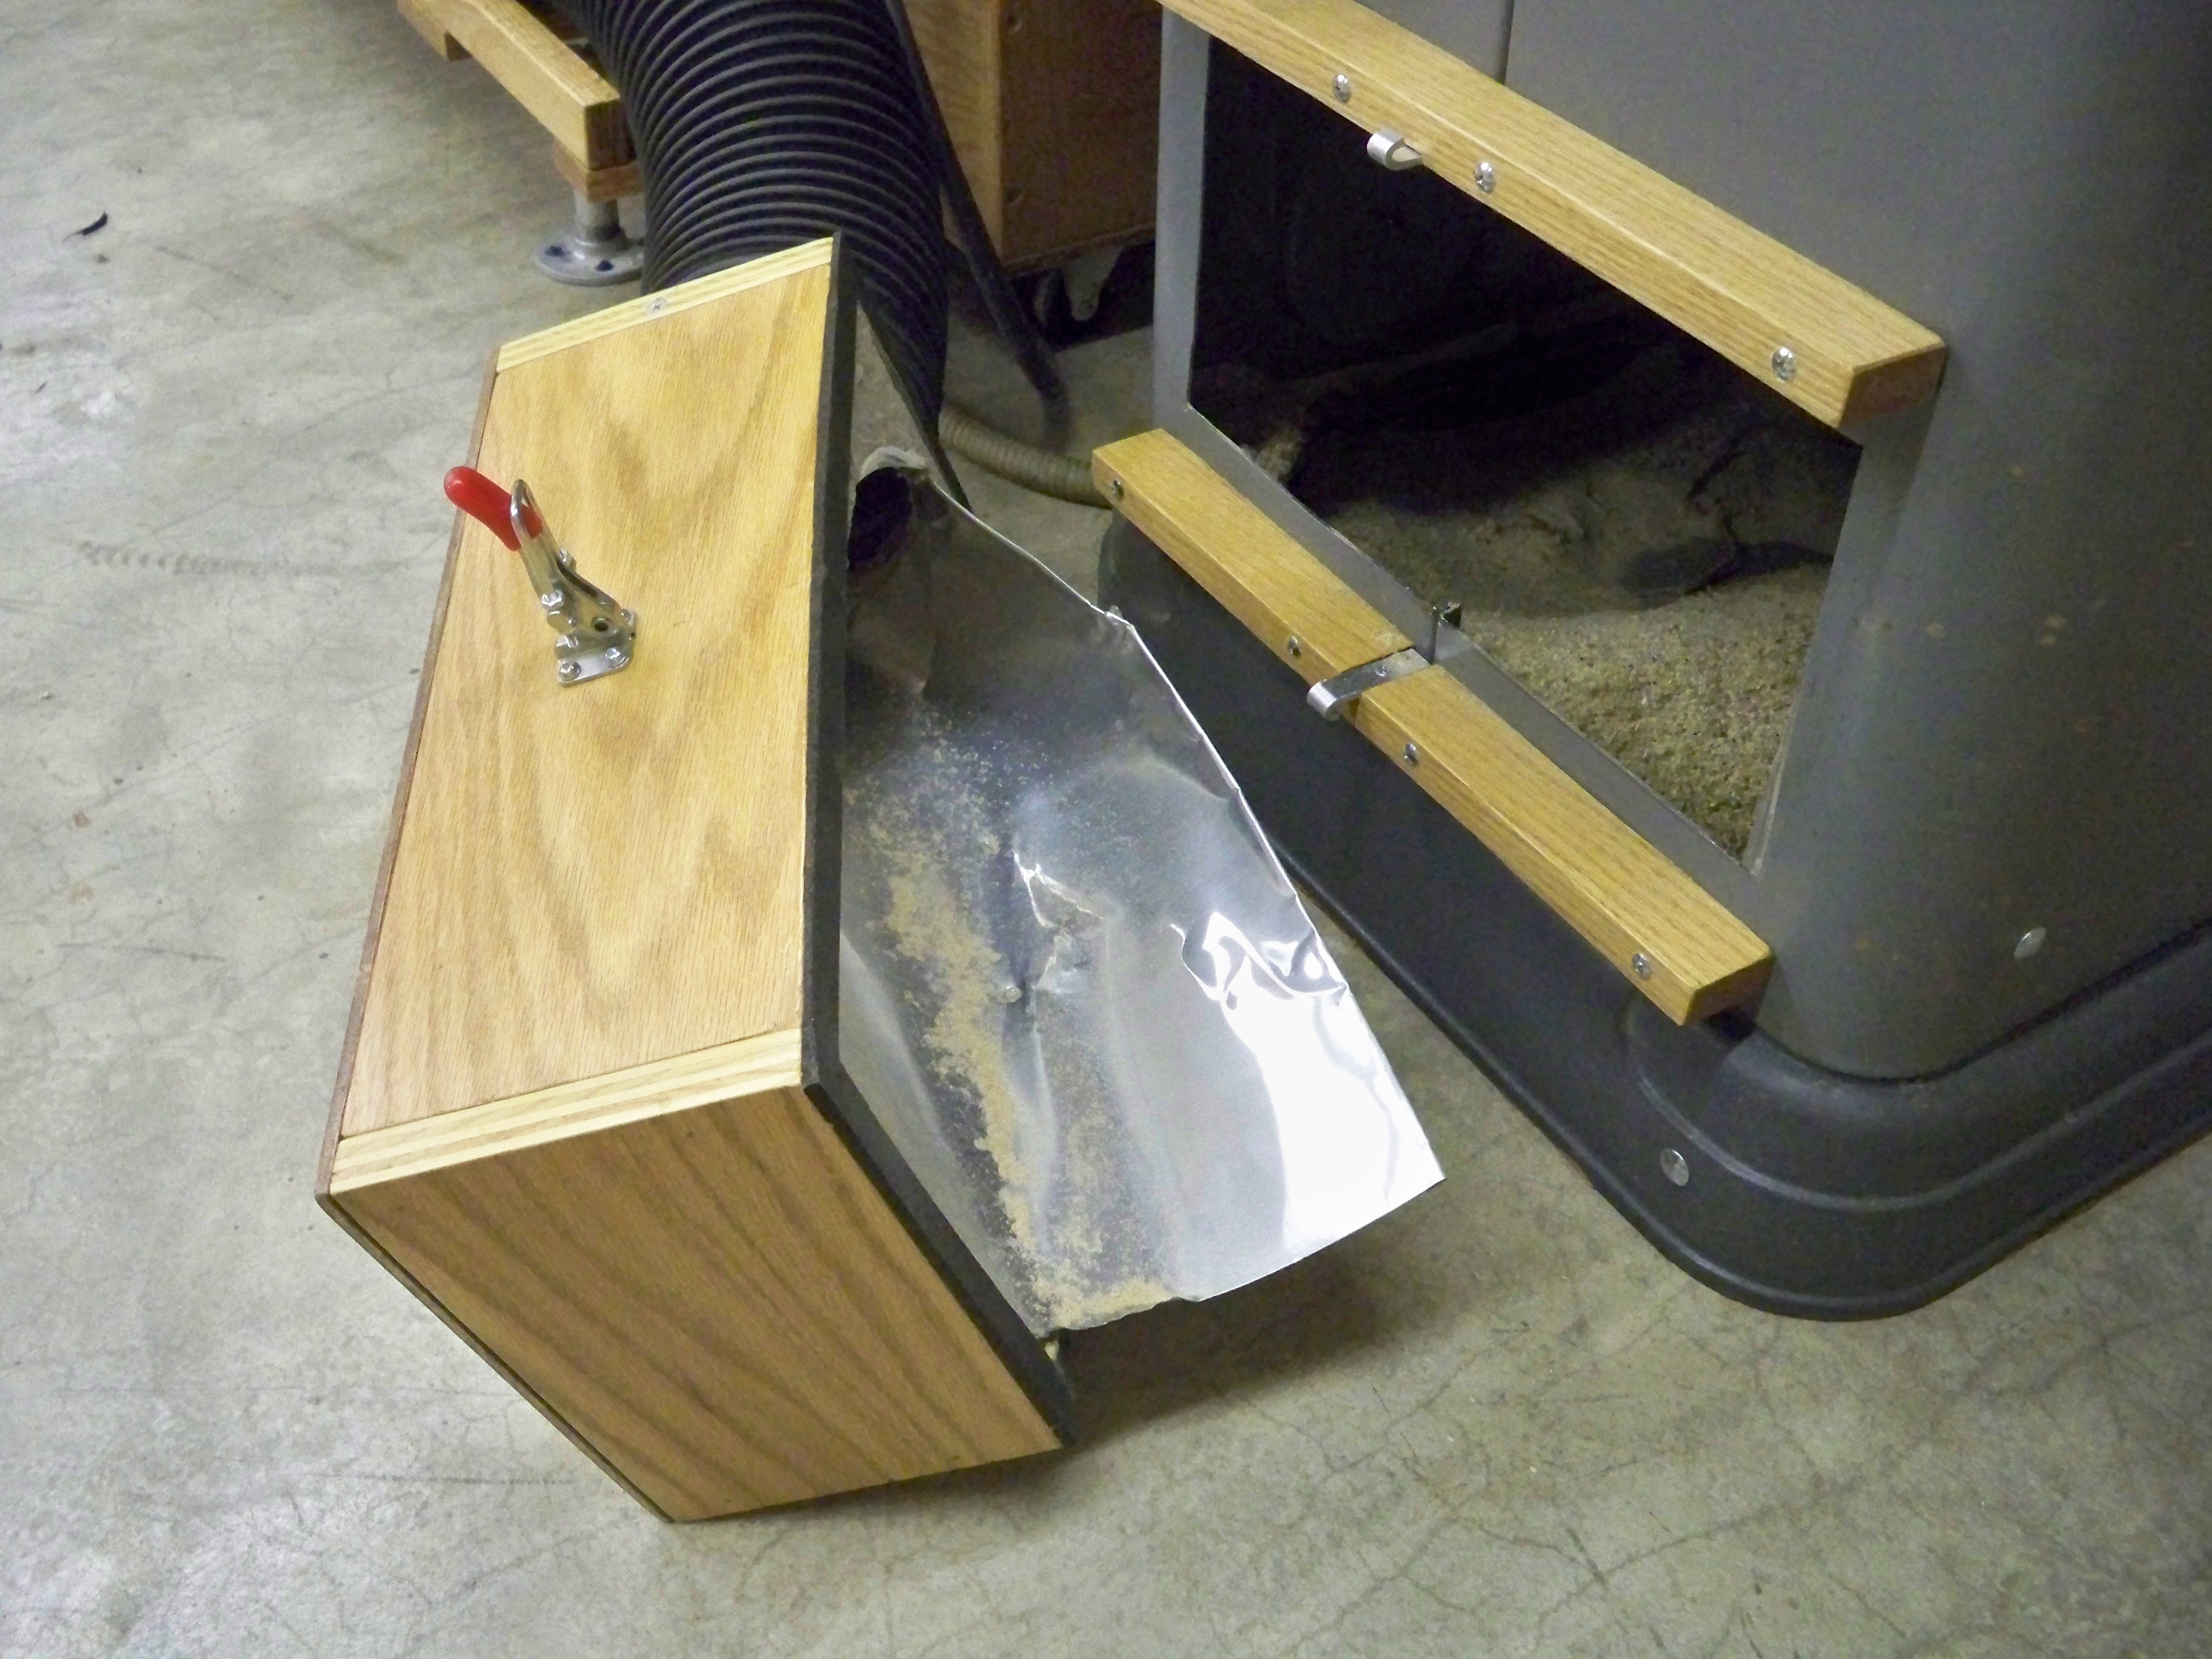
Unisaw's removable dust receptacle. The wood recepticle has an aluminum funnel (made from roof flashing) shaped in a way to direct the sawdust to the hose. Expanding insulation foam fill the space between the wood receptacle and funnel to give the funnel rigidity.
|
| |
 |
|
Sliding Tool Tray. I submited this idea to all the table saw manufactures years ago. Got lots of praise, but no takers.
|
| |
 |
|
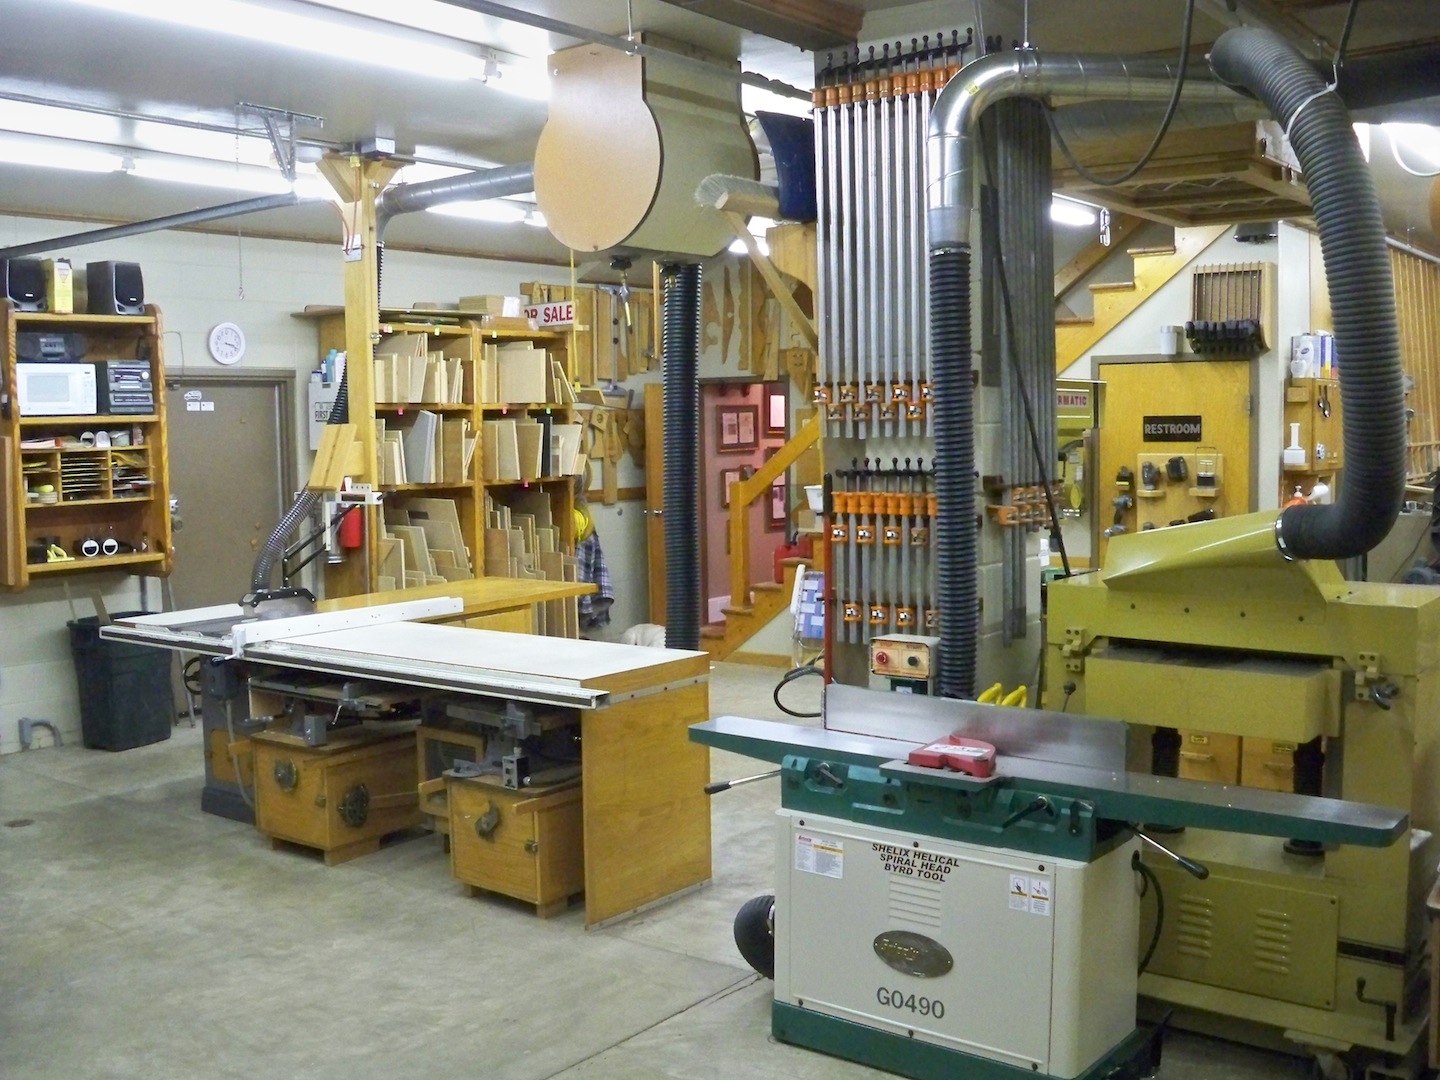
...Big-Joe lift in background is a material elevator to the second floor.
|
| |
 |
|
Custom made super heavy duty rolling mobil base for the Powermatic table saw. See comment section for my description of how it is made.
|
| |
 |
|
...Powermatic table saw that is a dedicated dado saw. Ritter 46 spindle boring machine. Derta dovetail machine. Powermatic lathe with 8' bed under countertop. Ritter 2 spindle horizontal boring machine.
|
| |
 |
|
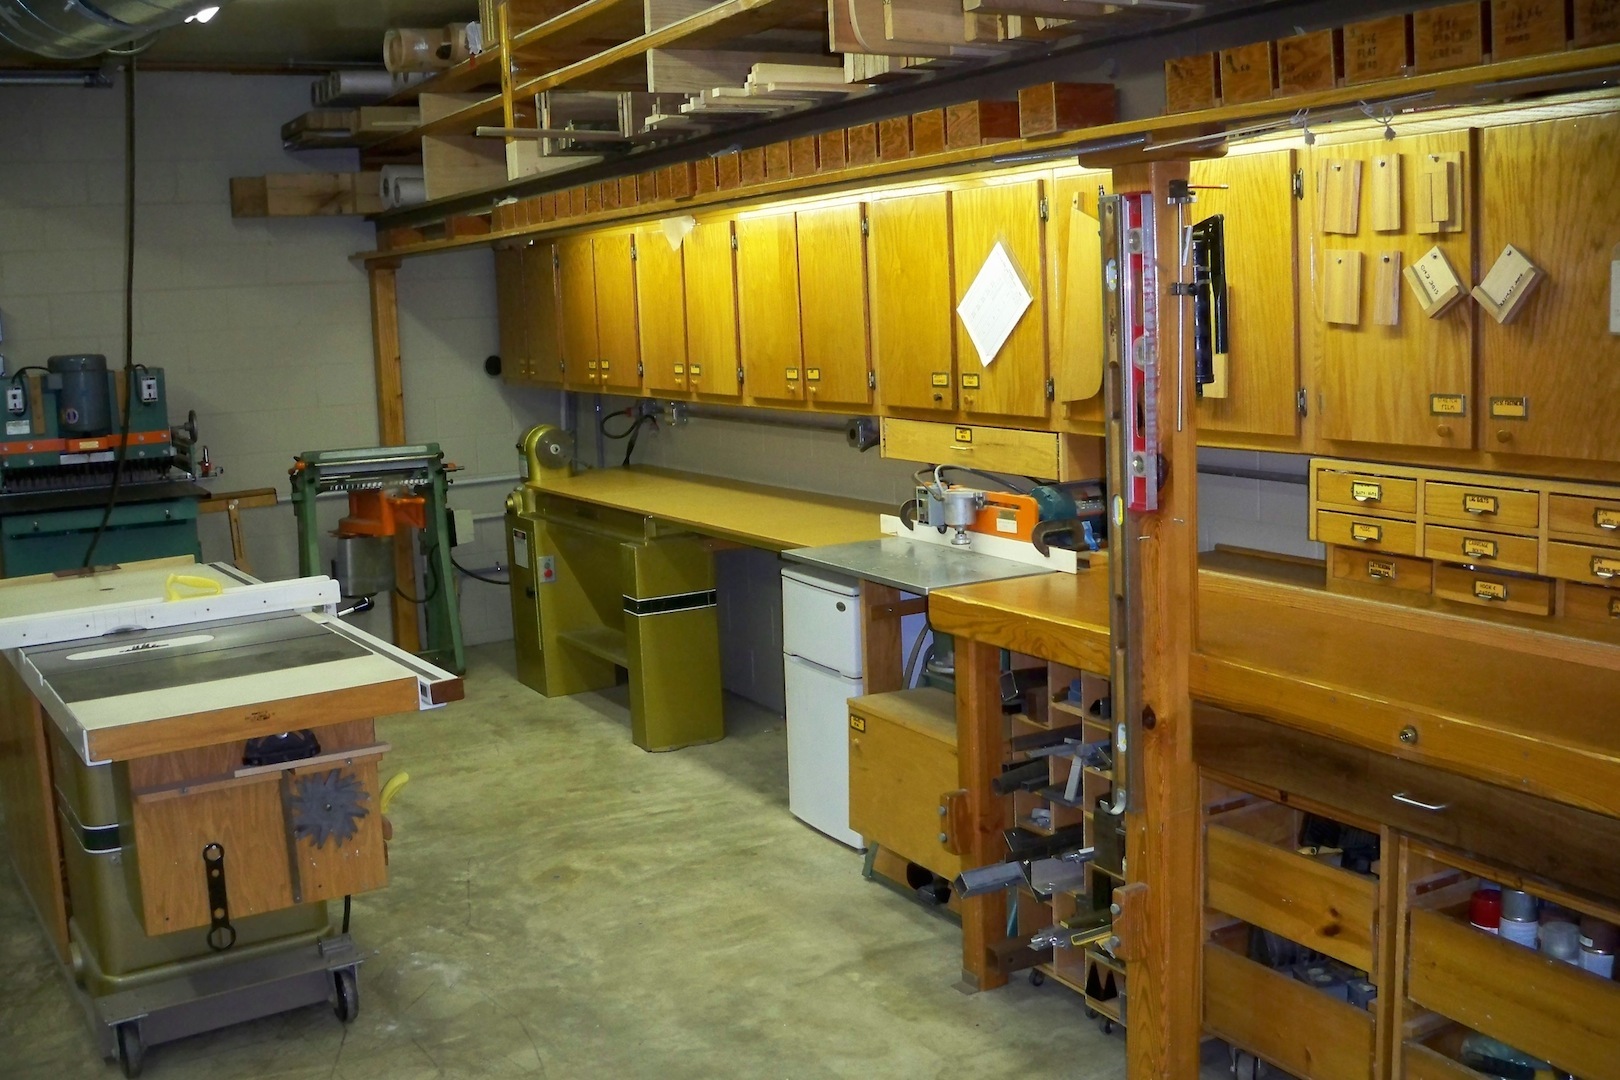
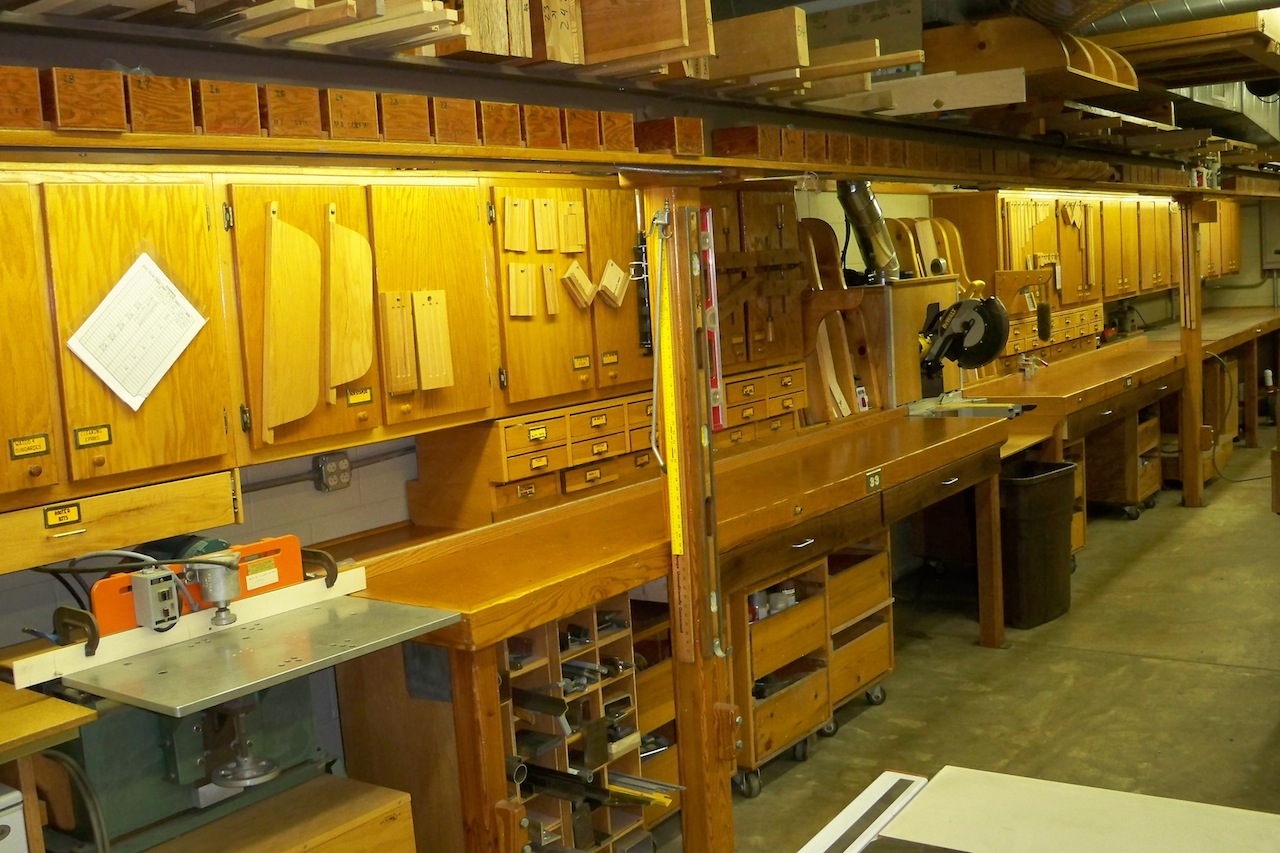
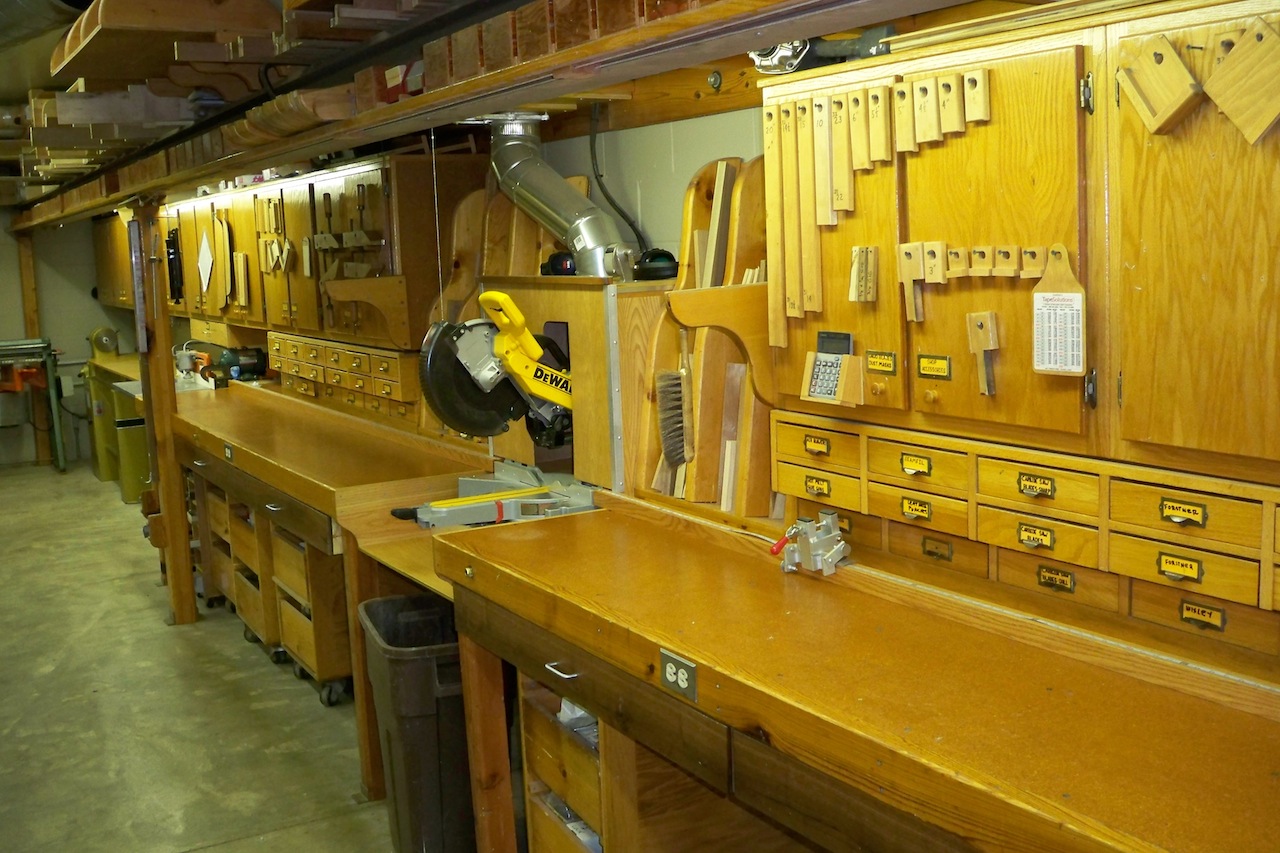
...Miterbox cutting area. Wheeled carts are stored below workbench when not in use.
|
| |
 |
|
...Another view miterbox cutting area. This was a radial arm saw cutting area early on.
|
| |
 |
|
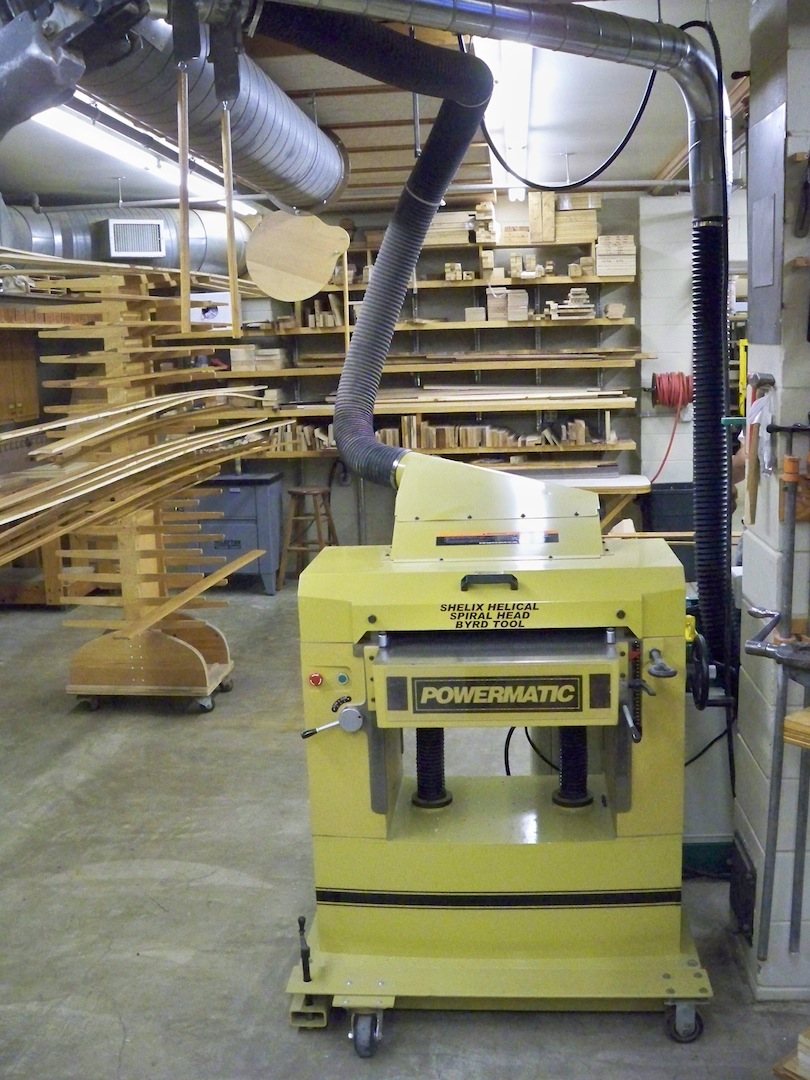
...201 Powermatic planer with Byrd Shelix Cutterhead. The mobile base is similar to mobile base for the Powermatic table saw I describe in the comment section
|
| |
 |
|
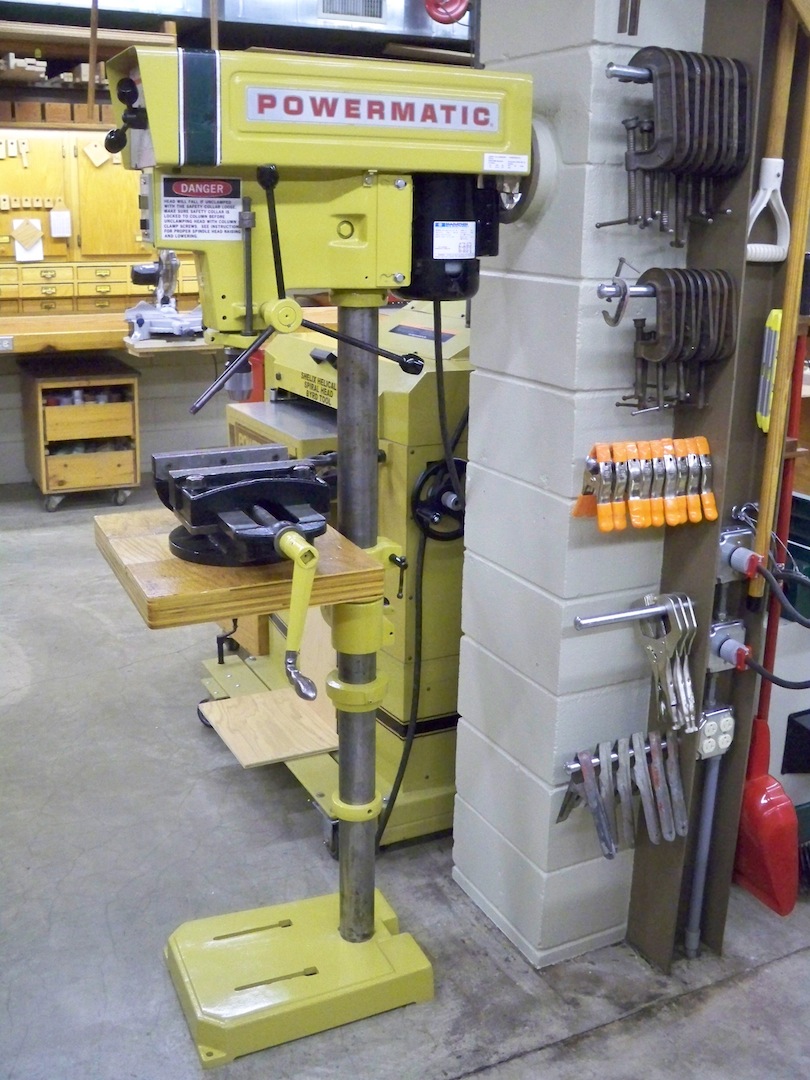
...Powermatic 1150 drill press. I recently rebuilt this drill press.
|
| |
 |
|
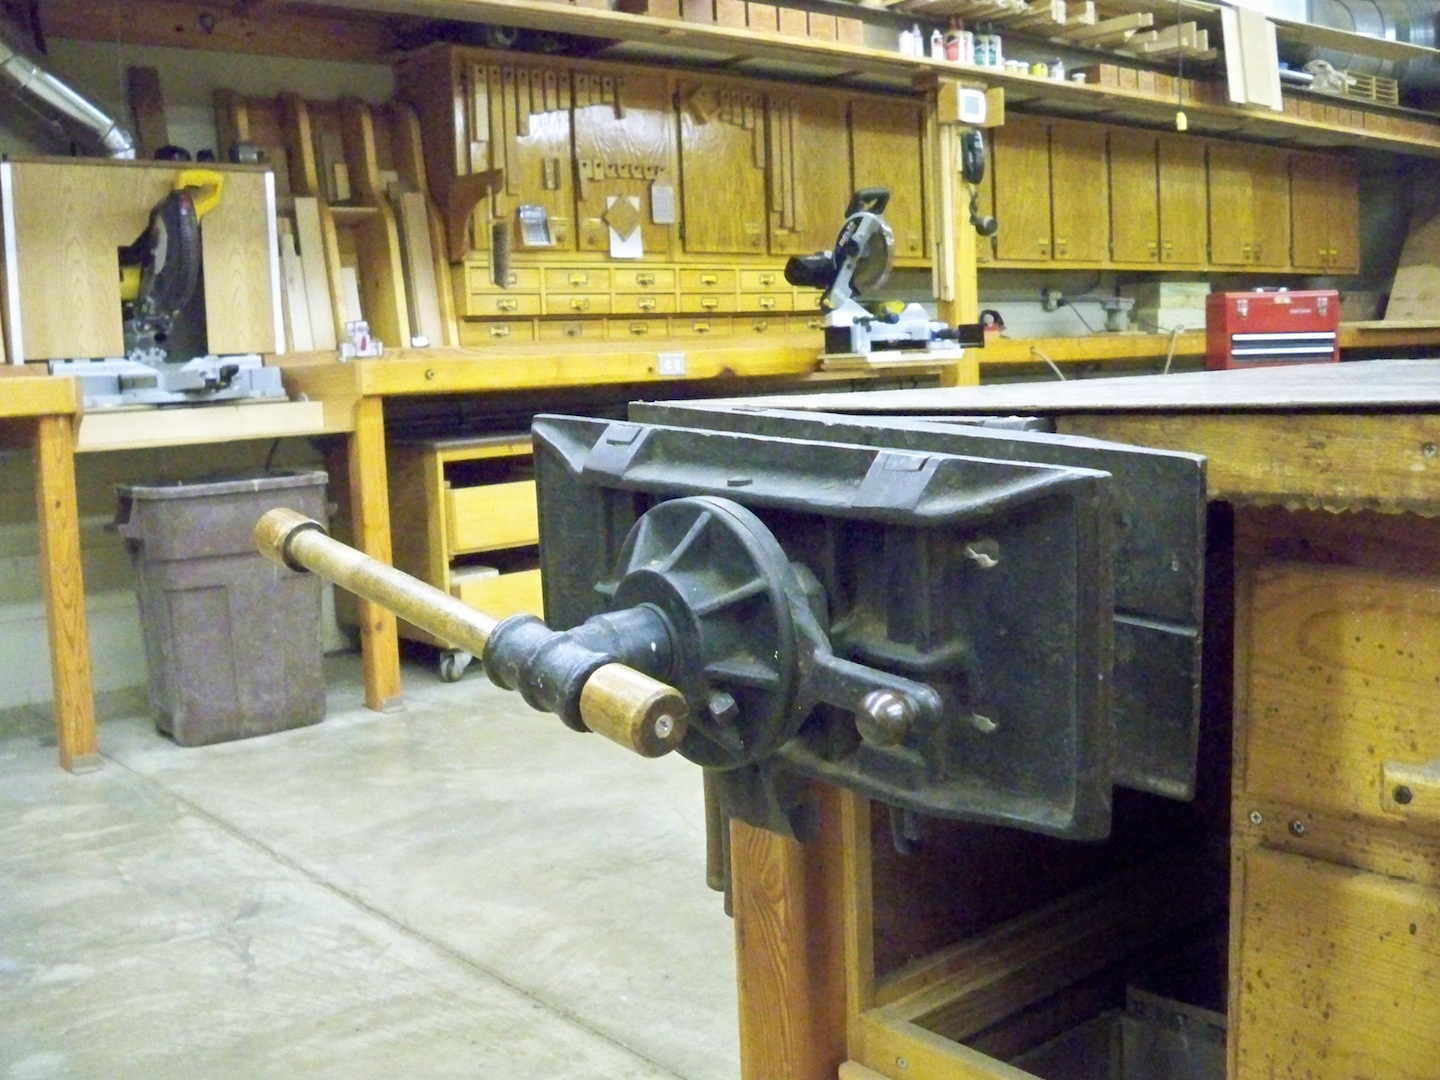
...Emmert pattern-maker's vise. A classic.
|
| |
 |
|
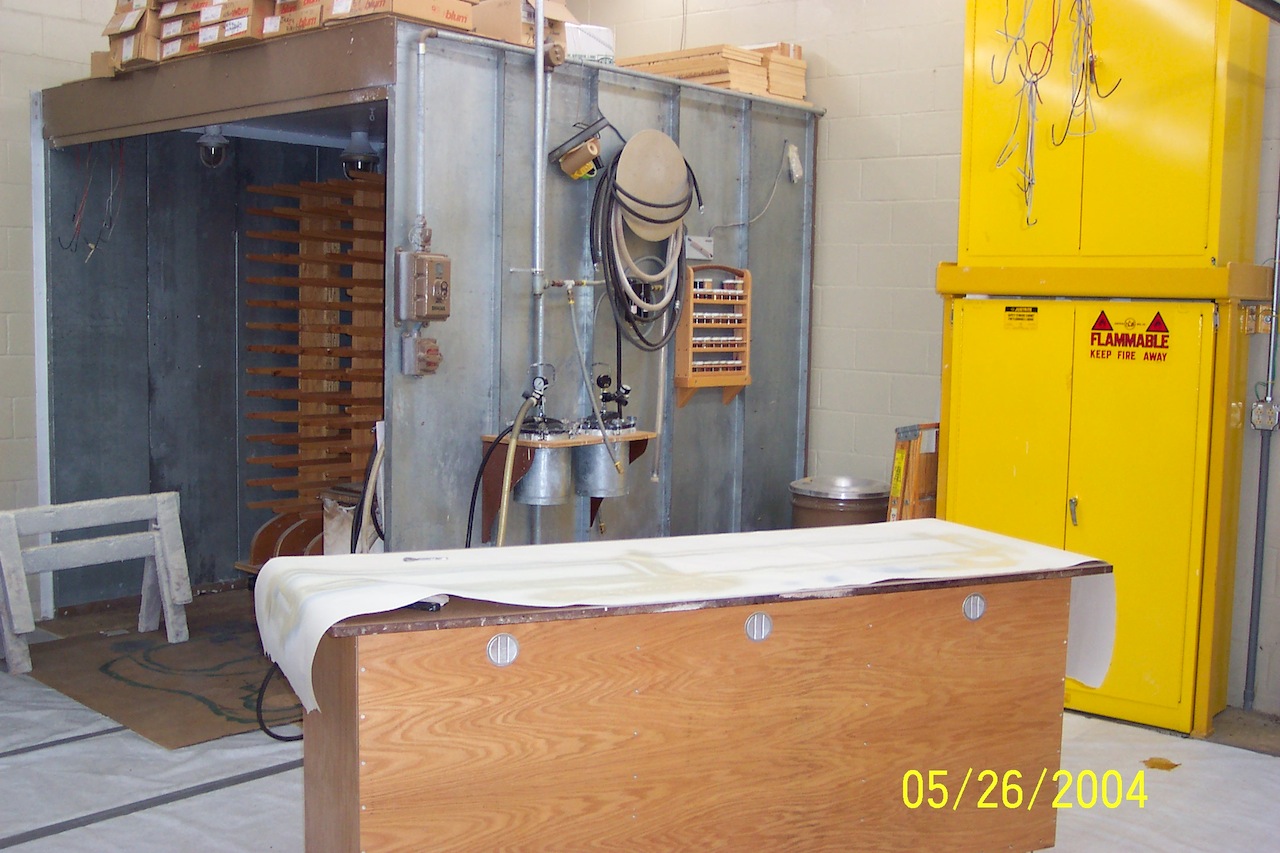
...Spray booth in finishing room.
|
| |
 |
|
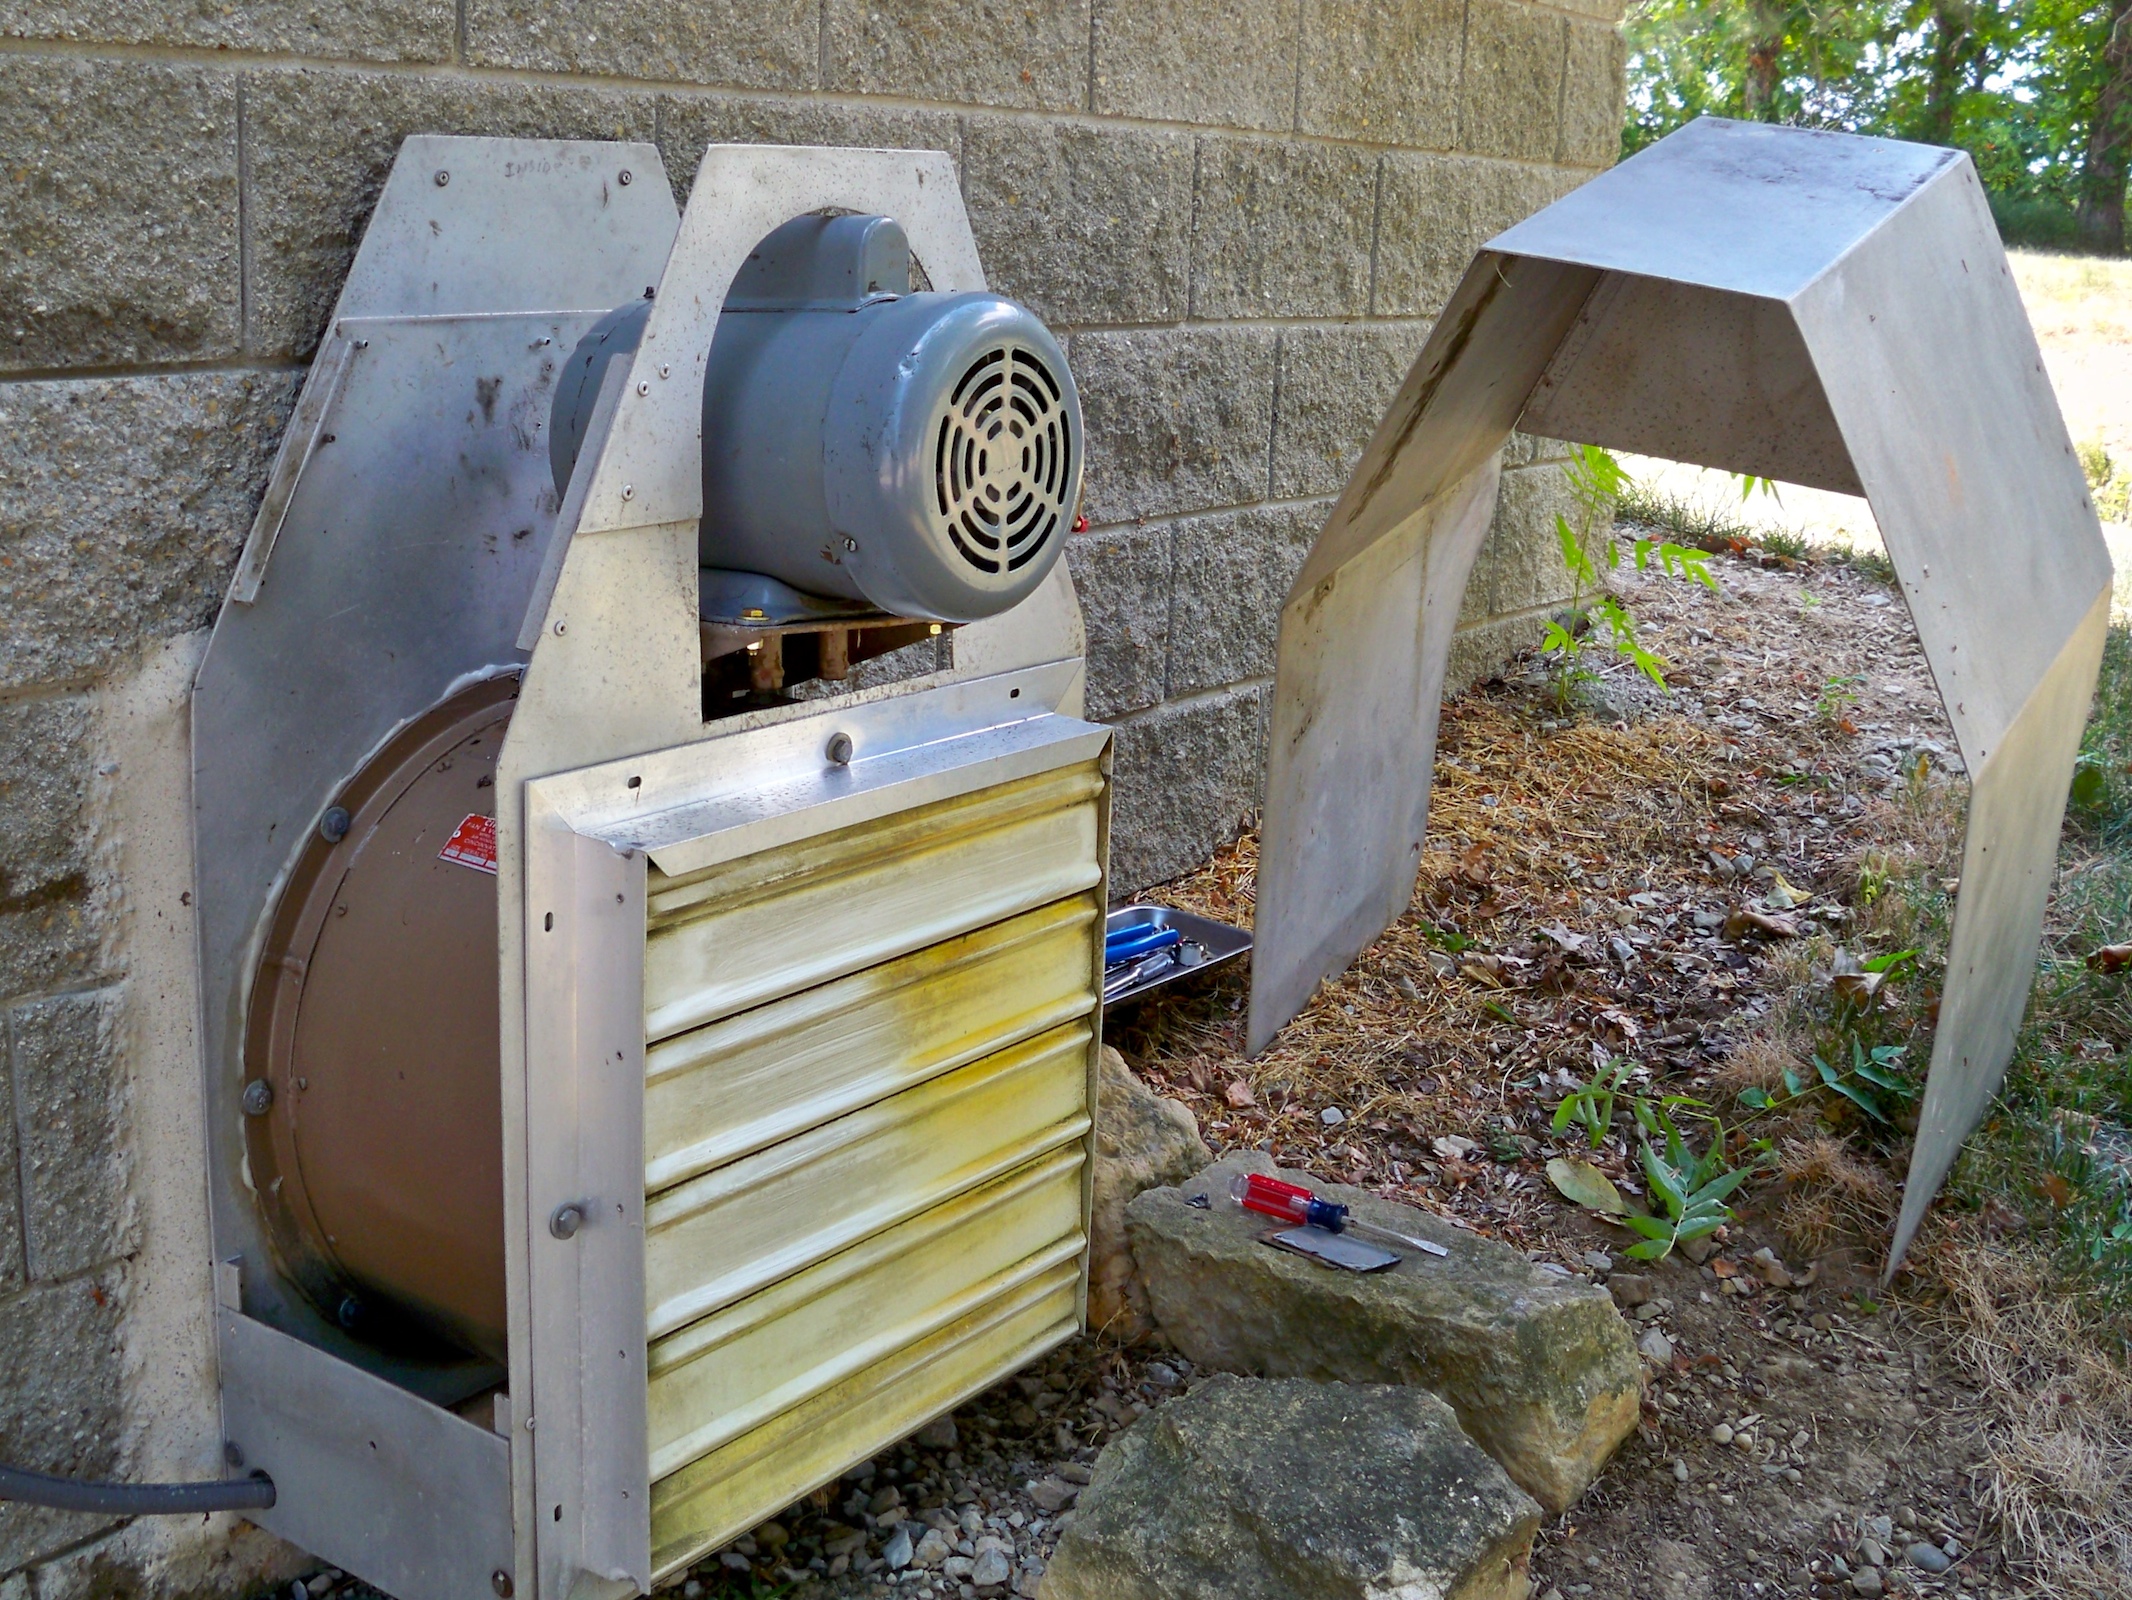
This is an outside view of the through-the-wall 20" tube axial spray booth fan with the weather shroud removed. There is another fan just like this one in the woodworking area for daily cleanup (see my post in the comment section that describes the daily cleanup process).
|
| |
 |
|
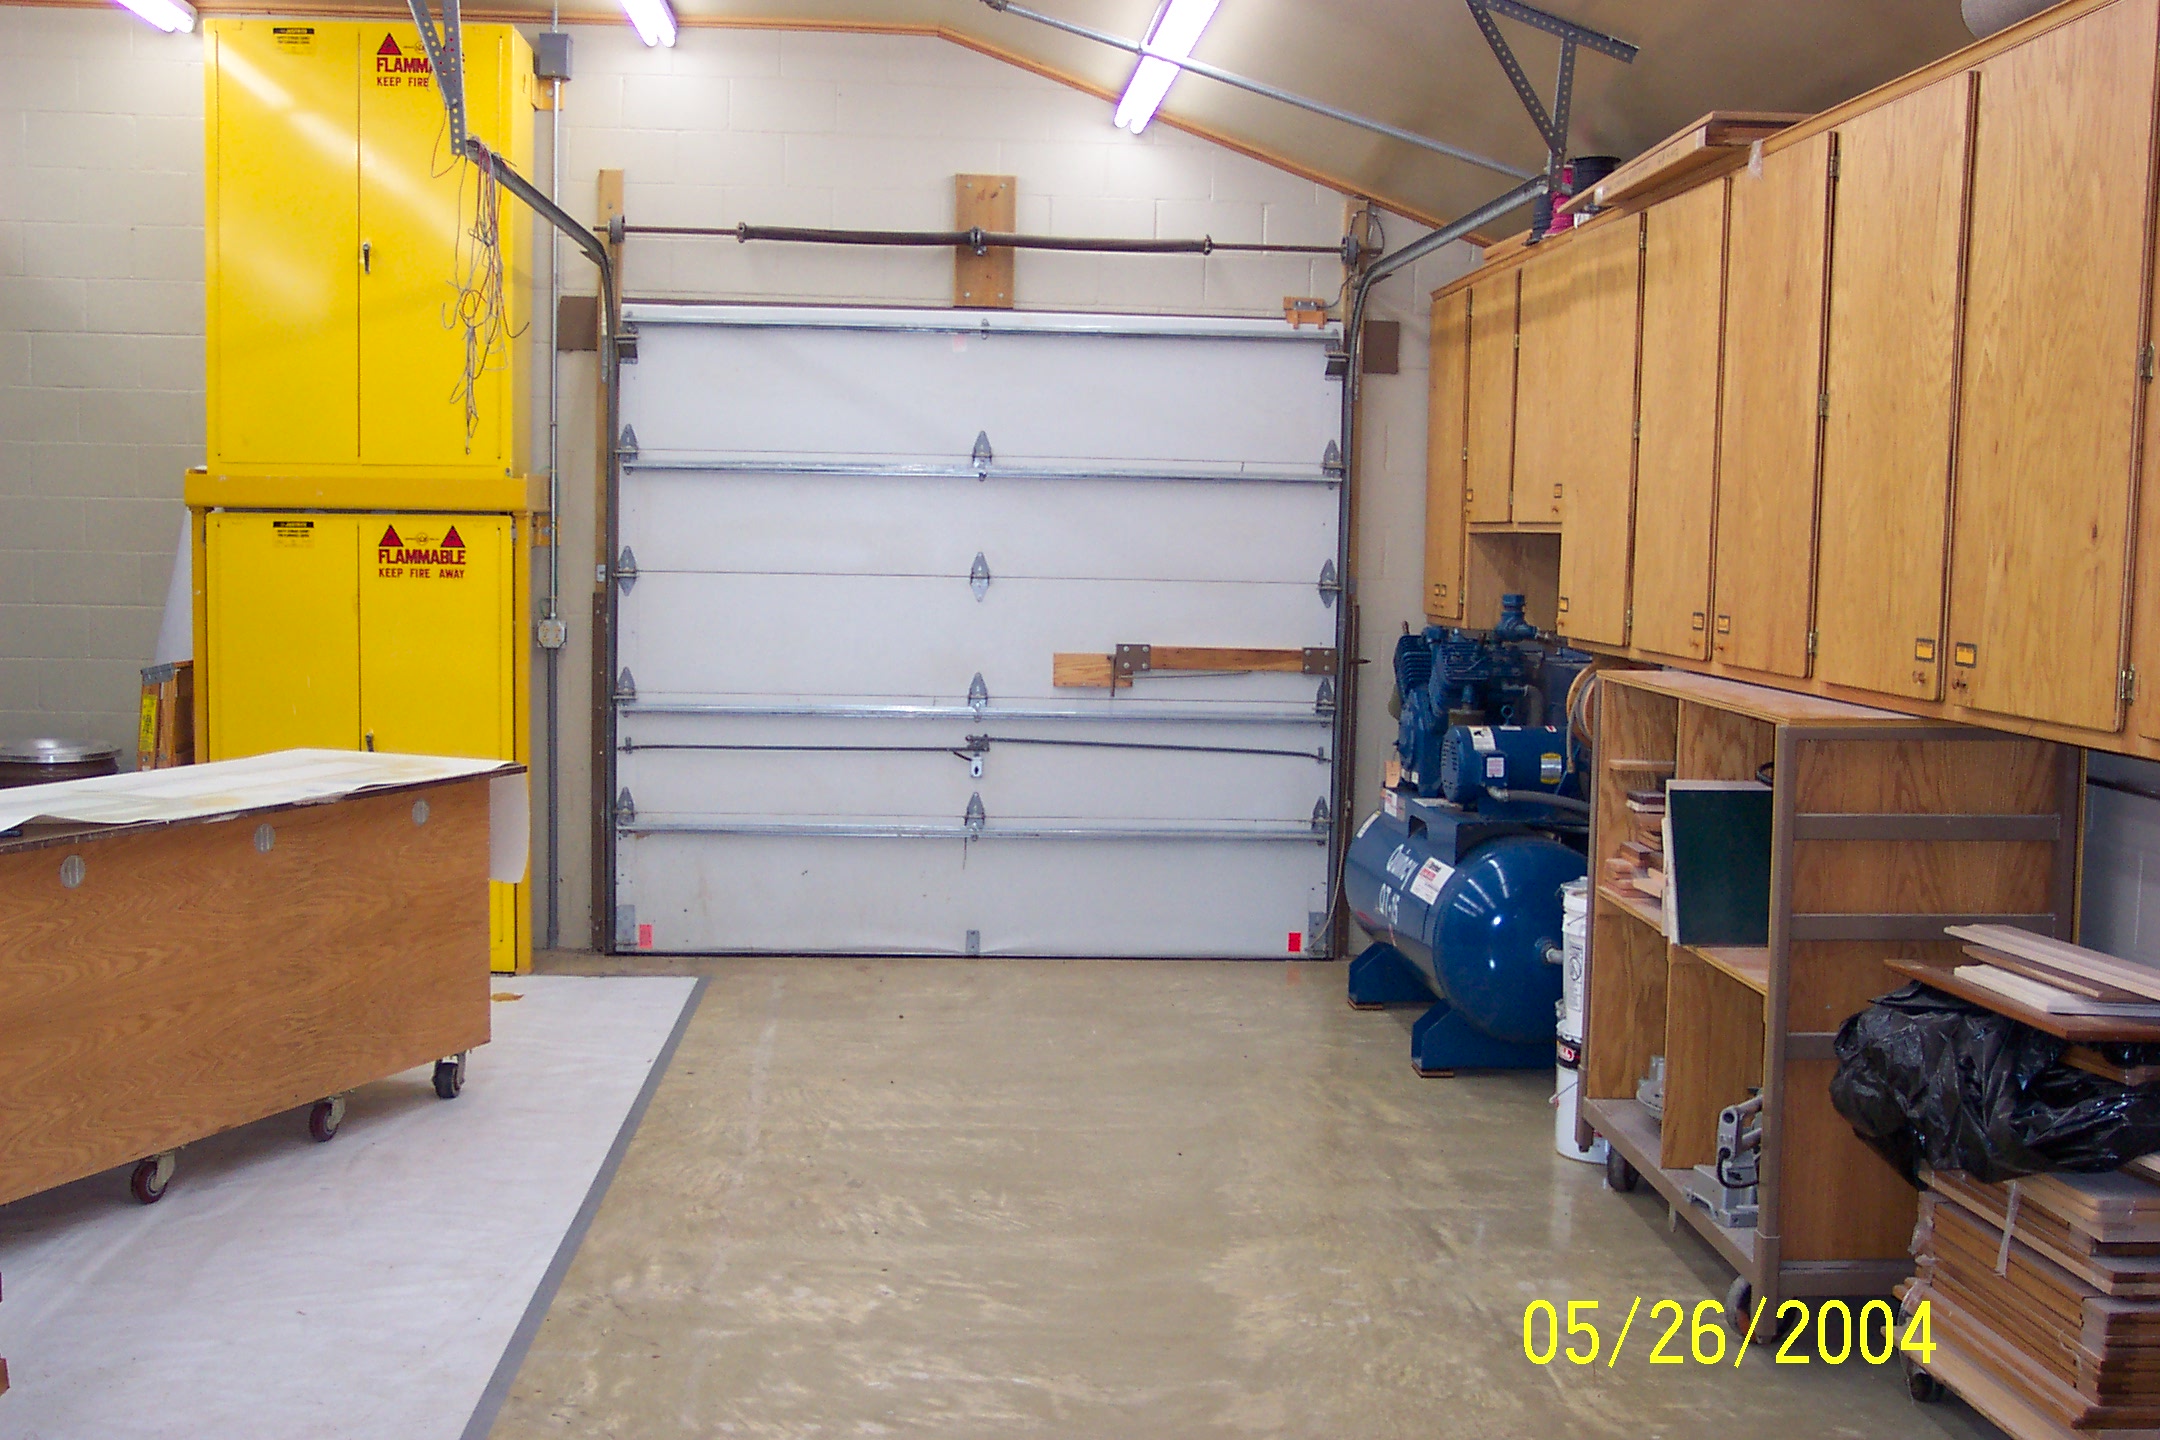
...View of the finishing room with Quincy QT15 15hp Compressor.
|
| |
 |
|
...Aget 10 hp dust collector.
|
| |
 |
|
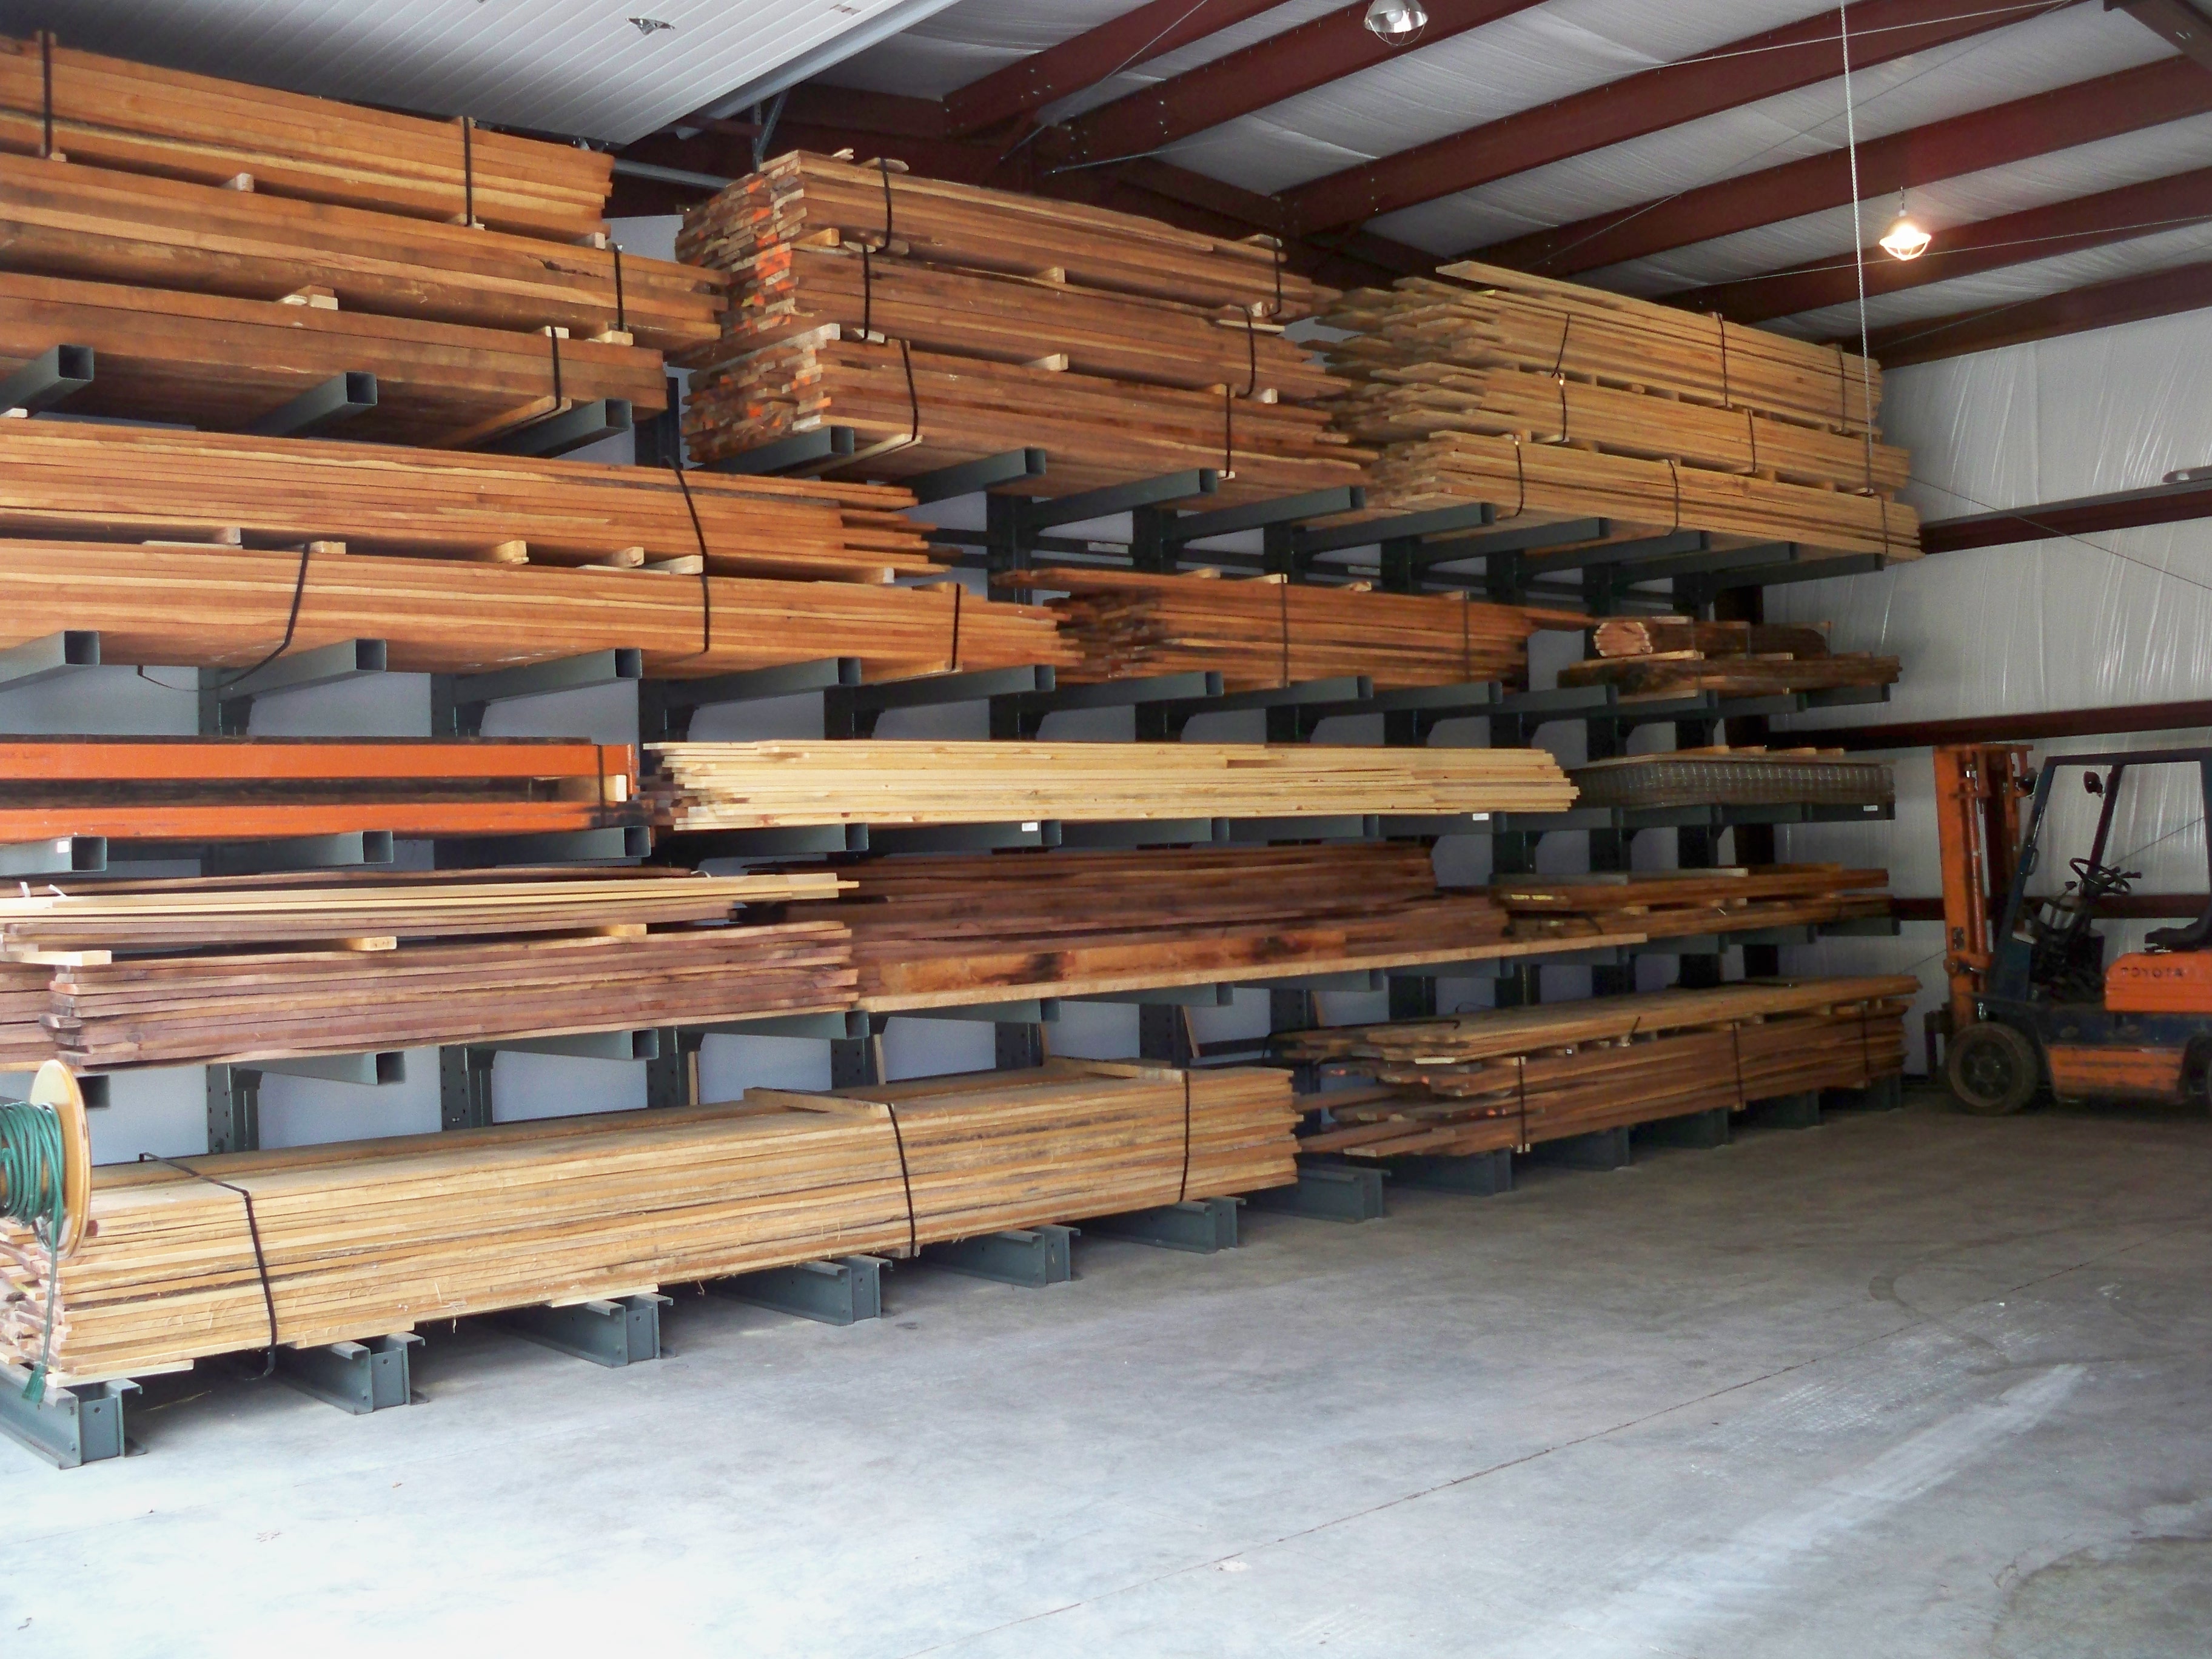
Cantilevered Jarke lumber storage racking in my part of a 3780 square foot Storage building that is next to my shop - I lease out 2/3 of the building and use 1/3 for my storage. The wood is kiln dried cherry, walnut, popular and quarter sawn sycamore. It came from the woods on my farm. At the rate I am now using it, I will never get it all used up.
|
| |
 |
|
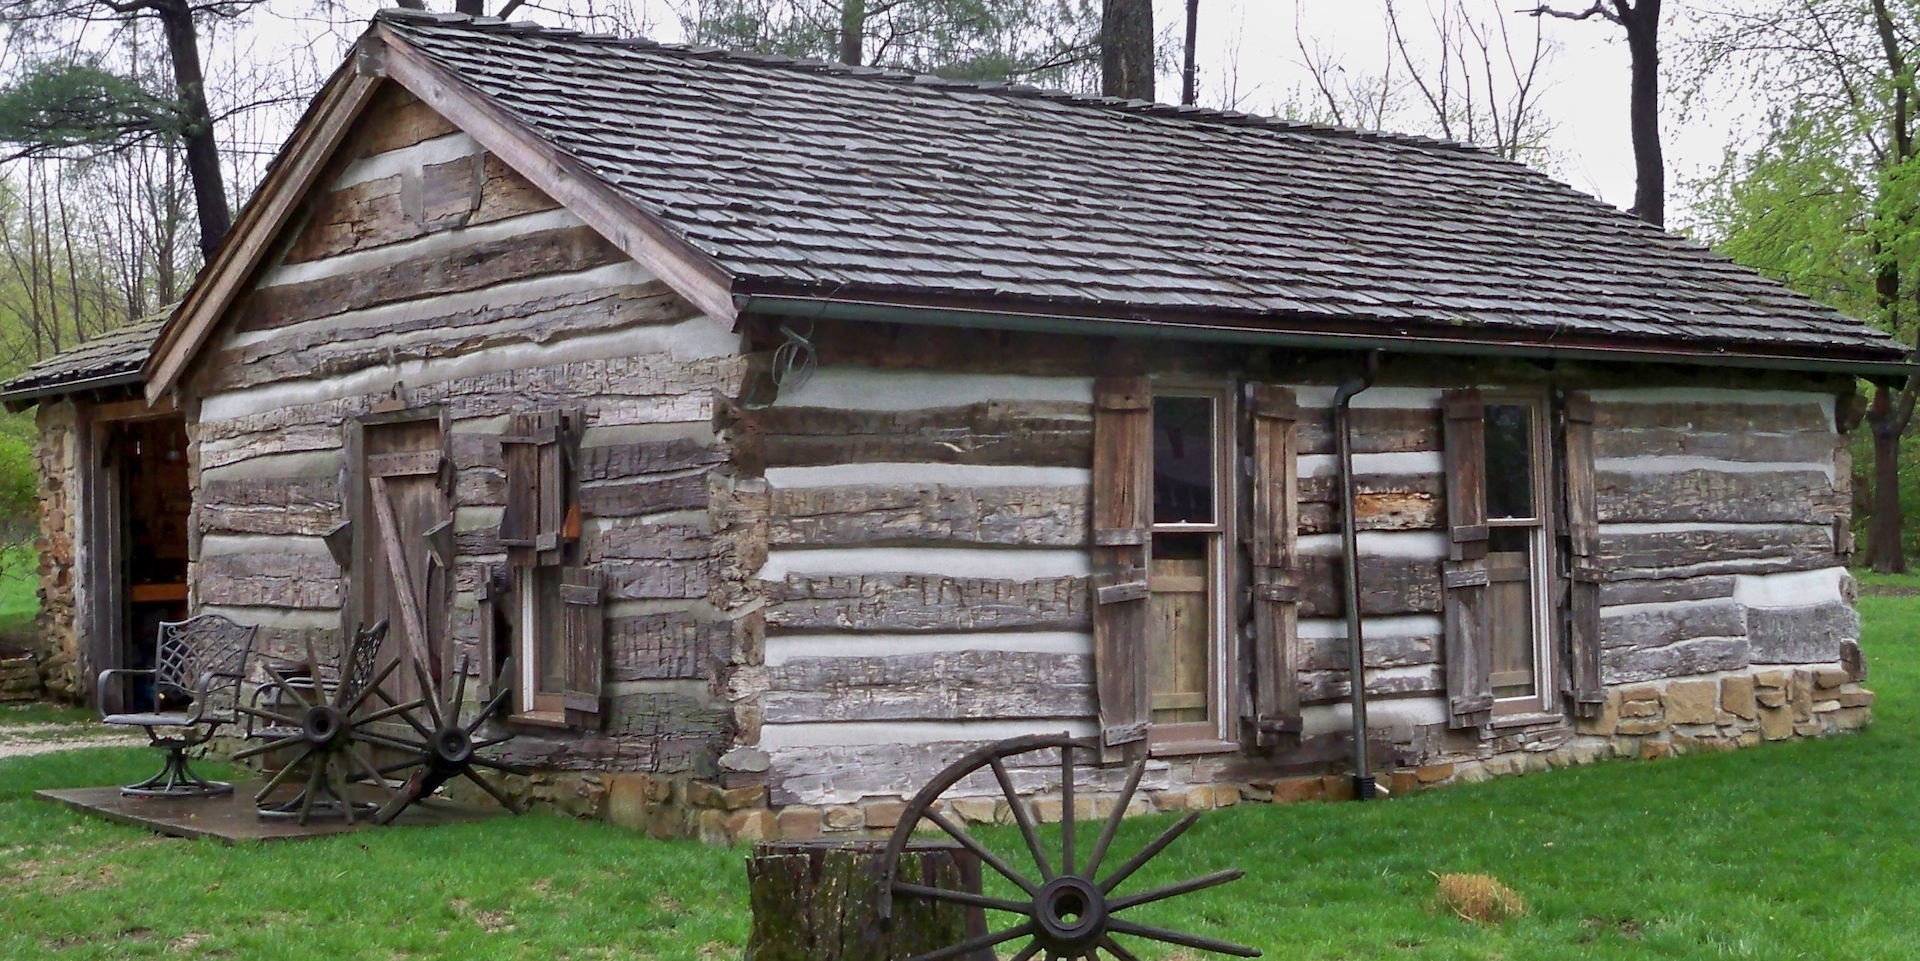
....My cabinet shop from 1975 to1984. It is a 1835 hand hewn log building next to my home. I outgrew it and moved to my current shop in 1984.
|
| |
 |
|
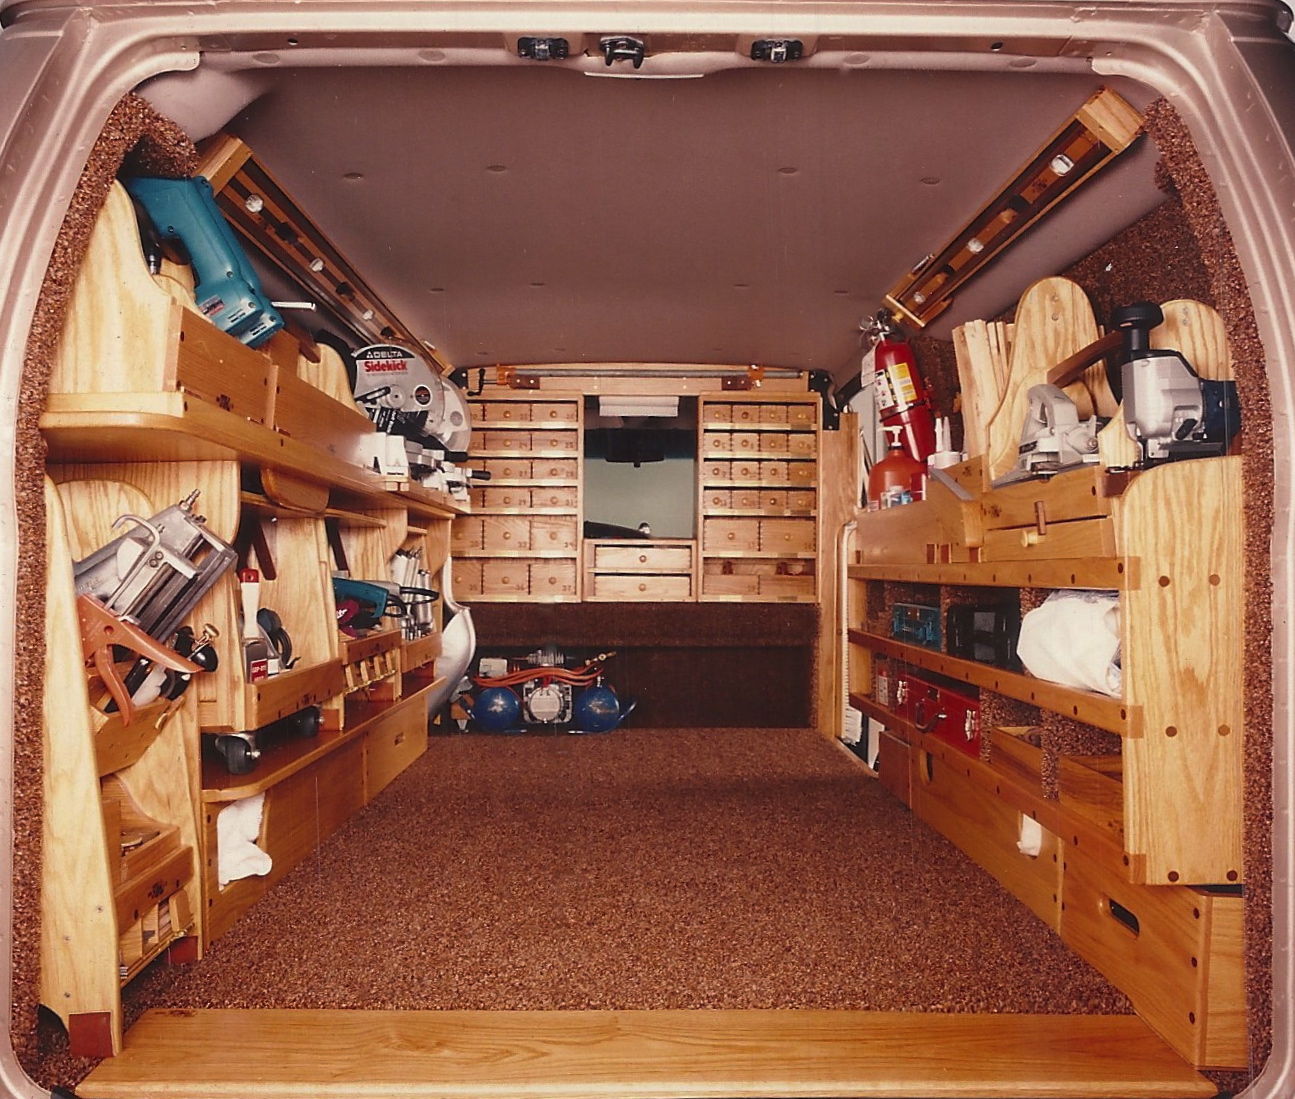
� My van as it appeared in the Fine Homebuilding book titled, The Toolbox Book by Jim Tolpin.
|
| |
 |
|
� I built this 1200 square foot home for Amy and I just before we were married in 1972. Some of my best work is in it and 41 years of living there with Amy has produced a patina that has made us love it more now than then. Yes, on the kitchen oil finished wood floor is a big scratch that matches many other scratches - but it is priceless for my now 40 year old son made it on his 13th birthday!
|
| |
 |
|
Babe, My everyday buddy. She is always by my side when at the shop. When I get a little down, I give her a hug and everything is OK. We lost Babe on Feb. 9, 2013. We are so sad.
|
| |
 |
|
Sadie, my new everyday shop buddy. She is a 5 month old Sheltie. She sure has a lot of learning to do.
|
|
|
|
Company Name: Jerry Hillenburg & Co.
|
|
Contact Name: Jerry Hillenburg
|
|
Location: Martinsville, IN 46151
|
|
Year Founded: 1971
|
|
Sq. Footage: 3,500
|
|
Employees: 1
|
|
Gross Sales:
N/A
|
|
Website:
|
Product Specialties:
|
Cabinets - Custom Cabinets
Woodworking - General
|
Shop Equipment:
|
Ritter - R-46 Pneumatic 46 spindle doube line boring machine
Ritter - R-130 Pneumatic 2 spindle horizontal boring machine.
Other - Quincy QT-15 15 hp compressor
Powermatic - 7 1/2hp 3ph 22" Planer model 201 w/ Byrd Shelix Cutterhead.
Grizzly - 8" Jointer Model GO490 w/ Byrd Shelix Cutterhead.
Other - Derda Dovetailing Machine
Rockwell - 10" Unisaw w/ 84" Biesemeyer fence.
Powermatic - 10" saw w/ 50" Biesemeyer fence
Other - Aget 10hp dust collector #60N70 (push through belt drive).
Other - Blum Mini-Press Hinge boring machine
Powermatic - 1150VS Drill Press
|
Viewer Comments:
Posted By:
Dick Yanikoski [01/26/2013]
Great shop with very clever use of space! Many small touches offer convenience and efficiency - such as the paper holder above the tablesaw and the roll of paper attached to the end of a work table. The loft ladder is elegant. Where did you get the clamp for your drill press? How do you raise the Unisaw dust guard? It seems like a load to just lift with one hand while attaching the chain with other.
Posted By:
Bob Card [01/27/2013]
Jerry, thanks for the shop tour. I found a number of great ideas in there for my own shop. I especially like the sliding toolbox for tablesaw tools. That's officially on my list of things to add to my own shop.
A nice clean, well laid-out shop. Well done!
Bob
Posted By:
dan nelson [01/27/2013]
Do you have any info on your Derta dovetail machine? I searched the web and no luck.
Posted By:
Rick Palechuk [01/27/2013]
Your shop is an inspiration for all, thank you.
Posted By:
Rich [01/28/2013]
Thank you Jerry for sharing. Tremendous amounts of pride and ingenuity are obvious in every photo. The thoughtful and deliberate planning for the future so you could keep your shop to play with should be an inspiration for younger folks. Wish you many satisfying years to come.
Posted By:
Eric [01/28/2013]
Loving that van. Now that is old school cool.
Posted By:
Steve Purcell [01/30/2013]
Well Done Jerry! I grew up in Richmond at about the same time. I now have a 10,000 square foot in Connecticut doing primarily yacht work and also custom furniture, estate gates, and so forth. When my shop was smaller and just me, your level of organization was constantly on my horizon. When things slow down a bit I expect to have a blast closing in on 'them there hills'.
All the Best.
Steve
Posted By:
antonio ageeb [01/31/2013]
Wow! What a nice and organized shop! My shop is about the same size with pretty much the same equipment but nowhere near as neat and 'well thought out'. I am 35 and am trying the same thing - keeping loans to a minimum and paying cash as much as I can! Thanks for the inspiration!
Posted By:
Solid Silk [01/31/2013]
This is a success story. This is an inspiration to small/medium woodworkers, I like it.
Posted By:
Bill Schilling [02/01/2013]
You are an inspiration to us all. I too am a one man shop and you are so correct on the fancy financing things. You have a wonderful shop.
Posted By:
Matt Jackson [02/02/2013]
Jerry,
fantastic shop setup...way to go!
BTW, what are the numbered sticks hanging on the doors just right of your chopsaw station?
Posted By:
Jerry Hillenburg [02/04/2013]
Dick, thanks for your nice comments! The Unisaw dust guard is easily moved to stored position because it is only 84" off the floor, it weights 25 - 35lb. I am 6' 1" tall so that is an easy reach for me. Another way to raise it and hold in place would be to create a lift by using 2 pulleys a 1/4" sash cord (I like this idea).
I purchased the drill press clamp at auction. It is heavier than what I need, but it works.
You are very observant in noticing the clip board support that is integrated in the wooden support arm. Not pictured is a remote that I recently added to switch my 10hp. Aget dust collector that is just below the clip board support.
Posted By:
Jerry Hillenburg [02/04/2013]
Bob, thanks for touring my shop. The Sliding Tool Tray is a must have for anyone with a Biesemeyer type of fence. I submitted this idea to all the tablesaw manufactures years ago - got lots of pats on the back, but no takers. This month is the first time I have made it public.
The Sliding Tool Tray has 3/16" sides that have vertical grooves for dividers, and a 1/4" bottom. The bottom of the bottom has two shallow grooves to allow for the fence rail's fastener protrusions and the fence rail's seam. The fasteners need to ground down to almost flush (take a look at the inside of your fence rail).
Posted By:
Jerry Hillenburg [02/04/2013]
Dan, The Derta dovetail machine has been very reliable but they are no longer in business. I purchased it at a Sheriff's auction in the 80's for $300.
Posted By:
Jerry Hillenburg [02/05/2013]
Rich, you are so kind with you comments. My retirement strategy worked well. Any company owner in our industry could implement this strategy with the same success.
Posted By:
Jerry Hillenburg [02/05/2013]
Eric, giving customers a tour of my van and my shop greatly increased their confidence in me - hence more cabinet sales.
Posted By:
jerry hillenburg [02/05/2013]
Matt, the numbered sticks hanging on the door to the right of the chopsaw are mostly spacers of an exact length for use in face frame layout.
Example; my face frame stiles and rails are 3/4" X 1 3/4". To cut the rails for a 18" wide cabinet, you would set your saw-stop to 18". From its hanging place, add your 3 1/2" spacer between the saw and the end of the saw-stop, then cut your rail which will be 14 1/2". These spacers of an exact length reduce arithmetic mistakes when laying out face frames.
My saw-stop stops at the edge of the chop saw. One of the spacers is 10". I use it in the same manner described above to cut short pieces by adding 10" to the measurement.
Example; I need a piece of material 5 3/16". I add 10" to 5 3/16" to get 15 3/16". I set the saw-stop to 15 3/16", add my 10" spacer then cut my wood to 5 3/16".
Posted By:
Eric Commarato [06/18/2013]
Jerry, the shop is beautiful. Too clean!! The Biesemeyer hidden drawer is genius...
Posted By:
Jerry Hillenburg [07/06/2013]
Eric, thank you for the nice comments. Every Biesemeyer should have a slide out drawer!
Posted By:
Jeremy Talbot [12/22/2013]
Jerry, I love your shop. I do like the look of the old building better tho. I have gone from being a cabinet maker to a cad/cam technician. My goal is to some day go back to woodworking, in a small shop like yours. I agree with you on paying cash for everything. I will have a small cnc tucked away in a corner however. I love the drawer in the table saw fence!
Posted By:
Jerry Hillenburg [12/23/2013]
Jeremy, Thanks for your nice comments. I agree with you about my old log building shop being better looking than my new concrete block shop. I just love the look of weathered structures. I just added to this post a picture of my 1200 square foot home that I built in 1972. Some of my best work is in it, and 40 years of living there has produced a patina throughout.
Posted By:
John Bacon [03/09/2014]
Jerry, I think your loft ladder is of an awesome design..
Do you have any close ups of the details?
Thanks,
JB
Posted By:
jerry Hillenburg [03/10/2014]
John, Thank you for your nice comment. Because of your post, I created a thread in Woodweb's Project Gallery about the ladder. The link is below.
Balcony/Library Ladder
Posted By:
Ron [04/17/2014]
This is what I strive for in our shop! Absolutely awesome! Thanks for sharing.
Is that a custom cover on the hose reel(s) hanging from the ceiling?
Posted By:
jerry hillenburg [04/17/2014]
Ron, thanks. The air hose reels were a 1980s auction find - they are three sections of one vintage auto service station hose reel set. One was for compressed air, one for grease fitting gun, and the other was for motor oil. I separated one of them and used two of them together. The ends are made of wood. They make terrific compressed air hose reels.
Posted By:
Glenn [05/26/2014]
I love the van the best. Everything is top notch.
Posted By:
jerry Hillenburg [05/26/2014]
Thanks Glenn. The van was described in the 12th chapter of the Fine Homebuilding's Toolbox Book by Jim Tolpin. I mounted the pages of that chapter on a wall of my showroom in two picture frames for customers to see - they were impressed. When you impress customers, you sell cabinets.
Posted By:
Eric Pendexter [12/03/2014]
Congrads on your wonderful shop. I have a molding shop and have shown your pictures to my crew just for something to strive for. We will never be as neat and clean but one can try!
Thanks for sharing
Eric
Posted By:
jerry Hillenburg [12/04/2014]
Thanks Eric for your nice comments. My employees and I hated working in a dirty shop. During the day we rough swept the floors with a 3' wide broom moving the debris to an out of the way area.
Every day at quitting time we super cleaned the shop. The floors were swepted. The sawdust and derbis was removed. The shop was then blown out with a 2 cycle Stihl leaf blower. To blow the shop out, the front door was propped open for makeup air, and a tubeaxial fan was turned on. This fan is configured for super high air exhaust - it is strategically located in an outer wall and was installed just like the spray booth fan in shown in the 18th picture. The Aget dust collector was also running to help in this 15-20 minute process.
Posted By:
MJ Bealor [02/09/2015]
I am late to the game, but I wanted to write and give you a big thanks for sharing both your story and your clever and immaculate shop. The modifications you made to the unisaw are brilliant.
I am a one man shop in a small (500 s.f. w/ a separate finish building), and have a few questions if you have time:
What did you use to crosscut your panel stock? (Right now I rip on a uni, and crosscut up to 24" on an old dewalt ras, would love to ship the ras out and gain some room).
Where are/were the shapers in your operation?
Thanks!
Posted By:
Jerry Hillenburg [02/11/2015]
Thank yo MJ Bealor. I did crosscutting of panel stock that was over 15� on my Unisaw tablesaw - it has a Biesemeyer fence that will cut to 84�. I know some woodworkers will chastise me for using a tablesaw fence to cut a panel 84� long that is only 15� wide, but I did it carefully all through my career and never had a problem. If you do this, be sure to use a kickback device and keep your table/fence slick with a light coating of silicone (wipe excess silicone clean with a cloth to prevent issues during the finishing process).
I had one shaper that was rarely used and I eventually sold it. For a small shop, creating moldings and paneled doors is very expensive in terms of equipment, and time. I feel the space needed for such equipment can be better utilized - like having a very large table saw setup.
I purchased moldings from a local supplier who has abilities to make moldings and frame stock in any shape - they stocked most items I needed. I outsourced doors to an amazing Wisconsin company called WaltzCraft http://walzcraft.com . Their catalogue is over 400 pages and they have more than just cabinet doors. Their quality is superb.
Posted By:
Mark Bealor [02/12/2015]
Thanks, Jerry, for taking the time to answer
Posted By:
Larry [07/31/2015]
Success!
Posted By:
Jerry Hillenburg [08/01/2015]
Larry, thanks for your comment - it is appreciated.
Posted By:
Mike Birkett [11/07/2015]
Jerry, thanks so much for sharing your shop with us. A special thanks for sharing the photo of your home and your philosophy on avoiding debt. Can you provide any more info on the rolling base for your powermatic table saw? I would like to do something similar for my Unisaw. I'm just a family guy working out of a small space. Thanks again!
Posted By:
Jerry Hillenburg hillenburg [11/09/2015]
Mike, the custom made super heavy duty rolling base for the Powermatic table saw would be an ideal base for a small shop table saw. Two 64� long pieces of 2� X 4� rectangular steel (�� wall) lay flat and act as �floor joists� for the base. Welded to those floor joists on one end is a piece of 6� X 6� angle steel (⅜� wall). It is welded in such a way so as to provide a mounting base for two 5� heavy duty straight line casters (see pictures). Welded to the floor joist on the other end is a piece of 4� flat steel (⅜� wall). Also attached to that end is a modified half of a piano carry dolly (a flea market find) that raises the base up for mobility, and down for table saw use (see pictures). The power cord is dropped from the ceiling to the piano carry dolly end of the base, then it runs through the inside of one of the floor joist to the other end where it goes to the magnetic switch.
Posted By:
Mike [11/17/2015]
Thanks Jerry! That does sound like a good solution. I'll be recruiting my welder friend.
Posted By:
Jerry Hillenburg [03/12/2024]
It is now 3/12/24. At 73, I still enjoy my shop during retirement. Except for the material elevator being removed, it has not changed at all. I still lease out 2/3rds of my storage building and the lease payments more than pay for the expenses.
Posted By:
Jerry Hillenburg [02/10/2025]
It is now 2/10/25. I am 74 and still have the shop. The 4 lane road that is in the front of it is now Interstate 69. I lost 1 acre to the road upgrade. I sold the Big Joe lift because I never used it. I am now the process replacing the florescent lights with LED lights. Other than that the shop it as described above.
Posted By:
Darin Read [01/18/2026]
I saw Mr. Hillenburgs van in a woodworking tool box book from a couple decades ago. It took me back to my finish carpentry mentor in Washington State, Mr. Harrell, these two master craftsman are on another level! Harrell taught me damn near everything he knew, I'd never seen another trim carpenter with modular set ups, down to the task. So freakin dialed! Harrell also had a door installation shim custom tote. Of course they were all cut perfect out of left over hardwood. I still use the same table saw jig to make my shims he taught me 25yrs ago. Just wanted ro say you're a true legend Mr. Hillenburg, I truly wish there were more guys like you and Harrell around the jobsite, I would study every step and ask so many questions.....follow you around like a vacuum. It's a shame building has become so demoralized! I'm dealing with an entirely new insane monopolistic cult when it comes to modern building practices, I call em the "greenie weenies" air tight buildings are the craze. The hypocrisy is so astonishing! I've seen energy "green building" not only drive costs through the roof, but sick building syndrome, rebreathing, centralized hvac systems that weren't designed/enginnered to accommodate our synthetic air flow, ventilation. Don't worry just hang all your hardie cement board and now 100lb corner boards and window trim off the sheathing!? Put special rain screen or zip wall and fur out every stud?! So how do I fasten those to your osb and 2" of rigid foam on the outside of wall?! Oh yeah! When you "fasten" the furring strips it penetrates the "waterproof" rain screen wall?! The entire building industry has lost their damn mind! There was a reason why tar paper and cedar siding was used in the pnw, but the computer said....affordable housing!! Ha!
Posted By:
Hillenburg Jerry [01/19/2026]
Thank you for all the nice compliments Darin Reid. I still have the shop and I enjoy using it in my retirement.
Posted By:
Chris Steele [02/08/2026]
I got the pleasure of working in this shop learned a lot being a small company you wasn't just an employee you were treated as family something that most big companies forget about .I got the nick name of the fastest base layer of south side Indianapolis .I thank Jerry for the knowledge he gave me best Job I ever had !
Posted By:
Hillenburg Jerry [03/23/2026]
Chris Steele, I am honored by those nice comments. You certainly were a woodworking natural and I enjoyed the times we had together.
Posted By:
Hillenburg Jerry [03/24/2026]
Chris Steele, I am honored by those nice comments. You certainly were a woodworking natural and I enjoyed the times we had together.
Posted By:
Allan Fowler [04/06/2026]
Mr. Hillenburg,
We bought a home that has cabinets built by your company. They are wonderful and still look great! We recently had some water damage and were hoping you were still in business to perform the repair. We want to maintain the beauty you put into these cabinets. Is there someone else you would recommend for this repair? Greatly appreciate the input and we enjoy your craftmanship!
Posted By:
Hillenburg Jerry [04/07/2026]
Allen, thanks for your nice comments. Unfortunately, I am retired. I do not know of any cabinet shop available to do that repair.
|
|