Color "Burnthrough"
Other Versions
Spanish
Ideas for getting a sanded-through look to enhance the sense that a new piece is anything but. January 25, 2005
Question
I am going to try some finishes with color burn-through in layers (different colored layers sanded through to varying depths). Do most of you use tinted lacquers for the color? Have any of you ever used old fashioned milk paint for the color layers followed by a clear coat?
Forum Responses
(Finishing Forum)
From contributor L:
I too will soon be doing a kitchen with sand-through colors. I am doing a fairly simple color scheme - light green over black. I made quite a few mockups before I found a way to make it work fairly simple.
I am first spraying with ML Campbell's Black Clawlock post cat primer, sanding, shooting another coat to cover burn-throughs, sanding again. Then I'll shoot the color coat. This is a pre-cat - ML Campbell's green called "Bounding Maine." I'll thin it to about 20 sec through a #4 Ford cup, I think about 50/50. Then spray it on only enough to get a full color covering. Remember, lacquer is tough to sand through. The thicker it is, the more work you will make for yourself. Then using 220-400 grit paper, starting in the most detailed areas and finishing on the flat areas, sand through for your desired effect. Then I'll finish off with two coats of dull sheen Magna-Max clear pre-cat lacquer. It's not a perfect match to the old oil finished, but will be so much more durable than they could be. If you want more durability, use post-cats all the way through. Remember not to put a post-cat over a pre-cat or you will be asking for trouble down the line.
From contributor J:
I am doing a burn-through finish right now. It consists of a stain first coat with a blend of white and raw umber to produce a taupe wash. Then sealer, then thin coats of pigmented lacquer. Then sand through to the taupe color. Then finish with pre-cat. Makes it look like 100 year old paint that has worn out. But it looks fresh, like new.
From contributor R:
I just did a job with a burn-through finish. I used latex paint thinned with water and sprayed on. Two different colors. I used a rust red and sprayed over with green. Let dry. Sand through, distress, spray on a full coat of vinyl sealer, glaze as required and topcoat with pre cat lacquer. The picture is of a different cabinet in the same room using just one color of paint.
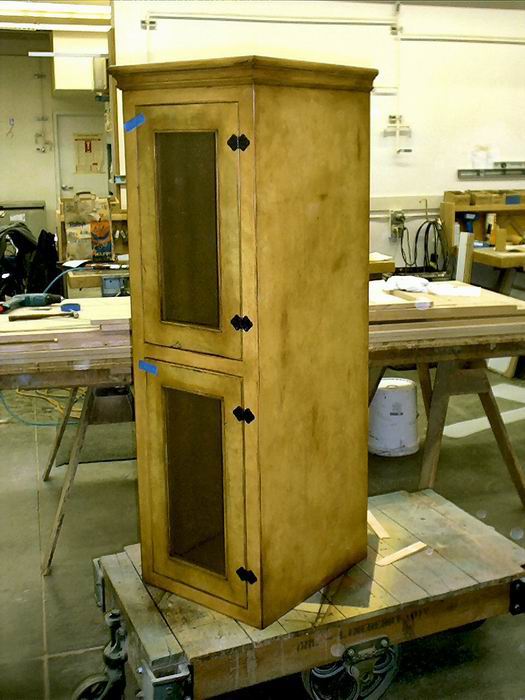
Click here for full size image
From contributor O:
Is it safe to use latex paint under pre cat? Does the vinyl sealer prevent any problems?
Very nice work, by the way.
From contributor L:
I did a mock up of a pair of doors using latex and pre-cats. My schedule went like this.
1. Prep doors
2. Prime with Ben Moore Super Spec alkyd primer. Sand.
3. 1st coat, black latex. Sand.
4. 2nd coat, green wall latex ($7/gal).
5. Glaze, using Old Village Varnish Paste glazing. Apply with steel wool and burning through to bottom color for desired effect. Let dry for 2 days.
6. 2 coats of MLC pre-cat, dull sheen.
I am waiting for some kind of failure, but it has been 1 1/2 months now with no apparent ill effects. Finish still looks like it did after I applied it.
From contributor R:
It works great. I did adhesion tests and it is just as good as the lacquer by itself. I also had to strip a couple of pieces and it was real hard to get off. There is a paint store near me with a real bad tinter, apparently, and I can get mis-tinted latex paint for $1/gal in just about any color you can think of. I just tint it a little if needed, and 1 gal does a ton of cabinets.
From contributor B:
To fake a painted country antique, I use a coat of clear water base sandwiched between the two coats of latex paint. First prime, then brush on your paint for the "show through" color (latex paints work fine). Then spray on a topcoat or barrier coat of clear finish (for water base lacquer I used Crystalac 2001 on painted pieces like this - I've recently switched to Oxford USL but I haven't tried it over/under paint). Scuff the clear barrier coat with grey Scotchbrite, then brush on the top color of paint (again, latex works fine and brush marks are part of the charm here). I use flat latex to simulate milk paint, just be careful to choose a muted color for authenticity. When the paint dries, sand or scrape through it into the clear layer and the first color will show through as if the paint were worn away from years of abuse. You won't know the clear layer is there, but it requires a lot less control in sanding the distressed areas. It might also act as a barrier to keep the top color from lifting any of the lower color. I used a random orbit sander with 220 grit to get the burn-through areas (for example, around drawer pulls, at the edges of the face frame, around shelves or doors, and on the corners of legs). I have also done this with brown NGR stain on poplar, a clear coat for an intermediate barrier, and a topcoat of white paint, so it looks like dark wood is showing through the wear areas. I did two kitchen sideboards with painted poplar bases and curly cherry tops - even the decorator who picked the paint colors was impressed.