Coped Crown Installation
Coping in an octagonal room. April 18, 2004
Question
I always cope 90 degree corners when I install crown moulding, but when I do an octagonal room I simply cut 22.5 degree mitres and butt them together. While doing this today, I wondered if this could be coped too?
Forum Responses
(Cabinet and Millwork Installation Forum)
From contributor P:
For octagonal rooms, cut your first piece of crown on a 45 degree miter so that it lays on the adjoining wall. In other words, at the point that would normally be the long point of a 22.5 degree angle, this will now be the short point of a 45 degree angle. Your next piece of crown will be cut on a 22.5 degree angle just as you would to butt two 22.5 pieces together. Now cope along the 22.5 degree profile, but back cut to an extreme angle so this piece will lay over the first piece. Continue around room. Your last piece will be double coped, of course.
From contributor S:
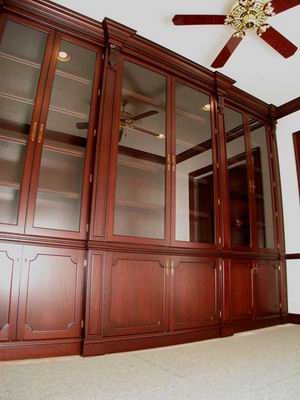
We only cope when running new molding into existing. With the new compound miters on the market and a couple 1 foot test pieces, one each with an inside and outside cut left and right, I feel there is no need to cope. Glue the miters and there you go. The crown on the following unit and the perimeter of room was measured, cut, nailed and glued in an hour and a half by myself with the exception of opposite wall where I had a hand holding up opposite end.
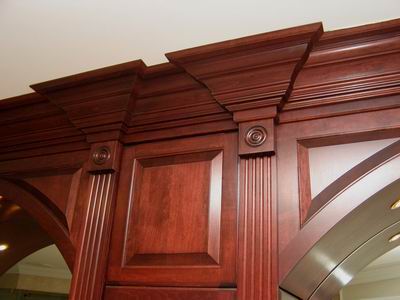
Close up.
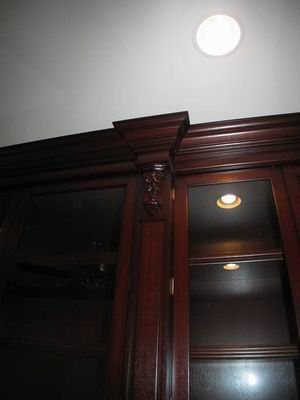
It took almost as long to cope this three-piece into existing as it did to do the rest of unit. In my opinion, it is an unnecessary time consumer to cope when not running into old profiles.
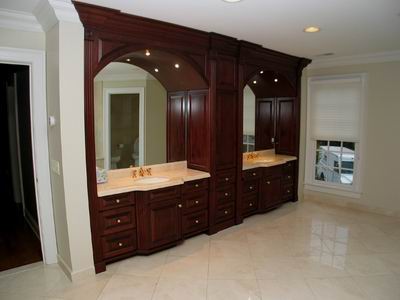
Mitered works for us.
From contributor P:
The original questioner wasn't asking about running new crown into old. Neither was he asking how to run stained cabinet crown at 90 degree angles as you have pictured (nice work, though). He asked if crown could be coped in an octagonal room (45 degree corners), which it can. The method you described, using test pieces, works well if you wish to miter. But how many times do you climb up and down the ladder to trim a little from one piece, then the other, to get a perfect fit? Then you have to duplicate that cut on the final piece. And sometimes it doesn't fit because of crooked ceilings or a buildup of drywall compound. Then you're back to trimming it again. There are always instances in which this method must be used. But by and large, coping is faster and better for most applications. Time saved equals money made.
From contributor S:
My point was that I believe mitering is faster no matter what the angle or situation except when running into old work. I use the short pieces to mock up corner and roll crown up or down till a tight miter is achieved, than nail piece in. Now I know that the next piece will fit tight because I used a short one to set previous piece. You glue inside corner, then nail next one up, leaving the opposite end loose till you put up next one, then roll that end into place and set, then continue until finished. As far as wavy ceilings and walls, I keep a hand plane in pouch and either hit wall or take a little off crown or both if need be (still on ladder). And on the rare occasion that a corner is extremely out of square or 45 or whatever the angle may be that rolling cannot achieve an acceptable joint, I may have to re-cut the occasional piece. Point being that time-wise, mitering works fastest and most profitably for us. I measure all dimensions at one time and cut everything at one time, then install all. I never go up and down the ladder to re-cut unless I made a mistake and cut it too long or short. Obviously, mitering around a square wood unit is easier than running crown on wavy walls, however ceilings are almost always out. Like I said, it's just what works best for us.
From contributor R:
With most new housing built with either engineered materials or kiln dried lumber, coping is not as critical as it once was. Besides, in my neck of the woods, you can't afford to cope. Very nice work in the photos, by the way.
From contributor J:
For the octagonal ceilings, I like to 45 both ends on the first piece, cut a 22.5 degree just through the coved portion of the crown, leaving the top material on the crown. My next piece gets a full 22.5 degree cut, and I then cope out the upper portion at a deep undercut, leaving the coved (and more difficult to cope) portion as a miter. When installed, it will practically self-align, leaving a visually mitered joint at the bottom, and a very tight cope on the biggest part of the crown. Hope I explained that correctly. I do the same with base, chair rails, etc. Works easier for me.