Curved Raised Panels
Woodworkers discuss ways to fabricate curved raised panels for the interior of an archway, with photo examples. December 2, 2006
Question
I have a job that requires I make curved raised panels like the ones pictures. It is not a cabinet like this one, but rather an interior entryway. The casings I can do on my W&H elliptical jig, but I haven't a clue on the best way to do the panels on the interior of the arch. The arch has a 4' radius and is about 8" wide. I am thinking about making it a little wider (like 12"). Any tips would be appreciated!

Forum Responses
(Architectural Woodworking Forum)
From contributor S:
This is coming from someone who builds almost every cabinet and entry door in house... Outsource them to a door manufacturer. You will not even come close to matching the pricing of outsourcing.
From the original questioner:
Outsourcing is fine. Any recommendations?
From contributor S:
Well, I know Conestoga has a custom department that does specialty wainscoting and I know they do custom radius doors, so I assume they would/could do this for you. Not cheap, but still way less than what it would cost to do yourself.
From contributor J:
Veneer Systems Unlimited does it, too, with a bookmatched veneer face if you'd like.
Click here for higher quality, full size image
From contributor C:
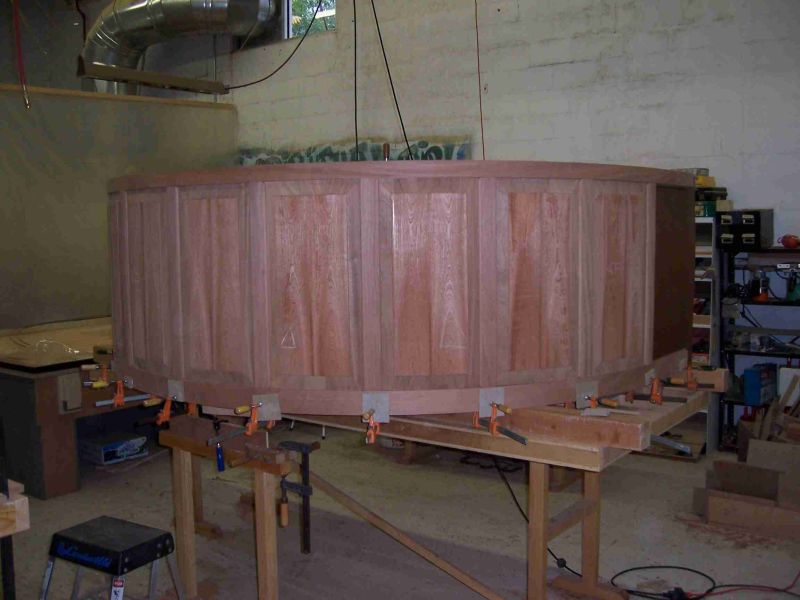
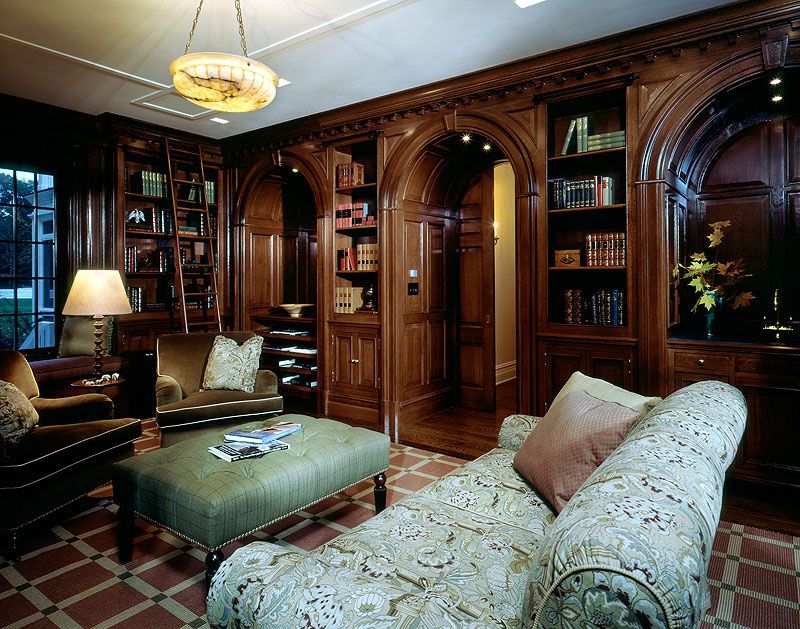
Making these is actually not all that difficult, but it is time consuming. My biggest concern was ensuring there were no witness lines in the part of the panel where it tapers into the frame. We therefore designed a knife that tapered 1/8" and made sure the critical laminations were 1/8" thick. Thus glue lines were hidden at transition points. The knife was designed to run in the vertical position and required two separate jigs to shape the panel.
We bookmatched the panels, and wanted to ensure the grain ran continuously through the panels, as well as appear to be the same grain in the raised part of the panel. Thus we used 6/4 material to get the faces and the layer behind them out of each board. All the panels were 5 ply bent laminations. I suggest you make them yourself, just allow time.
Click here for higher quality, full size image
From the original questioner:
That is some beautiful work... I am envious. Can you provide some more details about how you laminate and bend the panels?
From contributor C:
Those panels were a five ply construction, and each layer was 1/8" thick quarter-sawn white oak and just over 12" wide. All layers were resawn and edge glued in a book-matched pattern. They were then planed down to thickness. We built a bending form using plywood for the ribs and 2 layers of 3/8" bending ply for the skin. We used yellow glue (we used Borden's, but any aliphatic resin will do) for the lamination. To keep everything aligned in the press, each panel was screwed to the form at the apex. To minimize springback while the glue was still setting during the days following the pressing, we used ratchet clamps to prevent the radii from growing. After about a week, the panels were cut to size on the table saw.