Elliptical Moulding Jigs and Tricks
Simple curves are hard: elliptical shapes require a high degree of skill and experience. Here's a long discussion with photos from some seasoned old hands. April 12, 2013
Question
I am looking for information on making a jig for a Woodmaster to do elliptical moulding.
Forum Responses
(Architectural Woodworking Forum)
From contributor R:
Check out the Archmaster from Williams & Hussey.
From contributor D:
I don't know anything about Woodmaster, but I know ellipses. For a constantly changing radius, I don't see how that jig will work. We do this stuff on Hussey moulders, and it is all about hand to eye coordination when feeding the stock, gradually changing your infeed angle to as close to perpendicular to the cutterhead as you can. Any jig would have to be moving.
From Gary Katz, forum technical advisor:
I'd be curious to see a good jig that cuts elliptical shapes on a molding machine, too. I know that Gary Striegler cheats a bit and uses a two-centered arch so that he can make separate moldings on the Woodmaster and create a faux ellipse. It's sometimes difficult to tell the difference, so it's not really cheating - and it's the only way I've seen anyone do it.
From contributor D:
Well, two radii for a lookalike is one thing. Doing the real thing you have to be hyper-attentive, and before you get your confidence up (hundreds of runs, if you ever do get the hang of it, that is) you'll be making a couple extra blanks each time in anticipation of screw ups. I don't know about the Woodmaster, but the feed rollers on a Hussey are rubber, which I believe is absolutely necessary in order to maintain precise control. Toothy steel infeed rollers like on planers I feel would tend to inhibit your control - trying to force the stock to feed straight. Just from a guy who's run thousands of elliptical casing sets.
From Gary Katz, forum technical advisor:
Not being a jerk or anything, just insanely curious... I'd love to see someone free-hand an elliptical casing through a molding machine. That must be an unrecognized art form. Maybe while I'm crisscrossing the country doing shows, I can stop by your place sometime and shoot a video? Honest. I'd love to see it.
From contributor D:
I work at Riverside Millwork, Inc. in Charlotte, NC. I don't think the owner would feel there's a problem, because frankly the skills can't be taught on a video. We probably go by feel more than sight in fact. I will say this - on gradual changing ellipses, ones almost like a half round, the learning curve you can pick up right away. On ones that are tight and abrupt, say like 84" wide and only 10" tall, those require real experience. Our guys make it look effortless, but for the first couple weeks (16 years ago) I thought it was impossible. Probably the best tip I can pass on is to leave your blanks long. The few extra seconds you gain lining up as it starts to feed also give you a feel for how hard you need to gradually push and pull, and get you cutting dead on before you get to the springline. You may also get snipe at the in and outfeed, so going long you have room to cut the crap off.
From Gary Katz, forum technical advisor:
I'm going to be in Charlotte, NC twice next month. I wouldn't want to shoot a video to teach anyone how to do it, but rather to show how it's done. I think you're right, and it's true about a lot of stuff we do: you can't teach anyone very much with a video. It really takes practice and years of experience. But there are a lot of curious carpenters out there that would enjoy seeing this done. Let me know if I can come by for a visit. I'm pretty quick with a camera.
From contributor A:
I think what contributor D is describing is not exactly freehand. I am assuming they are using a straight fence in the back and a radius jig in front, cut to a smaller radius than the smallest radius on their moulding blank. It is more of a hand assist and there is an art to it.
I always enjoy reading about the many different ways people do radius work. I have been involved in curved work since I was a kid and still run parts everyday. Besides making my living in curved mouldings I have been in the unique position to visit many companies that make all aspects of curved woodwork, from 1 man with a bandsaw, sander and a W&H in a 10 by 14 building making 5 to 10 arches a week to 15 plus employees and over a million dollars in equipment making a thousand arches, jambs, crowns a week (heyday numbers - not current economy).
It really is fascinating seeing all of the different machinery choices and systems folks use to get from an order to a finished product.
From contributor Q:
I built a 3 bearing guide system for my 18" Woodmaster a few years ago. Based it on the W&H jigs. The nice thing about the Woodmaster is it's designed for multiple passes whereas the W&H is not. The major change that people do not make to the Woodmaster for curved mouldings are the feed rollers. The rollers have incredible pressure designed for planing. When running curved mouldings I disable the 1st and 4th roller.
The obvious limiting factor on the Woodmaster is that it's not open ended. However the vast majority of curved mouldings do not have the tight radius that the open end provides.
This discussion on the elipitical mouldings has raised an interesting insight.
The 3 bearing systems put the single bearing on the outside of the mould. 2 adjustable bearing on the inside. This is all well and good for most everything except ellipses. You really want the smallest bearing possible on the inside and the 2 adjustable bearings on the outside.
When you are "free hand guiding" what are the pivot points?
From contributor D:
Our setup is crude, but effective. Believe it or not, we bolt the W&H body onto poplar benches with the top designed to be replaced every few months. One straight fence is the guide for the outer radius, and another piece of scrap bandsawn pine sanded to a small radius for the inside. Crank up the height, line up blank under the cutterhead, screw down the guides front and back with drywall screws. Maybe push through a dry run without the machine running to get a visual on the angles (another great tip I neglected to mention). A rigid, thick pine guide can often actually get cut into, a safer bet than wheels and other gizmos. The extra friction in this tight fit is a plus here too - it enhances your hand control. If things just roll on through too easily it would be hard to control, if that makes any sense. You actually can do multiple passes, but this is sometimes problematic on profiles with lots of stock removal (not enough hold down area on subsequent passes), and on very ornate, wide profiles. Those ornate wide ones may look beautiful coming out on that last pass, but they are pretty certain to not perfectly match your lineal stock. That's a whole other discussion, I think, tips and tricks for making that joint from radius into straight blend seamlessly.
From the original questioner:
Contributor Q, you speak of the 1st and 4th roller. On my Woodmaster I only have 2. After reading all the feedback I am surprised how complicated this sounds. I may only run half circle arches and leave the elliptical runs for someone else.
From contributor Q:
I don't have the Woodmaster setup yet, so I'm going by my severely jet lagged memory.
There are only 2 feed rollers on the Woodmaster. I actually meant 2 settings. Basically I made 2 settings for each of the feed rollers. Normal (sanding/planing/molding), light(curved moldings). There are 2 spring kits available for the W&H as well. Obviously planers need more roller pressure than moulders.
Circular is easy, curved is harder, elliptical/oval is much harder. This applies to everything. Not just mouldings. Most small guys outsource the fancy stuff like curved crown and thicker casings, crowns to specialists. Many people including myself have made a good living using a decent shaper, a W&H and/or a Woodmaster.
The other trick is to outsource large runs to your lumber supplier. Pick a supplier that has really good moulders and planers and straight line rips. Give them all of your lumber orders if you can even if it costs a couple of cents more depending on the order. Outsourcing bigger jobs to them will make you far more money in one year. Also try to find a lumber distributor that will run moulding and get it primed as well. They will provide excellent service if they know you don't shop around on lumber pricing. It's the long term relationship thing. It keeps both of you in business.
From contributor Q:
I've got a couple of hundred hours using W&H as well. We started out from day one with the Schmidt curved jig.
I guess crude never really entered my mind. Your method reads like steering a board when resawing on the bandsaw. The proper way with a small round vertical fence and the blade. A bit of confidence and faith goes along way when freehanding mouldings, resawing nice woods, and many other operations we do every day without thinking twice about it.
The biggest issue is always the smallest radius that the cutter can make before cutting into the part. I think I've heard 6 1/2", But don't quote me.
From contributor D:
Steering I guess is a good word for it. We cut all the blanks in the same manner on the bandsaw, none of which I've ever seen a stock fence on. Those useless things all got trashed years ago. We call it "pinning" here. You basically clamp down a bullnose piece of stock a set distance from the fence after your outer radius is cut and sanded, then steer it through, changing angles so as to keep the width right. With experience, you get to where you're steering as fast as the saw can take it, cutting several hundred blanks a day.
From contributor A:
The methods you describe are the same methods we have used since the mid 80s, with the exception of going to Mikron for primary machining. We still freehand the outside radius and use a guide for the inside radius. The pic is the tightest radius elliptical I have ever run. It was run on a W&H with the method you described. The small radius is 1 1/2". Very little distortion, a little hand sanding and the customer was very happy. Back when I ran these I had ran a W&H around 12000 hours.
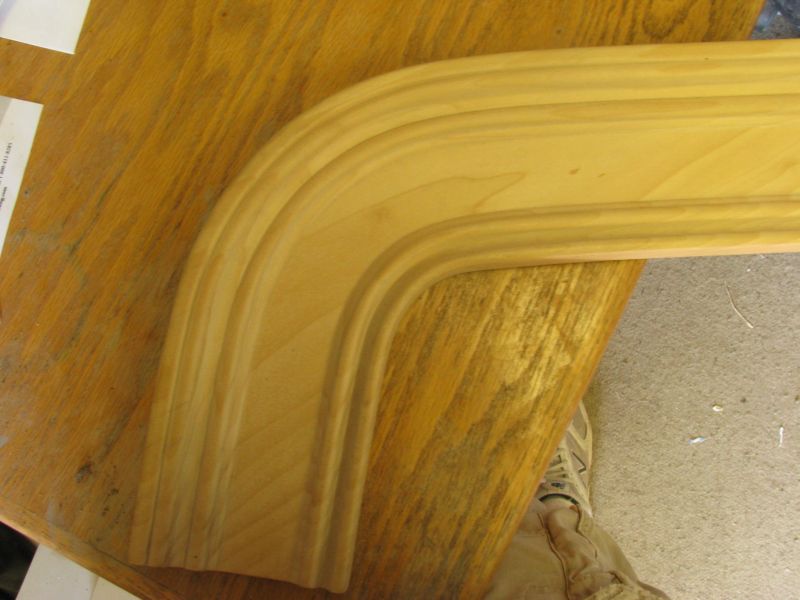
Click here for higher quality, full size image
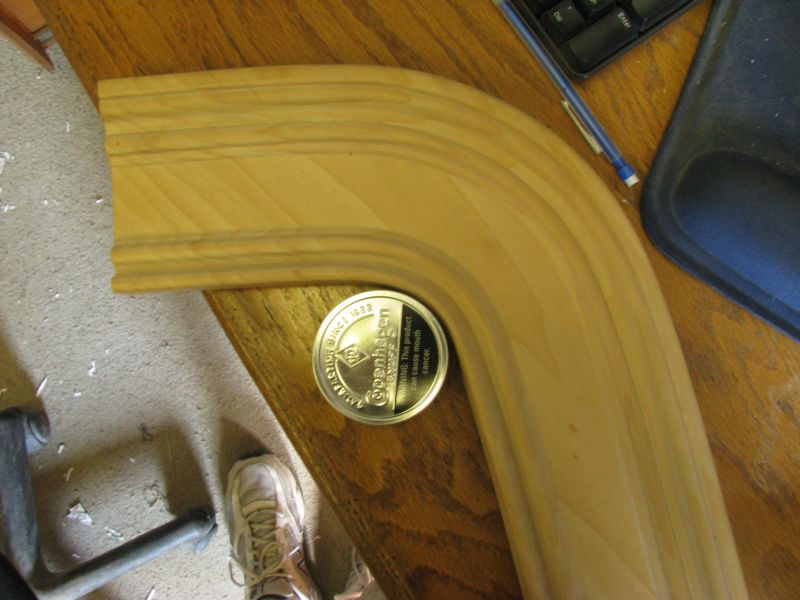
Click here for higher quality, full size image
From contributor D:
Almost looks like one of those 2-3 radii instead of true ellipse, but we get those too. For the curious others on here, that was exactly the kind of bend I had so much trouble with when I first started. An old timer was showing me how to pin and I finally got that part right - I thought. He eyed it then held up a tape, saying "That looks too big - yep. Sixteen too big. See?" "I set the guide up exactly, though, like you said." "Blade was walking, you weren't doing it right." I hung my head low and shoved the piece off in the trash bin. "What are you doing? That's good stock - here, fix it." He then did a little magic trick, holding the piece up in front of him and traced a perfect arc all the way around the outer edge a perfect sixteenth from the edge. I didn't know, because I couldn't see his middle finger behind the edge of the casing was a guide. I just thought Holy Smokes these guys have steady hands, and strived harder to do the best I could. Years later I was doing that same sleight of hand trick on newbies in here myself.
From contributor A:
A pic of a ceiling (complicated) with almost 400 curved parts that we did last summer.
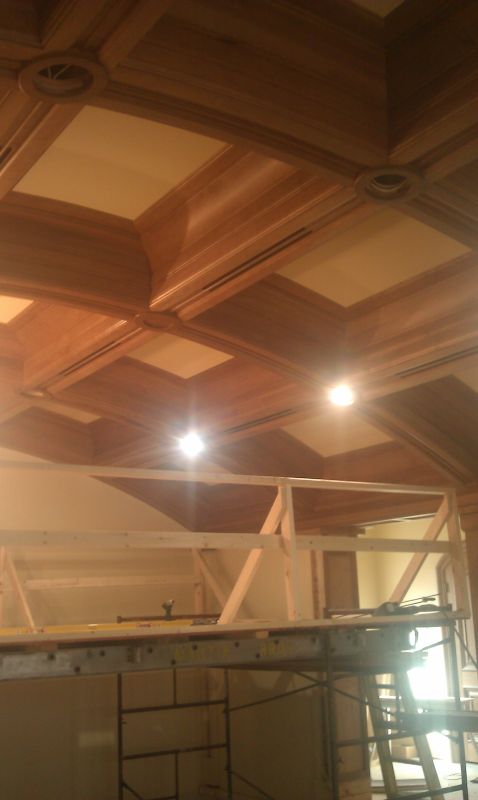
Click here for higher quality, full size image
From contributor L:
There is more than one way to skin that cat! We've got a Stegherr arched molding shaper. Works pretty well (after some experience). It traces whatever shape you put in. That includes S curves, true ellipses, full circles, etc. Cuts to full depth in one pass. US Concepts makes machines based on the same principle. Radius crowns are made on a tilt shaper. Really odd shapes on a CNC router.
From contributor A:
The combinations and processes that companies use to machine curved mouldings is many for sure. While machine (A) fits the needs of company (A) it might not fit the requirements of company (B), and machine (B) may or may not fit the needs of company (A) and vice versa. It all boils down to personal preference and if the part you want profiled will fit through it.
From contributor N:
Let me put in a plug for Mikron. We just finished a large job with Tudor arch casings - straight to small radius to large radius. The mold was 2 5/8 x 5 1/2 with 1 5/8" deep profile in quartered white oak. We tilted the head and took it in 3 passes. We've run true ellipses, closed and open, with good results. It takes a while, but not long, to learn how much pressure to use on the rollers. I think the US Concepts machine is heavier and has a better feed system no doubt, but for the money the Mikron is great.
From contributor L:
As usual the trick is to balance costs. Loaded labor costs, opportunity costs, capital utilization. For a shop doing only occasional curved moldings the best bet is probably subbing them out. The cheapest machine investment is probably a trammeled router and scratch stock. As the frequency increases a cheap machine may pay but the trade is almost always labor costs, sometimes also material costs, in mis-machined parts or carrier boards, set up time and sanding time, customer dissatisfaction with miss match to the straight molding, etc.
There is no sure way to judge all these variables. For one, they vary over time. I'm a bit of a gambler at heart and have gone for the opportunity gained rationalization more often than not. I've lost some of those bets too.
From contributor Z:
I own a WH, Mikron - all have been used for radius work. The beauty of the WH over anything else is the small cutting circle which really cuts down on the distortion of profiles in tight arcs. For everything else we use the Mikron. As far as jigs on the WH we use an old Bonyman jig and have actually modified it to work on the Mikron also. Works great.
From contributor D:
Boneyman jig? Just curious how that performs. I searched a bit and see it uses pneumatic cylinders. I imagine it would take a bit of dialing in to get a good part, then you could run them hands off. For one offs, seems you'd be better off going manual.
From contributor Z:
Nice little add on for the WH Moulder. Uses two switched pneumatic cylinders with bearings up against two fixed bearings. Basically mount your material to 3/4" template with a lead in and out on your template. As soon as the material grabs, you flip the air switch and it presses against the template. Still takes a little feel to guide real sharp radii through, but the constant air pressure does a good job guiding the part. I know the original designer has passed away, and I believe the family was still making them but they may be gone now.
From Gary Katz, forum technical advisor:
Okay! I want to see how this is done and I want to film it so other people can see, too. I don't intend to create a full-length video, and I doubt if anyone would be giving away secrets or techniques that might jeopardize their business. And on a selfish level, I have a Woodmaster and can't imagine how this is done. I'd love to see it. Can we make a date in NC? I'd only bother you and your shop for about an hour. Promise!
From contributor D:
You can call the owner here and see what he says. I just run the door department. But if you want to know what I think - just go get yourself a W&H or a Fox copy and try it. Like many on here have said, most radii can be learned fairly easily. You can practice the tighter bends on accumulated scrap - after all, the parts are small.
From contributor A:
After 14 years of abuse I traded my 645 for a new 652. I am loving the router attachment and also loving the 8" (optional) width capacity of this machine.
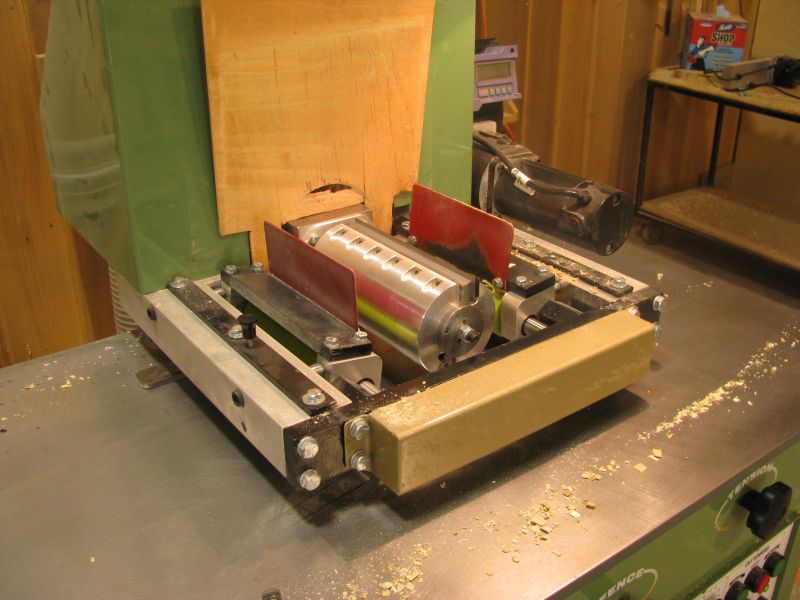
Click here for higher quality, full size image