Question
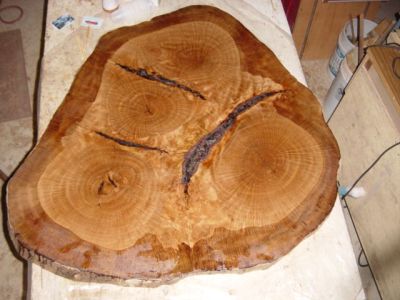
I have a slab cut from the base of a large oak tree, about 4" thick and about 4' in diameter, that I'd like to make a rough table out of. Nothing fancy, really, but I would like to preserve the color of the wood.
I really don't know the first thing about this kind of woodworking and was hoping someone could give me a list of general steps I need to take to make this lumber suitable for use. Is kiln drying necessary? What do I need to treat the wood with to preserve its color and prevent rotting? I will probably use it outdoors, so if it takes a while to dry, that's no problem.
Forum Responses
(Sawing and Drying Forum)
From contributor O:
The first thing you should know is that it will split when it dries. I have overcome this by sawing the slab in half, then rejoining the halves after they have completed drying. The edges will have to be jointed to make them straight. It should dry relatively fast through the end grain. As for the finish, I have never seen any wood exposed to the weather that lasted long. If it is dried inside away from the sun and rain, the color should stay.
A Finish for Outdoor Furniture
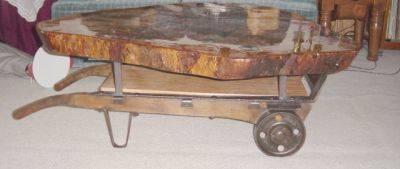
I slabbed it 3 1/2" thick with my chainsaw (Stihl 084 with 52" bar on a Logosol mill) and put it on my workbench, attached a fence board on each side of it that just cleared the highest protrusion of the slab, laid two 3/4" x 8" pieces of plywood across the fence boards so that they were a couple of inches apart. I then set my router up with a 1 1/8" flat bottom bit with the depth set to take off the highest 1/8th of the slab by sliding the router along the crack between the two pieces of plywood. Lower the bit 1/8" more and repeat - keep repeating until the bit has flattened the whole slab. Turn the slab and repeat the process. I then sanded to 220 grit, wiped with denatured alcohol to dry so the epoxy would adhere better and coated with 3 coats of Mas Epoxy. I was told I had a better chance of the Mas epoxy not clouding from the moisture in the wood. I found an old feed store dolly and made it into a table base. It has been in my living room since June of 2004. It has not cracked a bit. When the light is just right, I can see what appears to be millions of tiny crinkles in the epoxy, which I take to be from the slab shrinking. I cannot feel them nor see them without the right light angle.

Slab on my shop bench with 2 coats epoxy - be sure to put at least a 4 mil sheet of plastic on your bench under the slab before epoxying or you will have a new top for your bench. The cloudy area at the bottom is due to light reflection. I stuffed more bark into the voids in the bark inclusions before filling with epoxy. I also taped the underside of all cracks/holes that might allow epoxy to run through - and a lot did.