Installing Rollout Shelves
Keeping rollouts clear of the hinges. March 14, 2004
Question
I am looking for ideas on installing roll out shelves and drawers. I build face frame cabinets and have a problem with the roll outs hitting the concealed hinge or the edge of the door. There is not enough clearance. How do you deal with this and make it look nice?
Forum Responses
(Cabinetmaking Forum)
From contributor J:
Place the hinge between the drawer pull outs.
From contributor S:
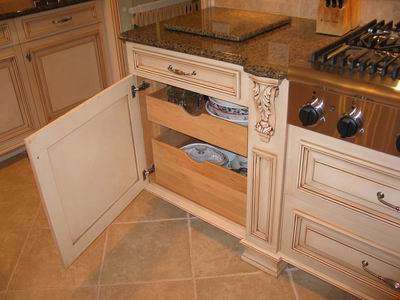
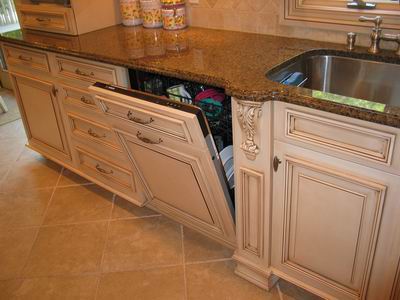
We build custom European, face frame flush inset, and beaded flush inset cabinetry. We use two different types of hinges on almost all of these. For the European concealed hinges (Grass 3000 series), we use one hinge type and three different plates to do full overlay, half overlay, and inset. On the face frame and beaded face frame, we use the 3175 Amerock hinges. The maximum thickness of European combination hinge and plate is 1-1/2". We build our framed cabinets with sides flush to interior edge. The clearance for butt hinges is 1" when door is open. We make all our blockouts for rollouts 1-3/4" x 3". This gives you 1/4" clearance to thickest hinge combo. For interiors we use pre-finished maple ply, so the rollout blocks are all solid maple. We make this stuff up in large batches and rack it. When we need it, we just cut to size. It's nice having one standard size for all three types of cabinet construction. It makes laying out a lot easier and you don't have to worry about where the hinges are. This works for side mount full extensions, or under mount full extensions. This shot is a flush inset face frame with Euro hinges and under mount slides.
From contributor J:
I missed the second part of your post. You have to "block" out your slides so that the drawer clears the door edge when the door is in its maximum intrusive position.
From contributor S:
This is Euro with sidemount slides. You need to figure what the maximum clearance is needed for your hinge combinations, then come up with one standard size, whatever it may be for you. No more story boards or hinging door in wrong spot. I have also seen those plastic extension pieces, not sure who makes them. They just seem cheesy and weak looking, never used them though.
From the original questioner:
Thanks for the advice, and nice cabinets. I have a few more questions. I use a cage to mount my runners to, then I screw the front of the runner to the face frame. Do you mount the runner straight to the block outs? Are they hard to adjust?
From contributor H:
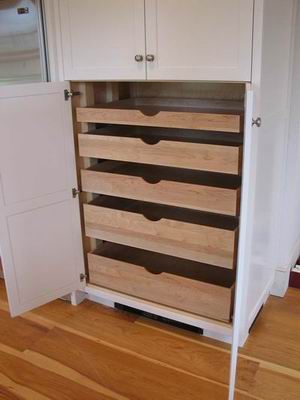
If you have a 32mm line borer, you can line bore your vertical blocks. Then all of your pull outs are fully adjustable. Use Euro screws, as all the slides now have holes for them. I tried this last week on a tall pantry, and it works very well. Also, the plastic units work very well, look funky, but a customer can change a pull out without any tools. They're 10 bucks a set (4 pieces) and I believe they are called Tenn Tex.
From contributor B:
I use the white plastic pilasters from Hardware Resources. My face frames are flush with cab interior and the 1" works for most hinges except 170's. Go 1 1/4" for those. Blum 230E or Metabox work well with the pilasters and give your slide-outs 23mm increment adjustment.
But, on higher end stuff with plywood interiors, I use the wood pilasters. Like contributor S's method, only bought "ready to install." Cost is about $14 per cabinet for 4 pilasters and 8 mounting pins (that attach to the slides).
From contributor R:
Here is a picture of roll outs with the Blum spacers blocks. If you line drill 37 mm back you can use system holes to make the units adjustable. The Blum spacers work very well and are simple to install.
I used to make rollouts like contributor S does, but it does not work well with melamine. Contributor S, do you have a better detailed picture of the toe kick molding at the base near the cooktop?

From contributor M:
We had the exact same problem. We use the 860 two piece teck hinge from Grass with the 6610 slides from Grass. The corner of the door will rub the slide. We simply went to a 3/4" base plate instead of the 1/2". Problem solved.
From contributor S:
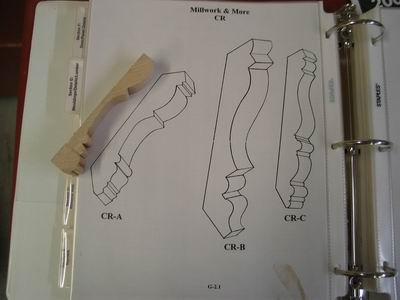
It's a two-piece base detail. The bottom section is the center of a very common crown. We made this but you can buy it. On side panels and around columns we brought both pieces to front. In toekick areas we set bottom piece back. Detail is shown upside down here.
From contributor S:
Hopefully this one is clearer.
From contributor T:
I use the removable runner 3/4" panel on the "w" shaped wire mortised in the top and bottom of the panel (I don't remember what the wire is called). I set the panel 1-1/2" away from the hinge. (This way you don't have to open the door all the way to clear, which is how most people open interior drawers.) Then I attach the runners to the panel. I use a stop screw to keep the panel from coming out. I also like to block out the blind space behind the hinge plate with an "L" shaped filler so you can't see or junk doesn't get into the space. The builders don't like to do that part because it takes a few more minutes, but it looks a lot better in my opinion.
From contributor R:
Contributor S, thanks - looks good! I did notice that it looks like a piece of molding is missing next to the corbels on the left at the bottom or is that a darker color? I also do a lot of corbels in my work. Where do you get yours from?
From contributor S:
Unfortunately, when door of dishwasher was fully opened, the trim wouldn't clear on bottom, so we couldn't put it on (not happy about that).
From contributor S:
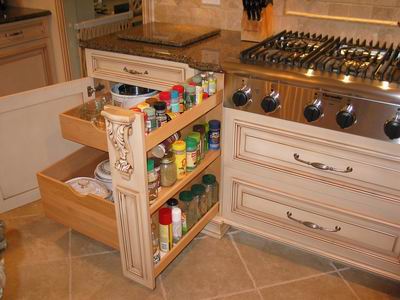
The corbels are from Enkeboll. We hollowed out an area on the back of them and used them as pulls on either side of cooktop. There are pullout spice racks there.
From contributor A:
Looks great! I did a pair like that, without the corbels, using kv8400 for slides. What did you use? Thanks for the pics.
From contributor D:
Contributor S, your workmanship and construction detail, along with the apparent care and expertise of finishing and installation, sets your work above and apart from most I have seen.
I'm particularly impressed that this appears to be (generally) frameless construction, which I believe goes a long way to help dispel some of the myths that this construction method is inferior to framed cabinetry.
From contributor W:
Beautiful job. I love your finish. Do you do it? If so, what products are you using? And do you do your own doors? They are very nice.
From contributor S:
The slides are Accuride 3832 24" 3 slides mounted on back side, one top, one bottom, one middle. The third one in middle is needed so the unit doesn't deflect when fully extended. We do everything in-house with the exception of carvings and drawers/rollouts from CCF in PA. Finish is Chemcraft, one coat plastiprimer scuff, then another coat plastiprimer (no scuff), glaze is homemade using Sherwin Williams concentrates. The topcoat is Danspeed Elite.
From contributor W:
What kind of topcoat is Chemcraft? CV or pre-cat? Was it SW Sherwood wiping stain concentrates you used or their glazes? What do you use to spray with?
From contributor G:
If you build frameless, lose the hinges, and mount the door to the bottom drawer. Saves the dollars on hinges. We have done hundreds without failure. Use Accuride 4034 glide at bottom, 3834's for other drawers. Typical sizing is 8" at bottom, and 2 6" drawers with scoops. Can be modified to have 4" scoops above to provide for tall pot storage. I have the drawer glide locations drilled into a sheet of plexiglass that I set over the cabinet side, and drill the glide holes with a vix bit. Very quick. Basic drawers are 1/2" plywood, but we have done the same with dovetailed boxes and undermount slides. Use Blum's 125lb. capacity undermount at the bottom drawer for these.
From contributor S:
Chemcraft is a post cat finish that is bulletproof and has UV inhibitors added to it.
From contributor K:
I use the Bainbridge white spacer blocks from MacMurray Pacific hardware in CA. The 1" blocks work for flush partitions and the 1.625" blocks work for 5/8-3/4" face frame overlapping partition. The pullouts clear the hinge by about 3/8". They are strong and easy to mount and work well with KV, Dynaslide full extension slides. I like these because I don't have to pre-finish any wood or melamine pilasters. I reach in my bin, grab a few, screw them in and they're done. My customers are happy.
From contributor I:
On a face frame cabinet, it appears as though an additional 2 1/2 inches needs to be taken on each side of the pullout to clear the Euro hinges. (In other words, the drawer/shelf needs to be a total of 5 inches narrower than the face frame opening to clear the hinges.) You can take a piece of 3/4 inch stock and screw or nail it against the back side of the face frame so that it protrudes 2 1/2 inches into the face frame opening on each side. Then you can butt the 1 by 2's that you have your slide screwed to, right into these 3/4 inch pieces just like you would have done into the face frame. Giving up 5 inches of total drawer/shelf width seems like a lot, though.
From contributor Y:
Use Tenn-Tex Quik Tray rollout bracket. Gives adjustability and solves build out problem.