Joining cabinets - at a 45 degree angle
Other Versions
Spanish
Cabinetmakers offer illustrated tips on joining a line of cabinetry which incorporates a 45-degree-angled unit. April 3, 2002
Question
There are occasions when I have to install cabinets at a 45 degree angle. In these situations, the shop typically makes the cabinets with extended face frames that have 22-1/2 degree bevels (sketch below). They've always been a pain to assemble in the field, since I can't clamp together and screw from the sides of the face frames.
I've found it very difficult (impossible?) to draw the cabinets together by clamping, and end up rigging some blocking behind the face frame and pulling the cabinets together by running screws from the inside of the cabinet side into the blocking. Has anyone come up with a clever way to make this situation less tedious?
Forum Responses
From contributor B:
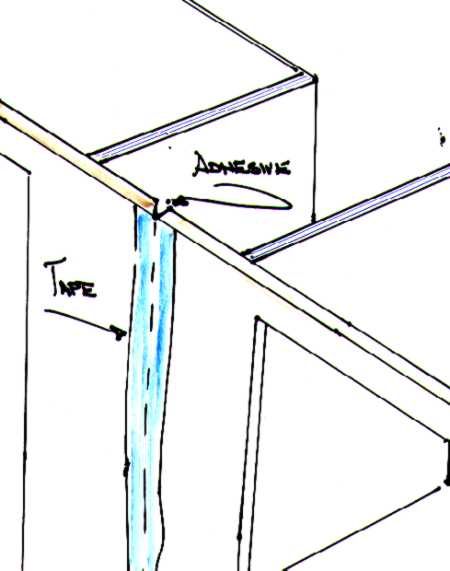
Sure, but it is too easy. Stand your cabinets flat, with the miter open at the back. Tape the long point of the miters together with masking tape, full length. Apply glue to the length of the open joint (I use Excel Urethane Express, which sets up in 10 minutes), then fold cabinets into position and wait for the glue to set up. The problem with this approach is that it doesn't involve a lot of work or fussing around. You can back the joint up with glue blocks if you think it is necessary, but I usually don't.
From the original questioner:
That's interesting. I've seen them do what you mention in the shop, but never thought about trying it in the field. Couple of questions:
Do you use a typical white/carpenter's glue (alphatic resin)?
Do you ever have any trouble getting the tape off?
From contributor B:
Carpenters glue will work but takes too long to cure. I change tape as per the requirements - pre-finished cabinets I use blue tape and un-finished parts I use the cheapest tape, because it sticks too good for finished parts but you need it for un-finished ones. Also for short miters like toe kick parts, I use hot glue. Try it - the wood will fail before the joint.
From the original questioner:
That makes sense - I've used the blue tape for pre-finished products.
Figured I'd toss in two sketches of how I see it happening - let me know if there's something incorrect.

From contributor B:
You got it!
Indeed it is easy. We call this miter folding in our shop. This is how we put returns on panels and such. Use clear packing tape, as you can see exactly how the joint goes together and the tape is very strong, but won't pull up cured finish. Fold away!
From contributor B:
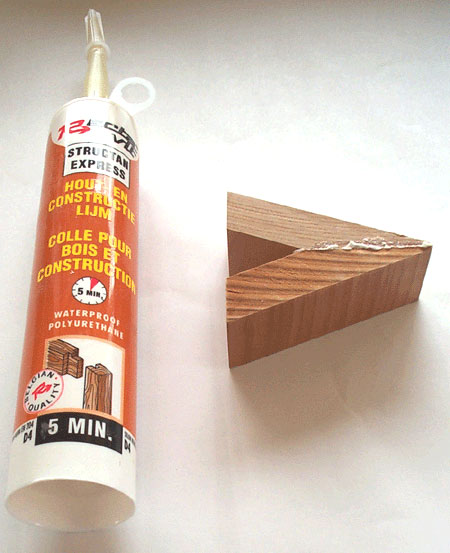
Here's a photo of a cut off of a "folded miter".
From contributor B:
Excel Xpress adhesive does not have a very long shelf life. Only purchase what you can use in about 9 months. I split a box with other shops. It does NOT come out of clothes when you get it on you and wears off fingers and does not wash off. This glue is absolutely fabulous, but not cheap. This glue has a reasonable open time - about a minute or less with a fast set time of about 10 to 15 minutes. It does not have that "fast tack" that yellow glues have and things can squirm a bit, so clamps are necessary.
From the original questioner:
The mitre with the tape is definitely the way to go. In fact, it almost seems too easy. Being able to run a bead of fast setting glue using a standard caulk gun, and folding the cabinet into position and letting it sit for a while, changes the rules. At this point, I can't imagine doing it any other way.
The comments below were added after this Forum discussion was archived as a Knowledge Base article (add your comment).
Comment from contributor D:
Try duct tape when folding miters in the shop. Slightly overlap the long points when taping. When you fold, the tape stretches and pulls the miter tight. I lock the joint with 23 gauge headless pins, remove the tape, remove excess glue and sand the joint while the glue is wet. Then I have a perfect joint!