Question
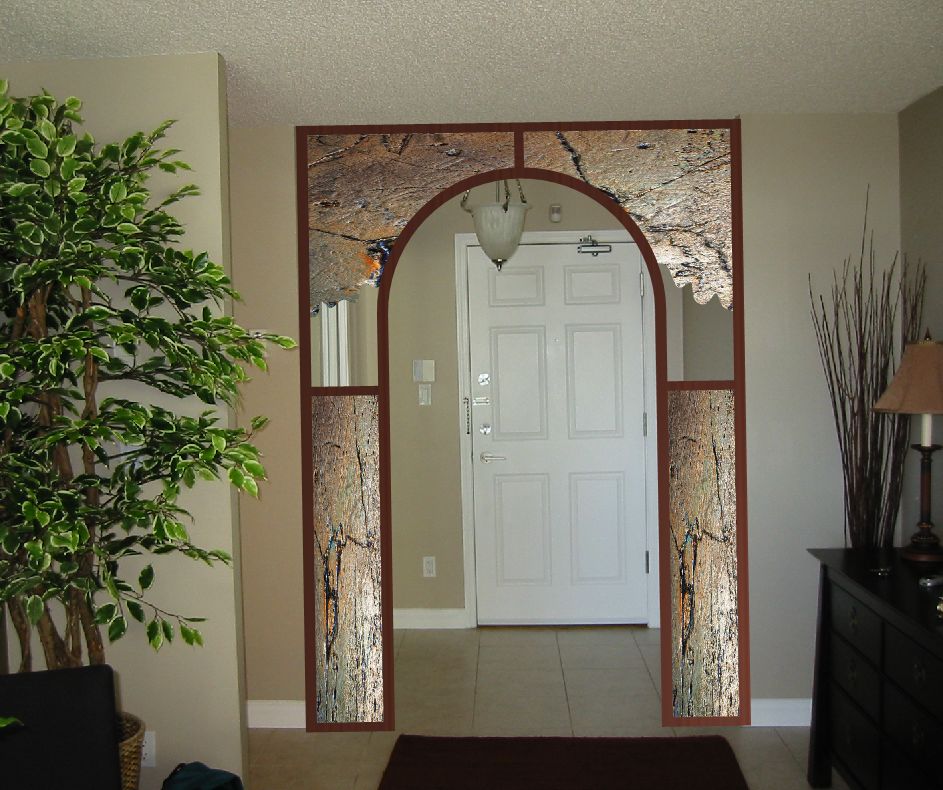
I'm picking up on a project from last fall that was put on hold. It is an archway entryway that has a 36" arch. I've decided on alder, and have resawn and planed the laminations - 10 (with a few spares) at 1/8" thick for a total thickness of 1.25".
Two questions:
1) I've always believed that a hard glue such as plastic resin/resorcinol would be the best, but I'm having a very hard time finding it locally, and I wanted to do the glue up tomorrow. Epoxy would be my next choice, but the finished arch will be run through the tablesaw, or planer, or both - depending on how evenly it comes out of the clamps. I'm quite concerned that the epoxy glue lines will tear up my planer blades. The blades are carbide, if that makes a difference. Is this a real concern? Or is there so little of the epoxy at that point that it is not a problem? I've also read a post or two that used yellow PVA, but since this arch is largely not fastened, I'm concerned about creep.
2) Based on advice from last fall, I will be doing the layout in a vacuum bag, bent around a form. The slats will go into the bag, and then the whole thing bent around the form. I saw a picture that someone posted showing only a very few clamps (3 in fact) that were used to pull the thing into shape, and then the vacuum bag does its thing. Do you pull the thing into shape before turning on the vacuum, or after? Or a little of both � i.e. suck out some air, bend a little, suck out some more air, bend some more, etc. This is my first vacuum bag lamination, and I don't want to mess it up. By the way, each slat is 1/8" thick by 3.75" wide by 68" long.
Forum Responses
(Architectural Woodworking Forum)
From contributor A:
We use a white PVA exterior glue. I wouldn't do all of the laminations as lumber. We always use bending ply for the majority of the header and use only enough lumber to cover the reveal of the casing. A little spring back isn't a problem since a properly set jamb will be shimmed and nailed solidly. As long as the legs of the jamb are set plumb the arch will be correct. You shouldn't need any clamps to pull the header to the form. Sometimes we will wrap a piece of banding strap or even twine to pull it close and then let the vacuum do the rest. As far as glue affecting blades, I would join one edge on the jointer with the fence set to an area that is never used (all the way in or all the way out) and then saw to size on the table saw.
As you can see, it really needs to be all plies of the actual wood. No bendy, unless I was to veneer the resultant edge, which I don't think is the way to go. Again, this is extremely sensitive to creep. The glass panels won't tolerate much compression. Because of the required focus on the glass panels, I need to minimize the amount of wood, thus just the three braces.
To contributor A: 6" jointer, there is no unused area. It was a nightmare indeed - my last bent lamination was 8 plys and 2" wide and not a full semi-circle. I did it all with clamps and was a bit of handful, but manageable. 10 plys at 4" wide and full semi-circle is a little more daunting.
To contributor B: Why thickener? I've used a fair bit of epoxy, both thickened and straight - and only thickened when I was concerned about gap filling. In this case, I'd be a little nervous about thickening the epoxy because of the potential increased thickness of the glue line. By the way, I'm not too worried about a little springback. I've allowed for it by overbending - my arch form is more than a semi-circle, more like 5/8 of a circle. So if there is some springback, I should be ok. If not, I've got room to trim back to where the ends of the arch will be tangential to the legs that will be attached. The reason I'm thinking of a hard glue is because of creep.
To contributor D(and all other PVA officinados): Do you not have problems with creep � i.e. the arch relaxing over time? Or are your arches subsequently installed in an environment where they are supported (e.g. by framing) which prevents the creep? Also what about open time? I'm having some difficulty envisioning being able to get all these plys covered with adhesive, stuck in the bag, lined up as best as one can, then vacuum applied and bent around the form before the glue sets up. The long open time of plastic resin or epoxy looks very attractive from this perspective.
To contributor E: Excellent idea, and already in my plan. I usually do a dry run for any glue-up or joinery that I'm not familiar with. In fact, for this project I sliced up a 2 x 4 and went through the motions of aligning and clamping. I will probably glue it up using the vacuum bag to round out the dry run experience, then on to the actual plys.
As far as glue type, I think you can use anything you like that has an open time you are able to work within. I use regular old aliphatic resin (yellow woodworkers glue) with satisfactory results. No creeping, no excessive spring back.
As to what to do about cleaning off the excess glue after the laminating is finished, naturally you need to make the part oversized across the grain so it can be trimmed to net size after glue up. Make some pencil lines at a couple inches in from the edge of the outer lamination on the concave face. Apply some pieces of double sided tape to that area and then align a 1/8" thick by three inches wide scrap laminate with straight edges on that pencil line and stuck to the tape. Now you can run the glued up curved piece through the saw with the temporary straight edge against the fence and remove the glue while straightening one edge of the curved part. Now remove the temporary straight edge and run the glueless and straight edge of the part against the face while ripping the curved part parallel and removing the glue mess from the second edge.
If you have ripped the part 1/16" over net width you can use the planer to dress both edges by planing 1/32" off of each edge. The small amount of glue you plane will have little effect on the planer knives.
To contributor J: I�m not sure it's entirely necessary to vacuum bag. I've done it before with just clamps. But on occasion the glue line wasn't as tight as it could be in certain places. I believe that's a function not only of the clamps (assuming you have enough on), but the wood. Depending on the grain of the wood, it may not bend into a fair arc (you discover this real quick using battens to loft full size hull shapes). So there can be the odd pucker in the glue line(s). I believe the vacuum bag provides the ultimate in equal pressure over the entire surface, and thus is the best way to assure completely even and powerful clamping pressure. This project is as much a learning experience as anything, and I'm hoping to be able to incorporate the process into my tool bag of techniques.
To contributor K: Thanks for the explanation. In fact, that has always been the way I've used it, but as I said generally where I had some potential gap filling concerns. I figured (perhaps incorrectly) that the totally flat and smooth faces of these laminations wouldn't require any thickening. I'd guess I'd better re-think that and use some thickener.
I also got some skewing, but that may be solvable. It's a pain trying to work through a 30 mil bag, where you can't see exactly what your doing and the work is being moved around by the seams and wrinkles in the bag. On a positive note, the plies were pulled absolutely tightly together - all along the entire arch - just perfect.
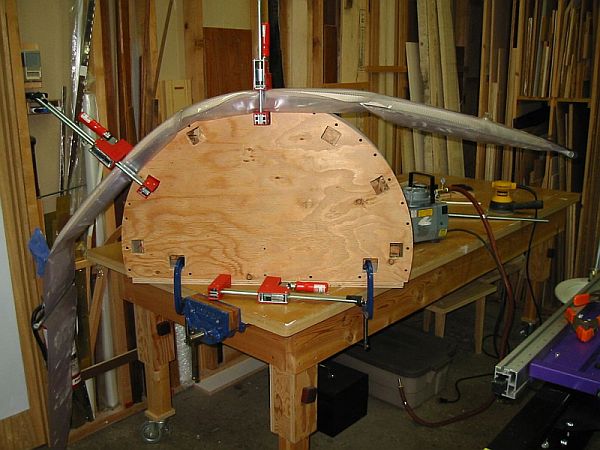
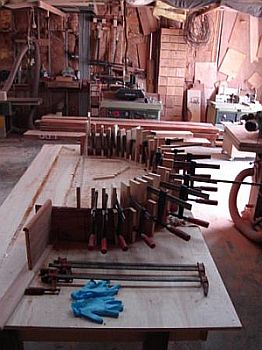
The attached picture was sent to me by a forum member last fall in response to my original posting on this project. What an excellent, clean looking setup. That's what I was aiming for.

Today we started on the following.
Eighteen 11/16 x 5-3/4 cherry extension jambs
Three 3/4 x 7-1/4 poplar jambs
Two 11/16 x 5-3/4 poplar extension jambs
One 3/4 x 1-3/4 extension jamb
Two 1-1/16 x 3-1/2 pop casings
One 1-1/16 x 5-1/4 mahogany casing
These will easily be finished by Friday, along with a lot of regular bandsawn casings. It takes a lot of C-clamps. A 36'' ID alder jamb can go from order to being wrapped in plastic wrap for shipping in as little as 3 hours.
So I went with clamps, using a 3.5" wide piece of 1/8" thick flat bar as a caul. This worked beautifully. The steel strap evened out the clamping pressure very well. I used epoxy, so had the working time. The final word won't be spoken until I pop the clamps and see how it looks, but I have to go out of town for several days and it will have to wait until I return. But as I said, just looking at it the form it looks very good. I posted the above to help anyone who hasn't done this yet, and also acknowledge the help of all of you who posted suggestions.
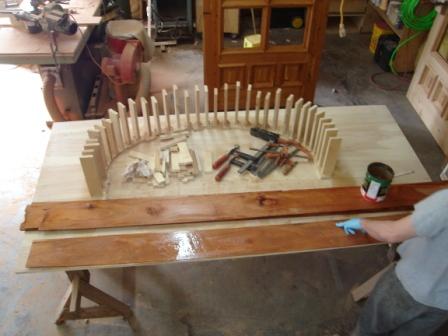

I need to build a bent wood table skirt and plan to use this method with a few modifications. I plan to use a cut form on the inside with a metal band to even out arch. I then plan to use a metal band on the outside of the arc with a hose between the outside laminate and the outside metal band. I will use a few clamps to hold things in the approximate position while I inflate the hose.
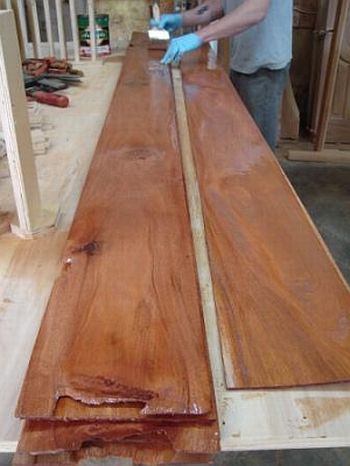
For the recurve bow we would put masking tape on the outside face of the last laminate and layout the cut profile while the piece was flat. I think this would work for laying out a straight edge as well. For a narrow project, say up to 3 inches, I think a single 2-1/2" hose would work just fine. For those that are doing a wider project I could see using more than one hose and working from the middle to the outside in applying pressure to cause the glue to work out to the edge and reduce the possibility of voids in the laminate. I think that this method might be a bit faster in clamp time because the air compressor does the work for you and can deliver a large amount of air quickly. It also provides an even amount of pressure throughout the arch.
To contributor B: Do you get any movement on the ends of your form pieces? From what I see, I would think that you would get some bulging out a bit at the outer (unsupported edge of the form) from the spring-back of the wood. I am also surprised that there is no talk of steaming the wood and bending it as a whole. What are your experiences with steaming and would it have an application here?
Comment from contributor M:
We make a form similar to contributor B. Instead of wrapping the form with plastic wrap we stack the glued laminations with the plastic wrap. This is cleaner and the wrap applies some even pressure everywhere on the glue-up. It does take longer to dry however. We adjust the thickness of the laminations according to the severity of the bend rather than being wedded to the 1/8" size.