Mahogany Bar Top Advice
Thoughts on how to build and finish a bar top made of three-inch-thick Mahogany. November 30, 2009
Question
I'm currently looking at a job to replace a bartop with hardwood. The approximate length is two 5' lengths at a 30 degree angle. The bar sits on a half wall, so support will be limited to the wall top and corbels. The ideal bar width is approximately 20", which I could do with a single piece of 3" thick Brazilian mahogany. My concern is warping over time. I'd hate to have to replace the top in a few years because I didn't prep (or cut) the wood properly. Any tips on how to best prep the wood? One suggestion I got was to rip the back side every 6" or so to release wood tension then fill with epoxy and finish both sides. Also, any recommendations on the type finish?
Forum Responses
(Architectural Woodworking Forum)
From contributor F:
Your biggest issue is going to be to allow that large slab of mahogany to acclimate to its new environment before finishing and installing it. If you don't allow that, when it dries out (or picks up moisture), it is going to cup. You will definitely need to finish both sides of the wood before installing it. If not, the unfinished side will allow moisture to escape or get in, once again causing problems.
From contributor A:
The relief method is like making an unbalanced panel to start with. You'll have no idea where or how much it will move. The saw kerf/epoxy fill method is often used as a last ditch attempt to fix a counter top after it moves. Make sure it is dead flat before you install it. Try to give it approximately the same amount of finish on both sides. A quick coat of shellac on the backside is not the same as a poured epoxy topcoat. Another good tip is to glue up the counter, let it sit for a week, and then run it through a wide belt sander to flatten it.
From contributor J:
Ten years ago I built a Honduras mahogany dining table which is 2"x30"x8' in length. The one piece top was well acclimated to the room, flat, and floats on the base. I routed out a 2"x20"x1/4" slot on either end, inserted a piece of steel, and screwed to the top, the holes of which are bigger than the screws. The top has not warped, but moves slightly with seasonal changes in the house. I have included and image of the steel underneath and a section of the top. Hope this helps.
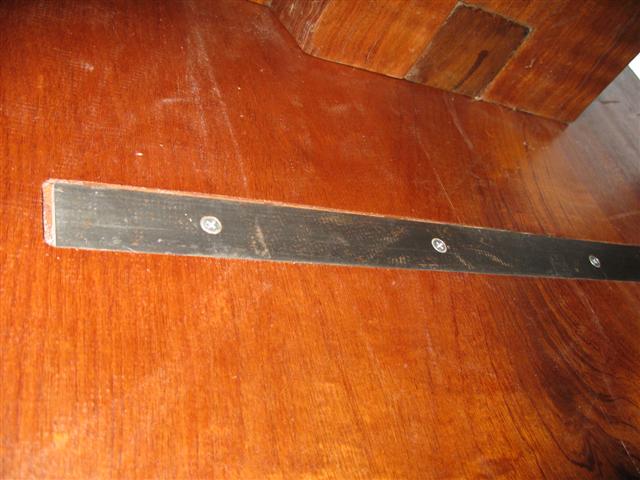
Click here for higher quality, full size image
Here is a section of the top.
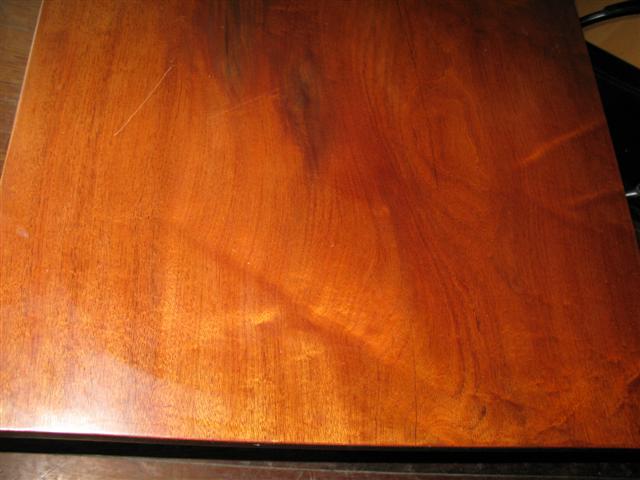
Click here for higher quality, full size image
From contributor M:
If you don't mind ripping that piece of mahogany, you can save yourself a potential headache by ripping it into three equal sections (7" wide each). After ripping, lay the pieces side by side exactly as they sat before it was ripped, and then flip the middle piece over to "reverse" the grain. Glue it up like this, and I personally would use dowels, although they aren't totally necessary. Essentially this grain alternation helps balance the movement.
For finish, you have several options.
1. Bar top epoxy - hard as heck, thick, and glossy. Downside: mahogany will need more than one coat, most likely, to completely eliminate the "open grain" texture unless you use a grain filler. It takes a while to cure and you may get bubbles in the finish.
2. Two-part polyurethane (MLC "Eurobild" or ICA's product). Spray application, very durable, extremely chemical resistant. It�s expensive, but fairly easy to work with so long as you remember the 15-20 minute pot life. It also cures very quickly.
3. Regular oil-based poly - slow drying (eight hours plus) and tends to catch dust, but it�s inexpensive and very hard. You can pile several coats on top of each other very safely.
Personally I would use the 2-part poly simply b/c the time involved is much quicker than the epoxy and oil-based poly.
From contributor J:
That's a more traditional point of view of working the top, finishing it - and a good one. From a point of view of aesthetics, the client may not want to see the seams or reversed grain and want the feeling of the tree to be viewed and experienced by the customers or individual who is enjoying a drink at the bar. Then you may have to consider some different options, maybe a Nakishima type approach to the wood. Somehow we have to remember that wood grows on trees and is an organic, live, material. Good luck with your project.
From contributor W:
Determine which surface is to the outside of the tree and put it down. That way when the piece eventually warps it will have a crown on top rather than a cup. I've used this method for years in determining which face let show. A slight crown is not always that obvious.
From contributor A:
It is better to have camber. You can use a slotted fastening system (metal brackets, etc.) to pull the counter flat. Concave is concave.