Making Custom Curved Moulding for Arched Doors
Ideas for curved moulding fabrication, including nice photos of a couple of router-table jigs. February 18, 2011
Question
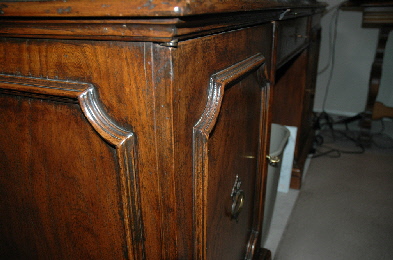
In the past when I've had a lot of doors that needed applied moulding I've just outsourced the moulding since I don't have a shaper. The results are always consistent and it saves me a ton of time. Over the next few months I�ll be working on an office that has twelve applied moulding doors that have a mild arch across the top (see picture below). I've racked my brain trying to figure out how I could do this on a router table and haven't come up with anything. Any ideas?
Click here for higher quality, full size image
Forum Responses
(Cabinetmaking Forum)
From contributor L:
You might look into a William and Hussey molder. I've made some pretty nice radius moldings, if the depth of the cut is not over 3/4. Out-sourcing radius moldings can get pretty expensive.
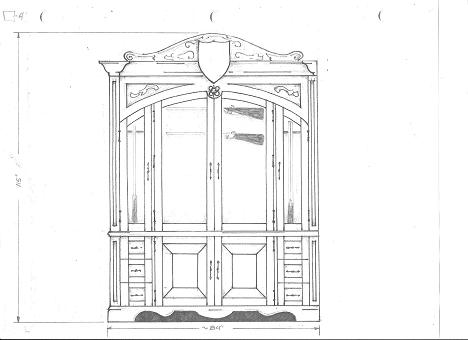
From contributor G:
I love my Williams and Hussy. If you have a CNC Vectric it has some new features coming in the next upgrade.

Click here for higher quality, full size image
From contributor U:
If this project will have the same radius consistently throughout the job, you could probably do this on a router table. What size is the moulding itself? We just finished installing an order that had a curved frame over the shutters panels that went into arch top shutters. I do not like ordering curved frames, it is hard to get the match I need and it is too expensive. Usually we only need 50' or less per order.
I finally figured out how to do mine on a shaper, but I believe it could have been done with a good heavy router mounted under a table. I used a router bit with a 1/2" shaft that had a roller bearing attached. I set it at the height I needed to match my profile to my straight frames. I then cut a curved fence using the same radius that I needed the frame to match. I cut this special fence or guide using my router mounted on a pivoting arm. I also made my moulding blanks the same way. I then attached the fence on my shaper table with c clamps. I then was able to pass the wood for my moulding against the shaping bit by sliding it around my curved fence. The results were excellent.
From the original questioner:
At this point buying a moulder would be my last option. I really don't have the room for one right now and I'd rather not go that route unless it was necessary.
Contributor U - I understand what you're saying about the curved fence. The problem I'm running into in my mind is after I've cut the profile on one side of the molding I would somehow have to keep it stable in order to cut the other side. There would be very little stock left for it to depend on for stability. Does that make sense?
From contributor R:
Williams and Hussey is a good choice for sure. The footprint is less than that of a shaper. The setup is easier than most shaper setups.
From contributor P:
Is the applied moulding just on the inside of the door frame? If so, and it's a small moulding, you can steam bend the curved pieces.
From contributor U:
It makes perfect sense that having to shape both sides makes this much more difficult. I was not thinking along that route as the mouldings we usually apply to shutters is one side shaped only. I do have a thought about how to do this, pretty much the same method.
If there is a profile (router) bit available that will make the moulding shape you need, and if it is available with a roller bearing, maybe the following would work.
First make a curved blank for shaping using a pivot arm and router, making two cuts with a straight bit. By repositioning the router you make the curved piece whatever width your moulding will need to be. By adjusting the radius, the curve should also be made to match your need.
Make this piece extra deep, say 1 1/4" or 1 1/2", whatever your wood stock and cutting bit will allow. Mount the router under a table with the bit exposed above the surface to the correct height. Then shape each side of the material. The extra depth on the material should allow you to have something to hold to making this a little safer and giving a little more control. After shaping both sides, turn on edge and run through the table saw or band saw removing the excess. Whenever we make something this way, we make twice the amount needed and cull the bad pieces. The actual doing doesn't take long, but the setup is very time consuming. A lot of "if�s", but maybe this can work for your project.
From the original questioner:
I think I can visualize what you're describing and that should work. I'm a long ways off from actually doing these doors/panels but I may play with this soon to see if it would work.
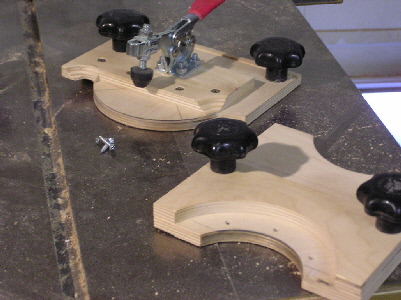
From contributor Z:
I'm not sure whether the molding you're cutting is all the same size or different sizes but we had a need to cut 36 pieces of very small curved molding hopefully without losing any body parts. We made up a couple jigs to use on the router tables and all came out well.
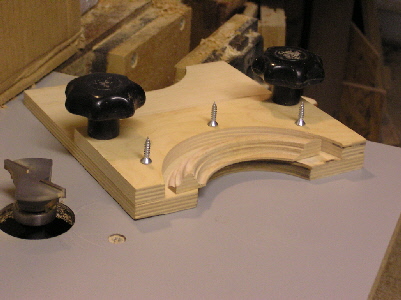
Here are the two jigs I was talking about.
From the original questioner:
The stuff I'm doing will not be the same size but I could make a variation of the jigs to make it work. I'm more interested in where you got that bottom bearing bit. Having something like that would solve half of my problem.
From contributor Z:
We had to match some existing molding on a desk so we had two custom router bits made (the molding was not symmetrical - different profile on each side of the molding) at a cost of $250 a pop and we just specified bottom bearing. That being said, I did one job where I needed a bottom bearing for a router bit that already had a top bearing. It was a CMT router bit and I was able to get a bottom bearing kit from CMT. It's really just the bearing and a little collar with a set screw, but it worked. I don't know if other mfg�s have that type of thing or not but I'd stick with the same mfg as I tried the CMT bottom bearing kit on a Freud bit and I had problems.