Mitering the Corner Joints of an MDF Box
Other Versions
Spanish
Advice on gluing and clamping a sharp, clean miter joint when building boxes with MDF. April 24, 2014
Question
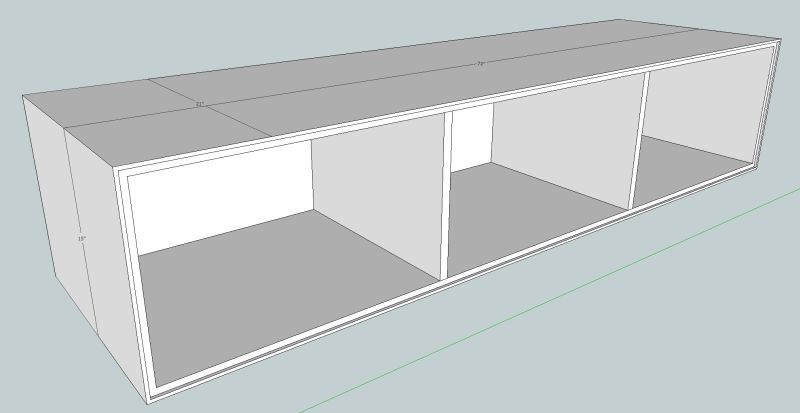
I am building two of these boxes (to be sprayed opaque color by my finisher). I made one using biscuits... Failed miserably using only packing tape and TB 2. Could throw a horse through the gaps. Tried clamping as I was losing the battle - miter clamps - no luck. I rough cut to 1" longer (square cut) then cut my miters at exactly 45. My suspicion is that I need to overcut the miters by .5 to 1 degree. At that point, wouldn't the miter be open inside? I am cutting on a brand new, professionally set up SCMI slider. The middle dividers get slid into case after assembly by means of biscuits and slots in the dividers. The back is 1/4" and is housed in a dado which also has to go in during assembly of the box.
Click here for higher quality, full size image
Forum Responses
(Cabinetmaking Forum)
From contributor N:
I just went through that this past month with a melamine box! Talk about frustrating, I yelled words I didn't even know existed. But I ended up throwing (literally) the biscuits in the garbage can and just gluing and taping it. I also put angle brackets on the inside as just the exterior was visible.
If it's getting finished after assembly, I would probably glue and tape again. But Lamello also had a fastener that fits in a biscuit type slot that looks like it would work really well too.
From contributor D:
Contributor N has it right - no biscuits, just miter fold. I have done this large and small with melamine, P-lam, plain MDF, plywood and like to make the miters tight, no over-miter, just fold slowly to let the glue squeeze into the substrate as much as possible. I suspect you just need to spend a little more time dialing in the joints or your MDF is a little warped, plays havoc with the miters. Once you get it right, no need to reinforce joint - it will be solid.
From the original questioner:
Thanks. So no 45.5 degree cut? I'll try it again tomorrow. At least it's only MDF.
From contributor J:
You are painting the cabinet, right? Use double refined MDF butt joint sand and fill. Once it is painted no one will know the difference.
From contributor M:
Use 10' MDF, and don't cut the joint all the way through: leave a skin. Reinforce with packing tape while it's flat open. Tape the third joint also with the box opened flat. Then add glue, and fold it up.
The gaps can come from clamping, as the MDF bows in the middle, and changes the miter angle. If you need to use bar clamps, then reinforce the boards longitudinally. Or they can come from a crap cut. Check the angle before you glue it up if you have any doubts. No matter how new the machine is, or who set it up, the operator still makes the cut.
From the original questioner:
I don't get the not cutting all the way through technique. CNC with a v groove bit is my guess. Don't have one. Thanks for the responses. I will try the butt joint instead I think. Clamps and glue feel better than glue and tape for such a large case. My fear was that even after sanding glued joints flush, they could show through paint. Guess I keep thinking high gloss as that was what my last 2 jobs have been.
From contributor N:
From my experience, butt joints in MDF always show through. I use packing tape that stretches really well without breaking. It gives lots of pressure to the joint for the glue. You really don't need to worry about clamping it the usual way, just load up the glue on both pieces because the MDF sucks it up before you know it.
And the v grooving method is by far the best, but you really do need a v grooving machine to do it well. And with the size of your box and the additional dados you need, I would stick with the miters.
From contributor V:
Paint (and veneer) over MDF butt joints will telegraph.
I don't think I could glue that big a box all at once. I would place one long side and two short sides inside down, tape them up (one piece of packing tape running the length of the seam), flip and glue. Maybe a temporary back on the front to pull and hold the sides up and, later, to support top. Set the fourth piece on top and pull the joints tight with long strips of packing tape. A temporary center cross strip laid across the backs, to bow the top while gluing/taping, might help.
From contributor L:
You can get nearly the same results as a miterfold machine gets by using a hand held router and straight edge. Put the tape on the back side where the joints will be first. Using a new vee bit, set the router to just shy of cutting all the way through. On large parts, you need to keep them from bowing during glue up. Do a test setup on a small box first. If you have more than one to do, use a stick or panel cut to space the straight edge so you get near perfect size.
Long ago I used that method. Now it's a CNC router.