Mounting a Power Feeder to the Shaper
Drilling and tapping the shaper table, rigging a stand-alone mount, and other fine points of setting up a power feeder for the shaper. August 15, 2006
Question
I just bought a feeder for my shaper and I have to drill four holes in the table that is cast iron, I believe. Is there a special bit that I need to drill through the cast iron? I know that cast is harder than regular steel. Also, I am putting a raised panel cutter on this shaper. I have several different sizes of bushings (rub collars I think they are called) - is there any particular manner that these are set up? This is the first time that I have put this shaper to use so I am new to the set up.
Forum Responses
(Cabinetmaking Forum)
From contributor A:
You should drill quite easily. Just start with a pilot hole. I don't use the rub collars for raised panel. If you have a split fence, just adjust the two sides so the piece moves across easily.
From contributor B:
Cast iron is easy to drill, as Bill said, start with a 1/8" pilot hole and then go up by 1/16" at a time until you are to the correct hole size. As for your rub collars (bearings) you should only use them when you are doing shapes other than straight line milling. Then it is best to use some sort of a template for the bearing to rub on. Remember to ALWAYS use a tapered starting pin, unless you make your template larger than your panel and it hits the bearing before any cutting starts.
For a standard panel make your fence with a 45� mitre on each inside end. Then adjust them as close as you can to the cutter. When you get to this point, mark things off so you can remove and replace the fences. Cut 3/16" off the bottom of the 2 fences. Glue and screw a solid board (hard maple or such) 3/16" in thickness and the same thickness of the fence to the bottom of the two fences. This is where the alignment needs to be accurate so the holes in the fence line up with the holes in the machine. You may have to cut out some of the solid wood to accommodate the arbor/spindle. This way you have a solid fence going across so your panel doesn't get stuck if things aren't perfect. This works best if you run the panel back side down.
From contributor C:
Center punch then 1/8" pilot hole then directly to finished size on cast iron tops, no need to step drill. Check under the top for ribs so you don't drill into them. Don't try to mount a feed on bolt-on extensions; they will crack from the flexing. Make a jig to locate the fences for the next time by using a piece of ply and a strip that drops into the miter gage slot. Use an add-on fence that allows the edge of the panel to ride all the way though without having a gap in the fences to snag it. Use a height gauge to set the spindle back to the same location. When I used to make doors I would use a back out cutter so I always had the same panel edge thickness even if the panels varied a little in thickness. Even though I have all the cutters and shapers I no longer make doors. It is better to spend the time on making other things and buy the doors.
From contributor D:
I still make a few doors, but for 25.00 each it's more profitable to buy them.
From contributor E:
Our machinist recommended drilling cast iron dry, in other words don't use any lube on the bit. It's actually pretty easy. The other responses are right on.
From contributor F:
Tool tops are mild steel. Since I like to move my shapers power feeder off to the table saw for a few special operations, I drilled and tapped both tables for fine threaded bolts. I like it better than reaching inside the cabinet to thread on nuts.
From contributor C:
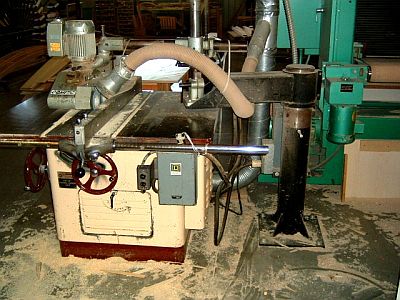
I had a post made by the local machine shop to support the feed without having to have it bolted to the table. This allows larger parts to be run on the saw with the feed still in place. Both the saw and the feeder post are bolted to the floor. The post is very stout and made with a collar below its arm so the arm can pivot while staying at the same height. It works well.
The comments below were added after this Forum discussion was archived as a Knowledge Base article (add your comment).
Comment from contributor G:
Whenever drilling any steel part to match another use transfer punches to transfer the exact center of the holes in the case of the feeder mount, onto the shaper. Transfer punches are available for $20-40 for a set. The transfer punch will make the mark and a center punch used on that mark will give a good divot for locating your drill bit. If you weren't aware transfer punches come as a set like drill bits and the outside diameters increase the same way. So you just clamp the feeder on, find the correct O.D., transfer punch for the hole in the feeder mount, lightly set the transfer punch and remove the feeder. Center punch the mark and start drilling, and the holes will now line up perfectly.