Question
I build furniture and recently purchased a Timberking 1220 mill to allow me some options with wood varieties and cuts.
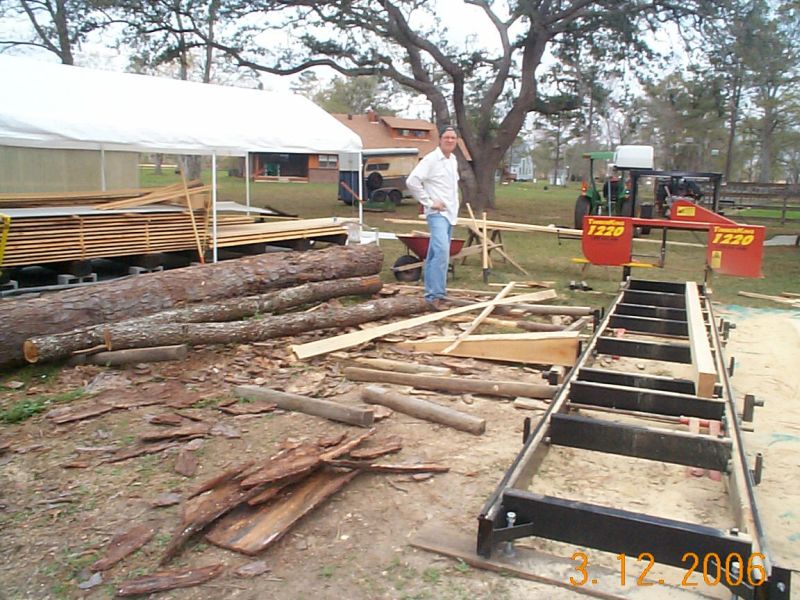
My question concerns how some of you have your mills set up with respect to stacking lumber, flitches (that will need to be edged), slabs, etc. I've only cut with mine twice so far, and both times I've thought of better ways to arrange things.
I'm stacking my lumber perpendicular to the mill on my trailer on the same side that I stand. My slabs are going into a pile next to the trailer (still perpendicular to the mill). The flitches that need to be edged seem to get in the way wherever I put them, though! It just makes sense to keep them off the ground but close to the mill - I'm thinking maybe a couple of roller beds where you could just roll them back onto the mill for edging?
Forum Responses
(Sawing and Drying Forum)
From contributor O:
My mill isn't too far from a TK design, and as far as the flitch goes, my tow hitch on the mill is removable, however I leave it on. It's a 3x3 square tubing about 4' long, and I built a rack that is about 6' long or so, made from 2x3" square tube and has a 2" ball welded about 1' from the end. It just hooks into the tongue, and the other end has about a 36" square tube of the same, welded, looks like a Tee except flat, with an adjustable support post. So once the jacket board is removed, which is thrown over and beside the flitch rack on the ground, then the second cut (flitch) gets drug/carried to the flitch rack, which is at the end of the mill there.
Contributor O, it sounds like you essentially made an extension off the front of the mill to hold your flitches on. Is that correct? I like that idea. I've got some roller beds I could rig up. Do you slide the flitch over/under the blade, carry it around the head, or gig the head back before sliding it onto the rack?
Contributor S, my setup sounds like yours. It makes sense to move the flitches to the rear so you can offload each one before guiding the head back for the next cut, right? Again, maybe some rollers set up? I've noticed many of the mills offer board drag back fingers that would pull the board to the rear automatically (with power feed of course). I agree with the ideal setup (besides having an edger) being a longer bed to allow placing them at the end; then you wouldn't have to move them again (maybe one day I can get an extended bed!).
Any other setups you would care to show/describe? I've gotten some good ideas from the Knowledge Base, but figured there would be some updated systems.
How about add-ons, either purchased or home made? I already see that I need a toe board and some way to turn larger logs. I'm thinking a hydraulic floor jack with roller would work for a toe board, and possibly a large post with winch for turning logs. I plan to build a log deck with timbers as well to make loading easier.
I also like the way Turner mills have all the log stops linked together to make setting them quicker; I think I'll make that mod to mine.
Any other recommendations for a new bandmiller? Can you tell I've got sawmill fever? I love my furniture work, but I'm really excited about this, too! My father-in-law ran a larger Frick mill his entire life, and I was fortunate enough to help him some while he was still alive - talk about spittin' some wood out (but man was it fun!).
I saw a simple log turner at Sawlex this year and fashioned a simple and very effective one of my own from a railroad jack, chain and hook. While standing on the side of the log that you want to roll up and away from you, wrap the chain under the log and hook it on top of the log on the edge farthest from you. Attach the chain to the jack and jack it up. As the jack goes up, it lifts the side of the log closest to you while at the same time using the hook to roll it. Believe me, I saw alone most of the time and have rolled logs as big as 26 diameter red oak 10 feet long with minimal effort. I have also used a hydraulic jack before the current method.
Two tips I would like to pass along: When rolling big logs, slide a length of steel tubing over the stops taller than the log is to prevent the log from climbing over the stops, and don't try to use the pin and hole preset angles for the log stops - they only take up time. Start with the stops straight up, slam the middle log clamp against the log hard, and then bump the stops down to the angle you want them. Tighten the rest of the clamps and cut.
Contributor J, that makes a lot of sense; I don't have loaders, but I guess once I get my deck built I could just toss the flitches onto it for staging. I really like your edging technique; I've been spending too much time trying to maximize my yield during edging, and it really eats up my time; taking 2" at a whack and then flipping each board when needed makes a lot of sense.
Contributor V, so you put your flitches parallel to the mill a few feet away, and load your boards directly into your truck at the head (start) end of the mill - is that correct? Do you remove each board after every cut, or do you cut several boards and then offload them? I plan to do my deck just as you describe; the factory ramps are a bit of a hassle to get a log up!
I really like the idea for the log turner; that sounds simple, quick, effective, and inexpensive - perfect! Is a railroad jack like a bumper jack (HiLift-type)?
Also, thanks for the two tips on turning/locking the logs. The tubing is a great idea for use while turning. I've been fumbling around with those stops (they keep falling when I try to lock the dogs in), so I'll try your method - it sounds much better.
I was thinking of moving my mill closer to my shop so that I can run AC power to it; that would require the start end of the mill to be fairly close to the shop wall (too close for a truck or trailer to fit at that end). I think I may keep the boards and slabs going to the operator side of the mill, and maybe make some roller beds that sit at an angle right next to where the saw head stops. This way I can just slide the flitches off the cant onto the rollers, and then when I'm ready to edge I can just roll them back on the saw. What do you think?
Another gentleman emailed me and that is how he does it, only he has a front end loader on his tractor that he keeps 3-4 ft off the ground. The lumber goes on the forks and slabs go underneath. When full he takes the tractor and stacks his lumber, then returns and moves his slabs to his burn pile to keep his area clean. He also places the flitches on his hydraulic loader arms (which I don't have). I plan to make some forks for my 3 pt hitch (no front end loader); until then I'll keep using my truck/trailer.
What tools do you keep at your mill? Every time I cut it seems I need something else. So far I've got two cant hooks (small and large), an axe, pickeroon, and tape measure (not to mention safety glasses, gloves, and ear plugs).
My mill has a manual log turner. It is a 4 ft long 2x2 sq tube that stands up hooked to the log deck with a hand crank cable winch on top. It has a hook on the cable that you wrap around the log. It saves a lot of labor. Worth its weight in gold. The other tool I use a lot at my mill is a pencil.
I've seen pictures of turners like you have, but it looks like it would get in the way during the cut (the post/winch) - do you have to remove it for the cut, or do you just step around/over it?
The mill length used to pile flitches on for later edging could be accomplished simply by placing pallets or junk lumber in a stack as tall as your log bed is so there is a table of sorts to accommodate your slabs. Just a thought - it all gets easier with experience and what seems to work well for me may not for you.
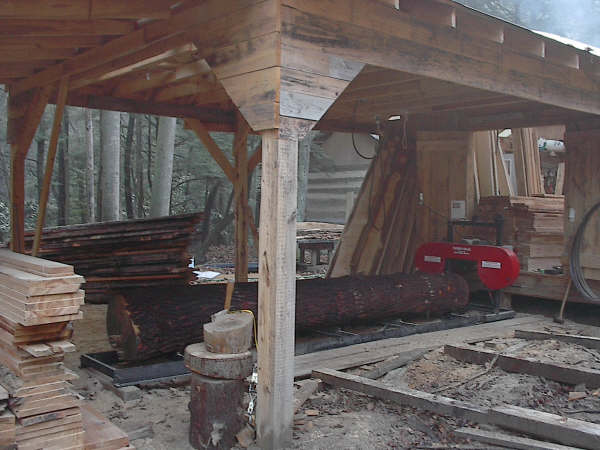
I also did my back a big favor by raising my mill up. The logdeck is almost knee high. This may be a little more trouble to someone loading logs by hand, but when edging and clamping, it makes for a lot less bending. I don't bend like I used to. The extra height also keeps sawdust and bark buildup under the mill from causing problems when clamping logs.
I have to agree with you on saving your back and raising the mill; I put mine right on the ground and definitely plan to raise it in the near future (when I build my log deck). I should get to saw some tomorrow, so I'll try out some of these great suggestions. Thanks!
My mill does have the hand crank, which provides a real smooth feed, but I don't know how much difference it really makes. Cranking does get old, especially during the gig back. On mine the handle will disengage, which allows you to just pull it back easier (Which I usually do) rather than cranking it.
Never did understand the crank thing on the smaller bandsaw mills. I just push mine through the cut and it's like pushing a shopping cart.
Modifications and Tricks with Small Bandsaw Mills
I know what you mean about hurricanes; when I first started dating my wife in '95 Opal had come through Alabama and there were trees everywhere. My father-in-law's 20 acre pasture was full of logs to saw!
Which blades do you use? I've got samples from TK, Timberwolf, and Wood-Mizer to try. Do you use water/soap or diesel for lubricant?
Diesel. Even though I usually am cutting hardwoods, just a few drops a minute while running keeps the blade clean and it won't freeze and bust the on/off valve or tank. What kind of wood are you sawing?
It's funny that you mention the busted valve/tank; the top of my tank is busted from freezing with the previous owner. I've been using water/Pinesol but am really considering diesel, maybe even with a felt wick system.
I also plan to drill a grease hole in the guide bearing shields to allow greasing, as has been recommended by several TK owners. All the bearings on my mill needed replacing when I got it (from water damage on the inside).
I buy those carport covers when they are on sale at Autozone or Pepboys for $79. They last about 4 or 5 years. Can't beat that for the price.
I have a 6 foot extension for the mill. I use one cup Pinesol per gallon of water, but everyone has their personal choice. I'll probably try the diesel some day too.
I use the standard TK blades. Seem okay to me. I'd really like to try the Timberwolf in the future, though. Buy a bunch of bearings to keep on hand. They will be the first to go and they are relatively inexpensive.
Here's my frustration. I see beautiful logs just lying around during my travels. But I just don't have the tools to load up logs on a trailer to take them home. I'd love one of those self-contained trailers with a grapple on it, but no way I can afford that!
I've got a 16' trailer that I cut some ramps for on the side; I plan to parbuckle the logs up the ramps on the side of the trailer. Many of the guys here seem to like that method. We'll see how it goes, but I think it will work well. So far all my logs came off my land and my neighbor's, so I just skidded them with my truck to the mill.
I added a manual winch for turning/loading by cementing a steel pipe in the ground a few feet from the mill so it's out of my way. I also added a winch to my trailer to assist in loading logs which has proved useful in sliding the occasional log on the mill if need be as well.
Raising the mill and the log deck have both paid off handsomely for my back and time, so thank you! I had mentioned that I didn't bolt the mill down, but did have metal pieces to keep the mill from sliding off the posts - I'm glad I did it that way. I had one of those oak logs that would have either damaged something or flipped the mill, but by allowing some slide, both were prevented from happening.
My next goal (for this summer) is to get an extension built to extend my capacity to 22' so that my logs don't have to be perfectly centered, and so that on shorter logs I can just slide my flitches back onto the open section of bed for edging.
I will admit that I used to see large trees and think, "Man, I sure would like to saw that tree," but now I think, "Man, I'd hate to have to saw that big fella, but those 15-24" diameter babies next to it would be perfect." I guess that's the difference in manual and hydraulics!
Most of my sawing for those ties and pallet material is post oak or red oak. Those are paying better now and you can sell them. Back when things were real tight, if you cut some of it they might buy it and they may not. They seem happy to get all you can saw now. The pallet stock I sell to a local company, so I deliver it right to them, but the ties are a different story. We deliver them to another mill where a buyer buys them and is usually there on a certain day of the week. The bundles of ties must be the same size as the mill makes. 20 or 25 in a bundle. My loader won't pick up that much (6000 lbs.) so I load them on my truck, band them together, and deliver them that way.
I did learn a new trick on those flitches. Many have one cut side already. So a person can put a bunch of those on and make one cut to edge many boards. The trick comes with the boards that have two live edges. I almost always have to cut one edge on each board one at a time. On my mill there is room to lay them on the deck and still have room to dog the next board, so I cut one edge on several boards and then cut the other all at once without having to move the boards back to one end or off the side. I don't know if it will work as well on a narrower mill. I do some of my edging while I'm sawing a cant if the cut comes out at the right space. Cutting ties, this doesn't work out right because the tie is 7x9 and the last cut would be odd for an inch board.
Baileysonline.com has a poly strapping kit for under $100. They work well and a person smarter than me could make their own tightener and just buy the strap and buckles. They are cheap and durable. I think the strap only costs 8 cents a foot. A great deal compared to steel.
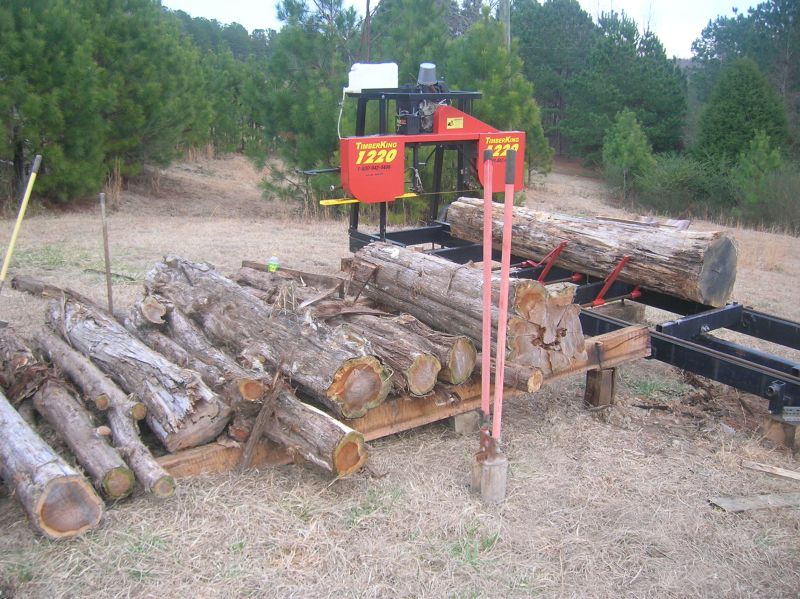
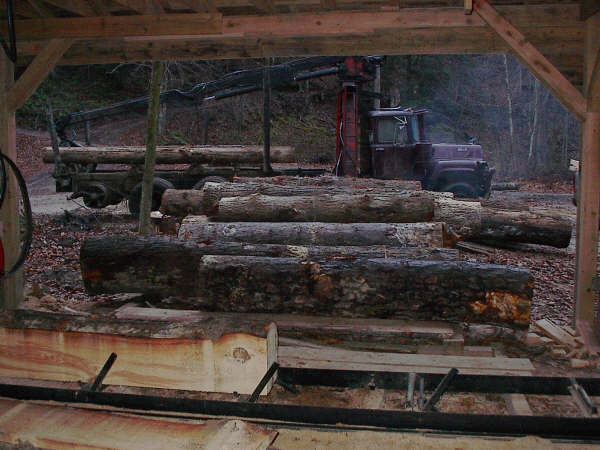
Here is a photo of a load of logs.
I had to trim/slab some of those large logs, too. It wasn't as bad as I thought, though. The quartersawing was much more work, but I got some beautiful boards out of them. I can't wait to use some of them.
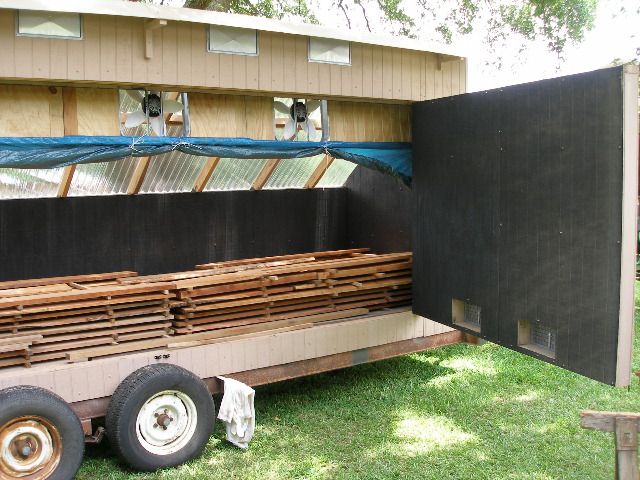
I'm looking forward to selling some wood; I've got several stacks of some nice wood just drying and waiting to be used. After the extension for the mill will come a solar kiln.
Thanks for the info on the strapper; I need to look into that for sure. I wish I had a larger tractor with a front end loader; my old 8N is a big help but has her limits.
Contributor R, I like your setup; I remember those pictures from my own research when setting up my mill.