Replacing Insert Cutters on a Holz-Her Edgebander
The Woodweb community steps up with detailed instructions and drawings for an edgebander owner who has gotten himself in too deep with a maintenance issue.July 5, 2011
Question
We recently purchased a 2006 Holzher 1310-6 edgebander that came with an operator�s manual that consists of three binders. I can find nothing in these manuals to describe the process to remove the trimmer and scraper units to replace the insert cutters and then re-align the units to the drive chain. Is there a service manual that describes the process?
Forum Responses
(Cabinetmaking Forum)
From contributor M:
They didn't put it in the manual because it would have added another whole binder! I managed to figure it out on my own (no techs in my area). If you are using the same head and the same cutters there should not be any major realignment issues. There is only on bolt holding the unit on the stand. It is the lever that changes the trim angle. The scrapers are easy to do because they are static. It is getting the trimmers to align perfectly when flush, radius and bevel trimming at the same time that is a pain.
From the original questioner:
I have changed the inserts on the trimmers and reversed the inserts on the scrapers but on re-installation there is a lot of clearance in the bolt holes allowing the units to twist and move in and out towards and away from the chain feed. My concern with the twist is it can allow the unit to be set out of parallel with the chain feed. A lot of what is in the manuals is of little use for someone who has been working on and around tools for 35 years but a description of how to carry out this process in my mind should be in the manual for those of us who don't have a tech available.
From contributor S:
It sounds like you unbolted the entire assembly from the "firewall". You should only have removed the trimming unit itself. Mine has a series of eccentric bearings that create a "no play" fit. I am amazed that we can pull the trimmers for maintenance and reinstall them with no change in set up. It will literally cut the same as before if no changes are made to the settings. Maybe your trimmers are different than mine? The scrapers are mounted to a "tool holder" like a metal working lathe uses. This tool holder is mounted into an assembly that has adjustments for no play as well. My bander is a late 2009 model Sprint. Having a good tech walk you through is probably a good idea.
From the original questioner:
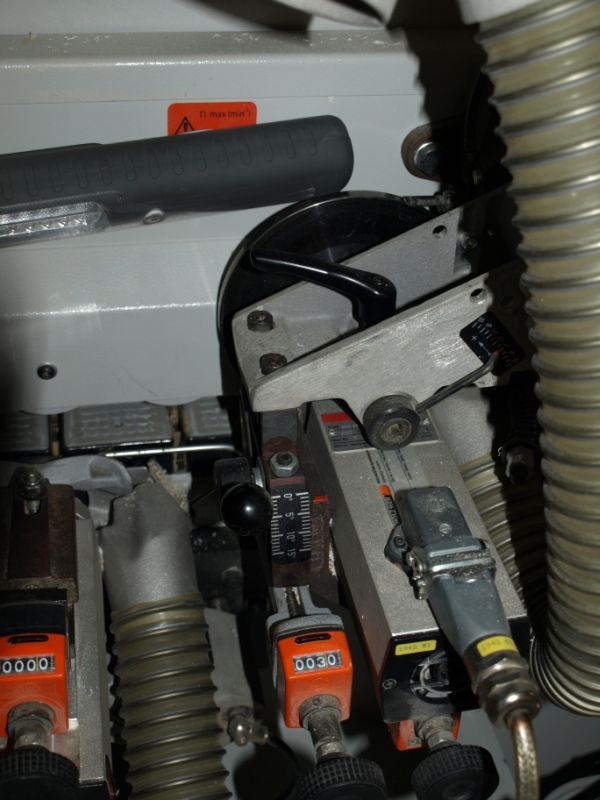
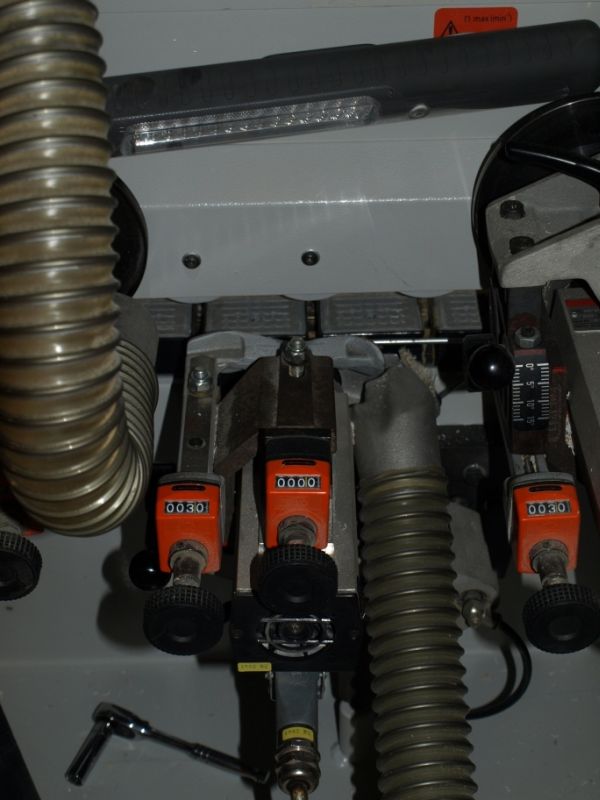
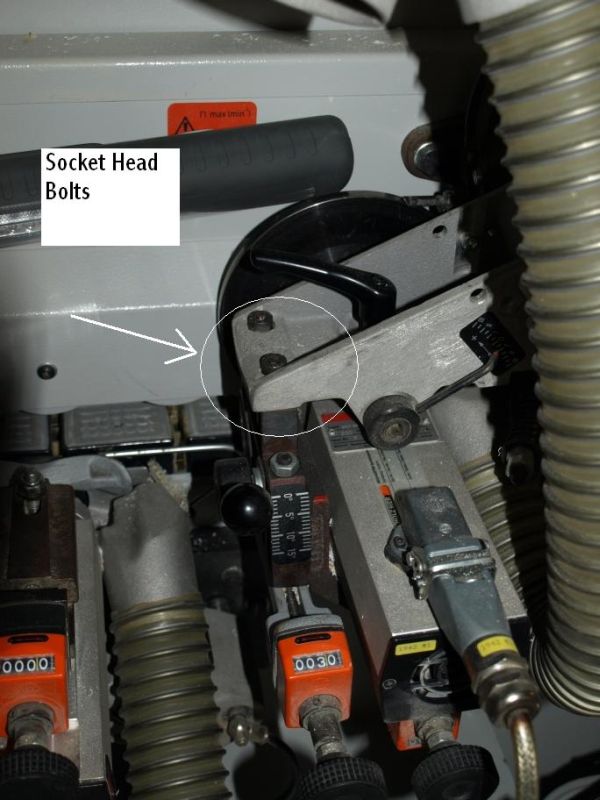
It sounds like my scrapers are similar to yours. I didn't take the entire assembly off but I am starting to get the sinking feeling I removed the trimmer from the wrong location. I removed the two cap head bolts in the center of the top trimmer. Instead I think I should have removed the hex head nut in the center of the bottom trimmer.
Click here for higher quality, full size image
Click here for higher quality, full size image
From contributor M:
My advice is to mount it as close as you can get it. Lock-tight the bolts. Then start from scratch. Though not necessary, some helpful tools will be a precision straight edge, a dial caliper, a spring powered hanging scale (the kind used for weighing fish) and some thick (25mm) and very flat and squarely cut MDF core melamine.
The good news is that the height should not have been affected - just the angles. I will not even try to explain the sequence of adjustments, I would have to stare at my own machine for a hour to remember. But there is a logical sequence of steps. I would say you should try to get it as close as you can and in the process you should learn a lot, then have a tech finish it up while you watch. Hopefully you can find a good tech that can explain what and why he is doing.
From contributor J:
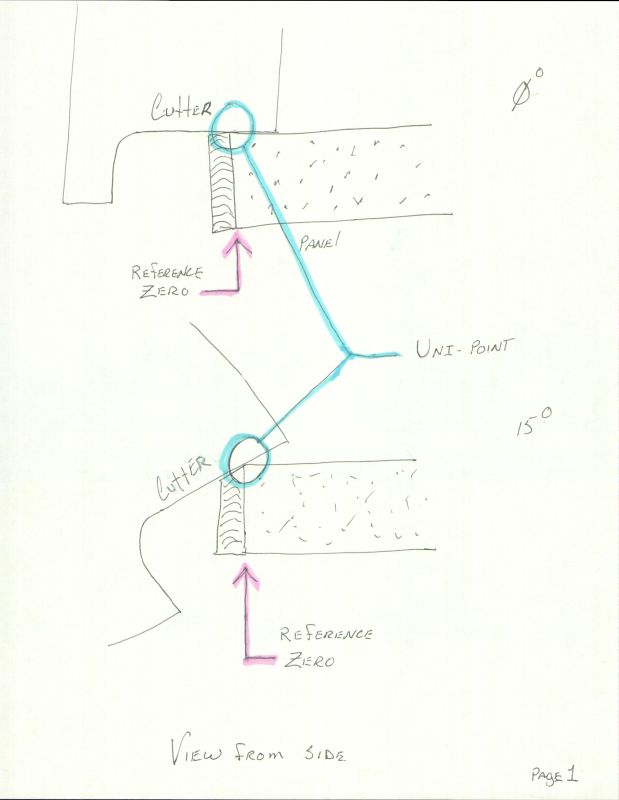
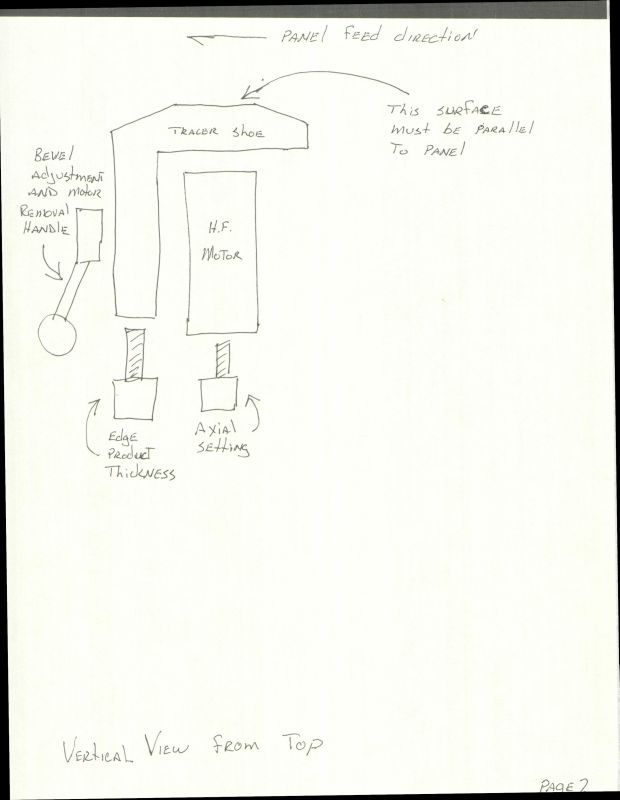
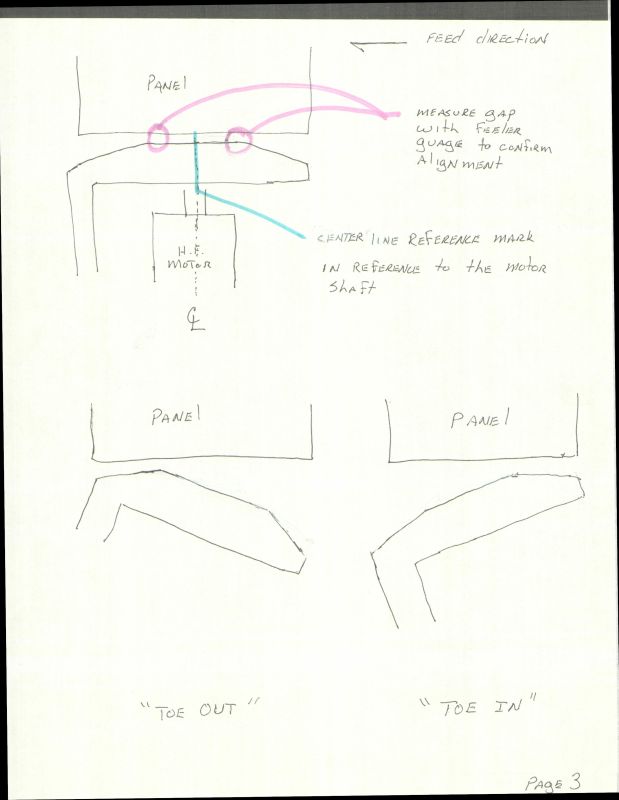
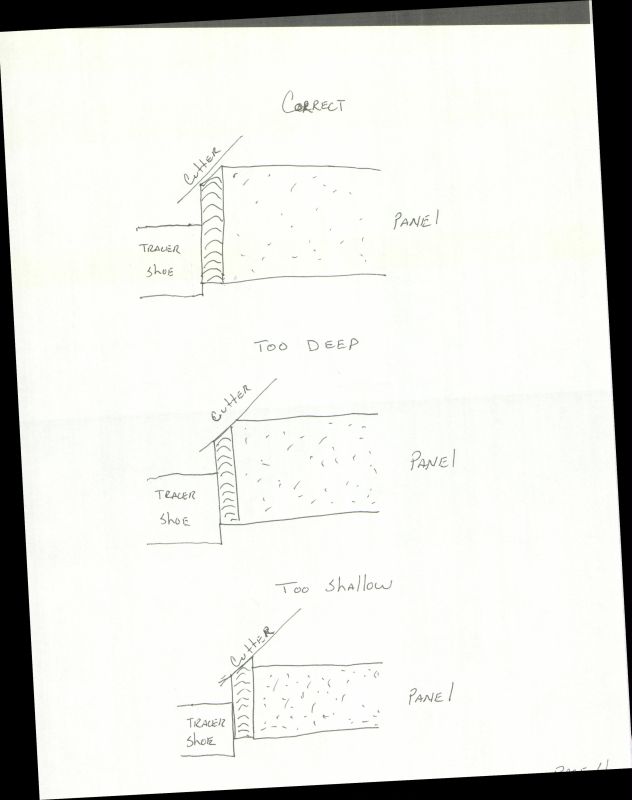
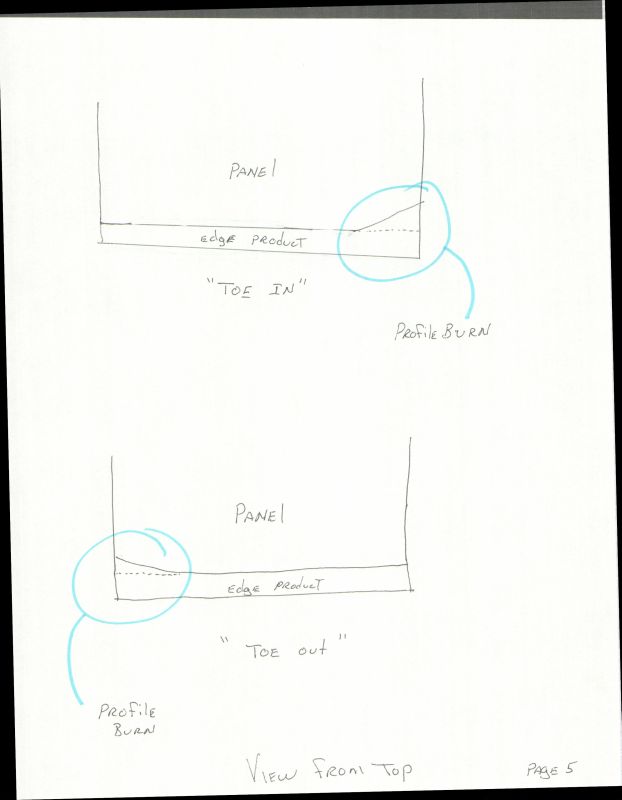
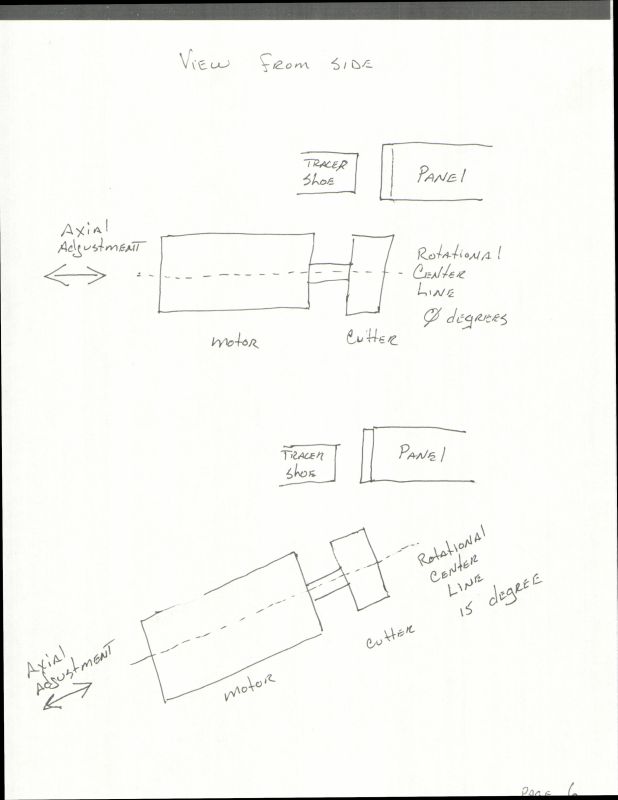
There are a six drawings that go with this. I will post them in multiple postings.
Also, this process is difficult to write. I will try to explain this in the best terms I can. In the interest of helping someone else who may not be a familiar, I am going to assume you know nothing about what we want to do.
As with any service to your machine, the person performing the service assumes any and all liability for any damage to the machine and/or person(s) that may result from the procedure. It is the responsibility of the person servicing the machine to take any and all safety measures to protect himself/herself, the machine and all others that may make use of the machine. It is also the responsibility of the said person to confirm the machine is in safe working order and all safety devices are present and functioning prior to placing the machine into production.
Click here for higher quality, full size image
Click here for higher quality, full size image
Click here for higher quality, full size image
From contributor J:
Click here for higher quality, full size image
Click here for higher quality, full size image
Click here for higher quality, full size image
Click here for higher quality, full size image
From the original questioner:
I gave it a try over the weekend and ran into an issue with adjusting the top flush trimmer to cut perfectly flush. I had it almost all the way to positive cut and still it was not trimming flush. On my old bander (a Cehisa EP-5) I would have been all the way through the melamine surface and cutting a rabbet. I suspect another issue is involved here.
Edgebanders as you say are complicated pieces of machinery and I think that an understanding of how one setting that is off can impact the ability to adjust another setting is required. I need a little more info on the operation of the machine before I feel comfortable adjusting the machine properly. I think an install tutorial from the tech will go a long way in that regard.