Staining Black Walnut
Other Versions
Spanish
French
A detailed discussion on staining kiln-dried Walnut. November 14, 2009
Question
I am preparing a sample door in black walnut with a veneer center panel. We've been using WB finishes for about 6-7 years now. I've never done black walnut, and the WB finish doesn't really enhance grain the way solvent does, so for this special project, I'd like to know if there is something I can use to enrich the wood and help it pop. Freshly planed, this wood has an overall greyish look. We had some older scraps around from another source that has a warmer brown tone, both on the finished and unfinished sides. I'd like our current project to have a similar brown/black tone possibly. I'm not adverse to taking a solvent step to start, if it will enhance the end product. Any suggestions practical for a room-sized project?
Forum Responses
From Paul Snyder, forum technical advisor:
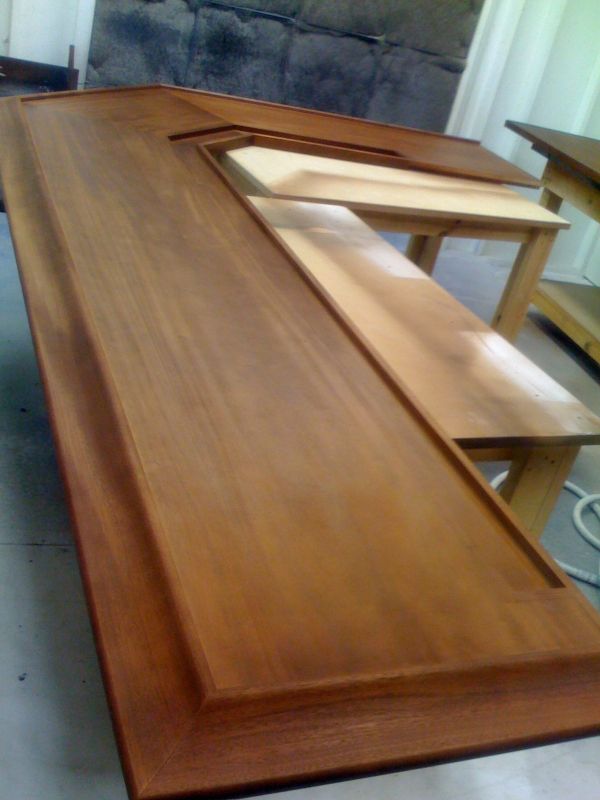
With all large projects, you want your steps and techniques to be easy and repeatable over large and numerous surfaces. Sounds like the walnut you have is steam dried, which washes out a lot of the color (like the piece on the right in the picture below).
Walnut takes dyes and stains very nicely. The piece on the left is an example. Warm browns and orange-ish browns look good on the steam dried walnut. You can even add an overall burnt umber glaze after the first coat of finish for added effect and to enhance the grain.
You can get a water-reducible dye that's lightfast (resists fading) and apply it by spray and wipe or by hand using a wetted cloth. You just have to work fast and wet the entire surface quickly to avoid overlap marks. Then wipe off the excess and let it dry. For additional color and depth, add 1/2 - 1 ounce of the dye to your second coat of finish and spray that evenly over the first coat after it's sanded smooth.
If you were working with air dried walnut that had good coloring, then you could just use a coat of highly thinned fast drying oil-base varnish or polyurethane like a stain on the bare wood before topcoating with the WB. The clear oil-base finish will pop the color, figure, and grain in the wood pretty good and once it dries completely, you can topcoat it with the waterborne finish without any problems. I like to use the fast dry poly from the local home center because it's cheap and really does dry fast. Thin it with 2 parts naphtha or mineral spirits to one part finish.

Click here for higher quality, full size image
From contributor L:
It seems that water based finishes tend to grey somewhat. I stain a lot, which solves this usually. The red/amber tones in wood are more of a problem. I have used wb finishes for a long time and won't ever change. You might try Sealcoat as a sealer. 100% dewaxed shellac under a wb finish. I have used Mohawk (or any metal dye) in a Van Dyke brown shade for walnut. It has an amber/brown tone which would move the walnut away from the grey.
From contributor B:
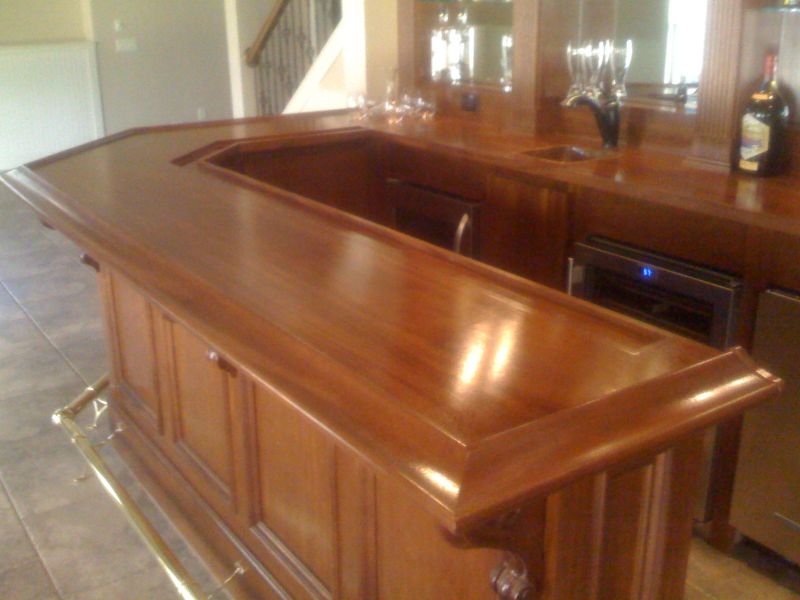
I'm in the process of doing a walnut kitchen and have used the following for walnut, mahogany, and like woods. I only use waterbase finishes as well, and have had great success getting figure pop while maintaining even color. When using dark woods I do a spray/wipe pigment stain directly to the wood followed by a coat of waterbased spray dye stain.
Walnut door:
1.) Sand to 320.
2.) Wipe door with damp clean rag to pre-raise the grain.
3.) Lightly sand with 400 to knock down fur.
4.) Spray and wipe stain.
5.) 1 coat of spray dye stain to help pop figure and get even color.
6.) Self sealing topcoat thinned 5-10% sprayed around 2ml.
7.) Two full coats of top coats back to back with no sanding in between 4-5ml.
8.) Sand with 400 or de-nib with maroon pad if grain didn't raise too much.
9.) Spray final topcoat.
Products used:
Fuhr 165 spray wipe stain
Fuhr 155 spray dye stain
Target Coatings Emtech 2000 clear
Click here for higher quality, full size image
Here is mahogany after topcoats. I've had the same success with walnut.
Click here for higher quality, full size image
From Paul Snyder, forum technical advisor:
That's a nice looking bar.
From contributor B:
Thanks. I remember going to your website years ago when I wanted to educate myself on finishing - great info! I think everyone should read what you have to say about cutting shellac and making wash coats... I did. I wash coat all my cherry right before I do the above process and sometimes add a glaze to boot. Here's one more picture of a cherry bar I did using a wash coat learned from you.
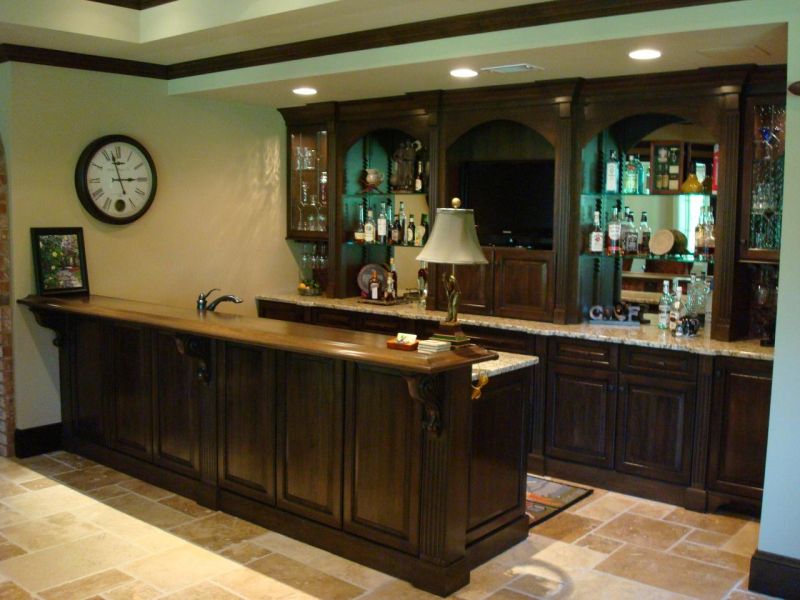
Click here for higher quality, full size image
From the original questioner:
Paul, after looking at your photos, we actually do have air dried walnut. The raw color is good - the greyish tone was after the WB was applied, as contributor L mentioned. The veneer was a little lighter to start with.
I was most interested in your suggestion as it seemed very doable for this project. How would you suggest applying the diluted poly?
Additional info if needed: I'm using a Kremlin air-assisted airless with #6 tip. I also have an inexpensive gravity fed pot gun for applying WB SNW stains.
Contributor B, I want to compliment you on the beautiful photos you posted!
I have a couple of questions after reading your schedule. I had always thought you weren't supposed to sand raw wood finer than about 180 grit when staining. Too fine of sanding was supposed to close off the grain and cause the stain to pool on top instead of penetrating. Looking back, I even believe that is what happened in our shop many years ago when we sanded red oak with 220 grit before staining (this was all solvent based products).
You are using a spray and wipe stain, *and* a dye? I'm very ignorant of stains and dyes, as we try to encourage people to choose a wood that is naturally a color they like (or enhanced with glazes), hence using black walnut instead of a dark stained oak or painted cabinets. The money spent on the black walnut is offset by what I'd charge them for staining. So could you tell a little bit about why you take the steps you do in your schedule?
From contributor G:
I've used an ML Campbell cherry Mictroton over the raw walnut to give a touch of the umber, keep the grain color reasonably similar, and shade if needed. Quick and easy - and the ML Campbell Agualente (precat) or Aguabarnice (postcat) worked really well to finish.
From contributor A:
You don't have to resort to air dried walnut... Just make sure the wood you use has been dried in a dehumidification kiln (low temp over a longer time without steam) to get the original color of the wood. If you use air dried you do run the risk of powder post beetle infestation and a loss of all your hard work. Western or Claro walnut tends to have more of the rich brown tones, but is more expensive.
From the original questioner:
I believe I was using bad terminology. By air dried, I meant professionally kiln-dried only, and not steamed. Sorry for not making myself clear. The hardwood we have has a nice color; I just want to bring out the grain and not diminish that color with the greying effect of a plain WB clear coat. On the other hand, the veneer that came with it has a greyish look to start - maybe it was made with steamed wood?
I'm getting the materials together to try Paul's suggestion of pre-treating with diluted oil-based poly.
The local Sherwin-Williams store suggested pre-treating with their neutral stain base, untinted. It is solvent based, but can be sprayed with WB coatings within 2 hours.
I'm not trying to mimic the yellowing effect of oil-based finishes (that's the main reason we switched to WB), just bring out any shimmer and enhance the grain and not add a greyish cast.
From contributor O:
Thirty years ago in a custom millwork shop, I was enlisted to do most of the finishing. (Box fan in the window.) Guess I was the low man on the totem pole. However, I found that a 50/50 mix of
Minwax Special Walnut and Dark Walnut applied after necessary sanding, using an old cotton T-shirt, was nice. I never soaked or applied too much, just a nice even coat. Waited 24 hours, then took a cotton rag soaked in mineral spirits and wrung out real well, then lightly wiped off any excess pigment. Waited another 24 hours then applied lacquer based sanding sealer (two coats), then sanded with some 220, then applied about thirty coats of lacquer hand rubbed at the appropriate times along the way. I promise (if done correctly) this will show the walnut grain like nobody's business. Did five walnut conference tables like that.
From contributor Y:
With black walnut, I like to start with one of two finishing schedules:
(1) dewaxed amber shellac followed by walnut oil, or
(2) walnut oil followed by dewaxed amber shellac.
After that, you can use whatever protective finishing you like, but that'll pop the grain all you'd like.
From the original questioner:
Thanks for your responses. What exactly is walnut oil?
From contributor Y:
Walnut oil is a food-safe finish often used for things like bowls, cutting boards, and the like. I get mine from Highland Hardware or Lee Valley. Looking forward to seeing what you end up doing.
From contributor S:
Walnut oil is the oil pressed out of the meat of the walnut, a natural drying oil.
From contributor N:
As has been pointed out in a number of other threads - walnut oil (and all other nut oils) is only food-safe to those without nut allergies.
From contributor I:
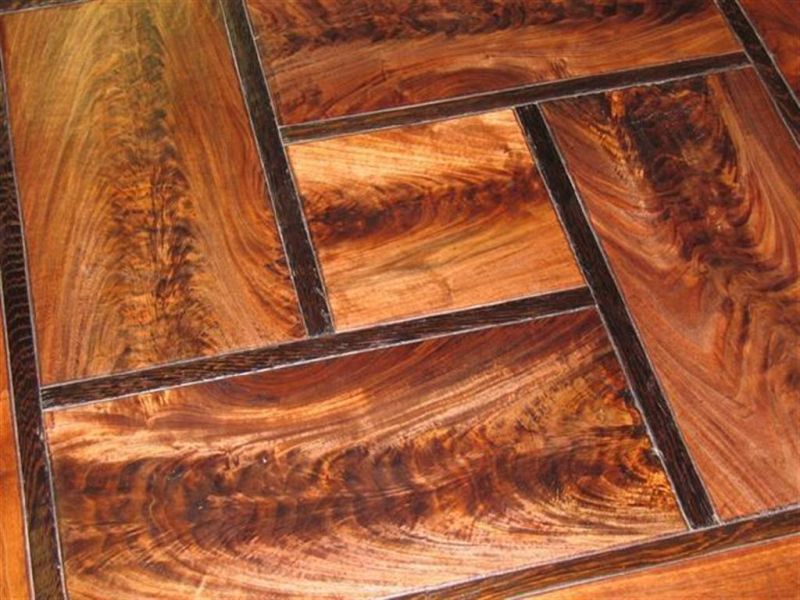
Like so many, I have often been frustrated with black walnut color. I have a couple of suggestions that I have found work fairly well. First, I make a walnut stain using whole green walnuts with the husks on. I usually try to get them as soon as they fall from the tree. Put them in a glass jar. If you happen to have one with a spigot on the bottom, that works great. No metal or plastic. Fill the jar with walnuts and then pour in household ammonia. Leave soaking for a month or so. When you want to stain something, pour off a little of the liquid and dilute with water to desired darkness. Be sure to test the stain on a scrap or in a place that won't show. Second, I have recently been using teak oil on several species after sanding to 180. I never sand finer than 180 on the wood when using any waterborne product. It just seems to make the finishes work better. After I apply the teak oil, I let it dry for at least 24 hours. Then lightly sand to remove any grain raising and the finish if I have the desired color. I have done this several times and have found no signs of any bonding issues.
From contributor D:
We always sand to 320 grit. To get topcoat to stick or dye to penetrate, you will have to water pop the surface with a damp cloth to open the grain back up. Dye tends to darken 180 grit sanding scratches and make them very obvious, so finer sanding is best. After dying, burnish in a coat of oil sealer with #1 steel wool. This will shear off the grain raise, lock in the color, and develop the maximum amount of iridescence and light play within the wood. Topcoat with WB after oil coat is dry, or our preference is 2 more coats of oil and a topcoat of wax. This will make the walnut look thick and holographic.
Click here for higher quality, full size image
From contributor H:
I have been leaving my logs sit for over a year before cutting them. If you want to see the difference in color and grain, you would not need as much dye.
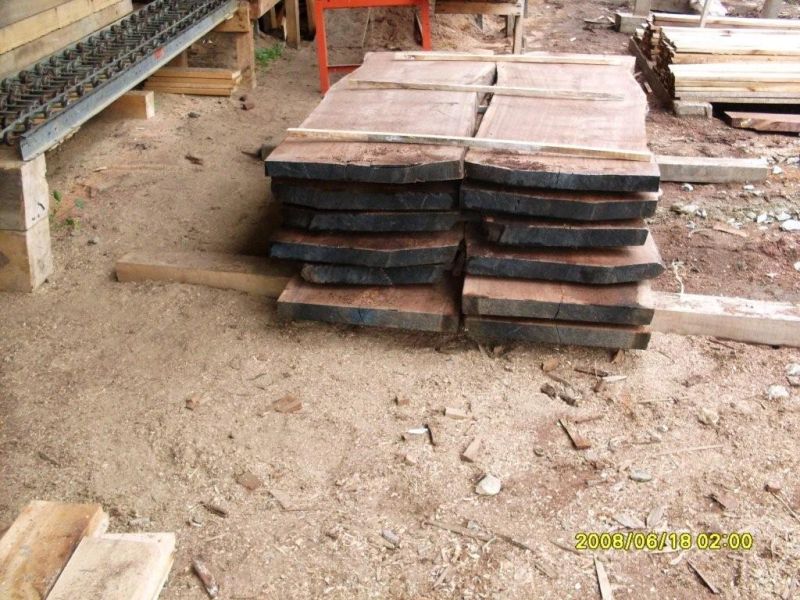
Click here for higher quality, full size image
From contributor P:
Nobody has mentioned
Watco oil, which is a linseed oil base with chemical driers added, and if you want easy availability (Home Depot, Lowe's Ace, True Value), ease of use, the ability to finish with anything (shellac,
polyurethane, lacquer, waterbased, varnish, etc.) and a 3D look because it soaks into the wood, it's
Watco! I've used
Watco with lacquer over it for close to 40 years and almost invariably the customer's response is "Wow, I didn't know it was going to be that beautiful."
Watco has the problem of 2-3 days dry time and the spontaneous combustion concern, but if you're careful and patient, the results are unmatched by any finish I've ever seen.