A three step coloring technique to achieve rich, dark, even coloring on a variety of wood species (and blend different species in the process!) - By Paul Snyder
Anyone that's tried to slap a stain on the woods listed above, and other species as well (e.g., aspen, pine, etc.), can tell you that the results weren't always what they hoped for (and that's being kind!). It's pretty standard to get very uneven coloring, ranging from very dark mottling/blotching to shades that are a lot lighter than expected or desired. While some stains work a lot better than others, they don't solve the problems well enough by themselves to be a dependable solution. Getting a rich, even color on any of these woods can be done consistently using a three step approach;
1. Use a dye to establish a uniform base color
2. Stain and/or glaze to build the color
3. Tone/Shade to add color and depth as well as improve uniformity
Dye
Dye establishes a uniform base color for the rest of the finish, reducing natural color variations in the wood. By thinning the dye to reduce its color strength, it's easier to apply an even wet coat while avoiding blotching. Dye does a great job of popping the figure in the wood and develops highlights that are visible after the other coloring steps. Using a brightly colored dye that compliments the stain color (e.g., reddish-orange dye under a "cherry" wiping stain) produces more dramatic highlights than a dye that harmonizes too closely.
The brand of dye isn't that important as long as it's fade resistant (metallized). Check with your supplier to see what they have or contact one of the many suppliers that carries dyes (e.g., Chemcraft, ILVA, Behlen, Mohawk, ML Campbell, Sherwin Williams, Homestead Finishing (.com), Wood Finishing Supplies (.com), etc.). Each brand has unique colors that are handy to have on hand, or you can intermix dyes from the same brand to make custom colors; don't intermix different brands unless you know they're compatible.
For even coloring, spray a light, even wet coat without any wiping. Some problems that come with spraying dye are oversaturation, flooding, bleeding, striping, and poor coloring in corners. Unlike wiping a dye, where the color reaches a limit, with spraying you can oversaturate the wood with color and it gets darker and darker. I usually like to spray the dye in one even wet coat though some finishers prefer to mist on multiple coats to build the color. The problem I have with multiple coats is maintaining the same color intensity and consistency over numerous surfaces. Applying the dye too heavy, flooding the surface, causes blotching, bleeding, and/or color pooling. A light coat that wets the wood and flashes off quickly keeps the color even. I have to pay close attention when spraying dye to make sure it's heavy enough to wet the wood and overlap the passes enough to avoid spraying stripes. If it's not wet enough, it produces a "hungry" look where the grain and figure are muted. When you spray into corners and recesses, the turbulence from the air the spray gun uses keeps the dye from wetting the wood evenly. Keeping the air as low as possible and good spray technique will minimize the effect.
Wiping Stain/Glaze
Once the dye dries, apply a wiping stain over it to add more color and accentuate the grain in the wood. For speed and ease, spray a light wet coat of the stain and wipe away the excess. Depending on the stain and the effect you want from it, you may or may not choose to use a washcoat to seal the dye before you use the stain/glaze.
Some wiping stains work a lot better than others. Several good brands of stain include Behlen, Chemcraft, ICA, ML Campbell, Mohawk, Triclad, Valspar, etc. The various brands have different versions of the same color as well. Like dyes, by intermixing colors (stick with the same brand for compatibility) and varying the thinning ratios you can get a huge range of colors. When you thin these stains, use the stain base instead of the solvent. The stain base has the right blend of solvent, binder, and additives to maintain the stain's working properties. Before you use a wiping stain, make sure to do a large sample to see how that color works. While one color will work well, another color from the same brand can look horrible. If the stain is made with both pigment and dye, it'll usually cause blotching on woods like poplar, maple, cherry, pine, alder, etc.
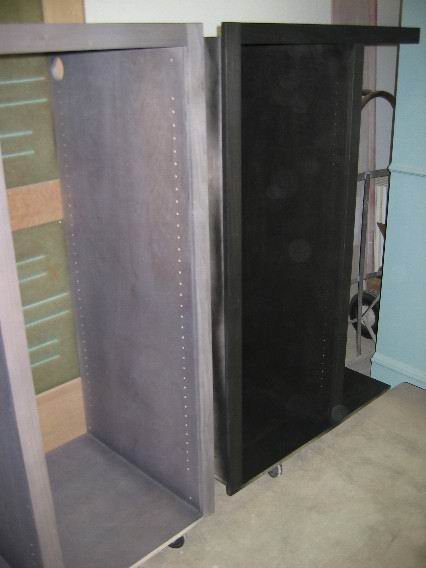
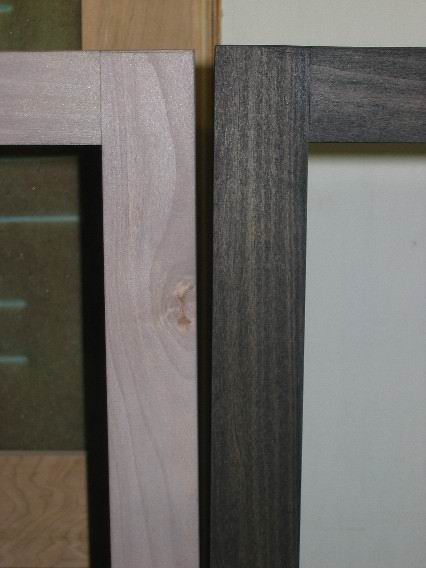
Here's an example of the dye and stain steps. In these pictures, the cabinet on the left was dyed a shade of grey and the one on the right was dyed and stained. The grey dye established a uniform base color to build on and the stain provided most of the color.
Toner
After the stain/glaze dries, seal it with a coat of sealer or thinned finish, let it dry, sand it smooth, and remove the sanding dust. This will give you a smooth, sealed base for the toner.
I like to keep the toner coat thin, so that it doesn't add too much to the dry film thickness and I can use a couple clear coats over it to protect the color layer. To make a lacquer toner, I'll usually mix up 4 ounces of finish to 28 ounces of thinner and add 1/2 - 1 1/2 ounces of dye concentrate. With other finishes, like water-base, stay within the manufacturer's limits for thinning. Sometimes I'll use stain (by itself or with the dye) in the toner as long as the stain is compatible with the finish. In some cases, like a pickled finish, I'll use 1/4 ounce or less of pigment (e.g., Degussa 844 Titanium White) per quart. I like to stick with a single coat of toner whenever possible. Follow the toner coat with a couple coats of clear (don't sand the toner).
Blending Different Wood Species
Not only does the technique produce excellent results on the woods individually, it also works very well to blend different species together with uniform color.
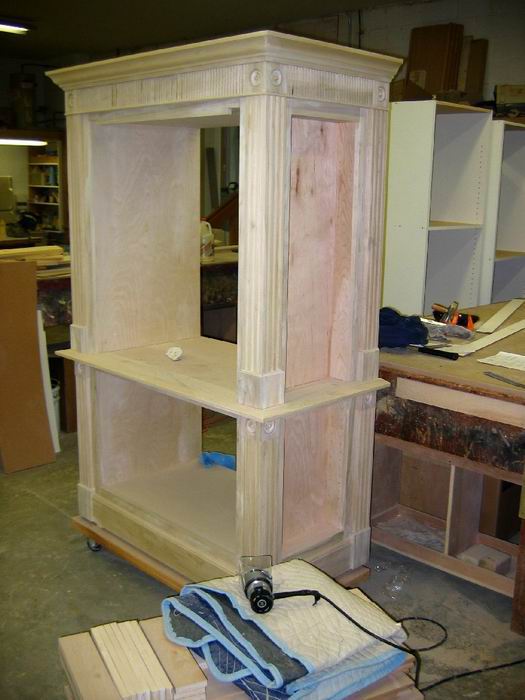
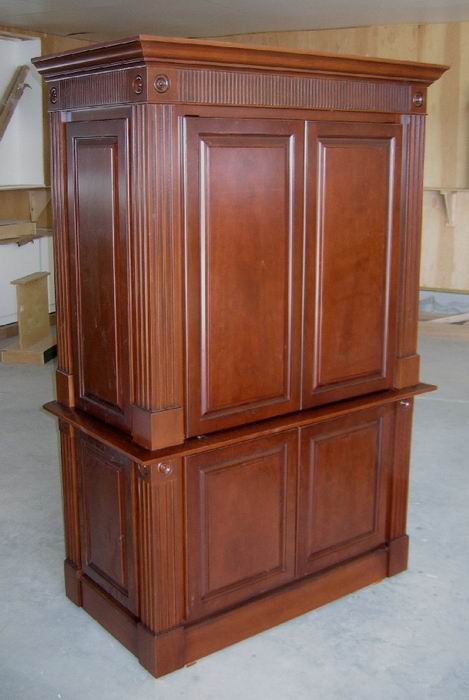
On a recent project, a customer wanted a tall TV cabinet/armoire to match a mahogany table he owns and provided a leg for color reference. The armoire that needed to be finished was made using birch ply, poplar trim, and alder doors. The leg from the table was dark red with a hint of brown; one of the standard "mahogany" colors that's widely available.
Matching a Finish
First, I needed to match the color on the leg on a sample to make sure I had the colors right. It's a lot easier to do a new sample than it is to strip a piece down if the colors are off! The leg had a dark finish when you looked at it from a distance or at an angle. But up close, and viewed straight on, it had a strong orange base color and wasn't that dark looking.
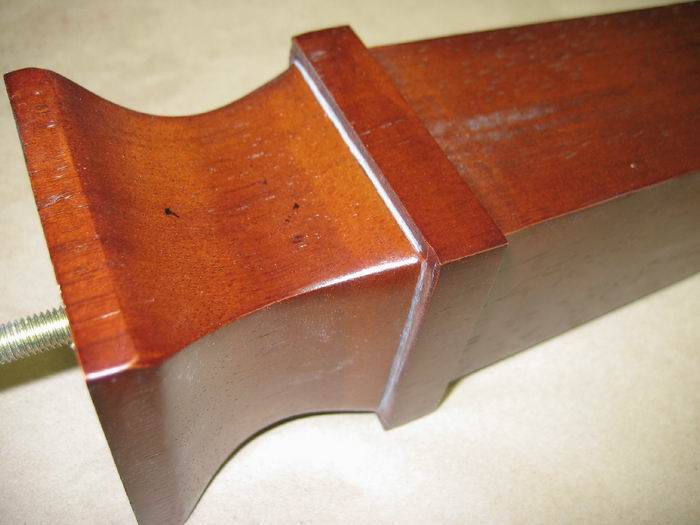
When a finish looks darker at an angle than it does straight on, that lets you know there's color in the topcoats above the wood (toner). On this match piece the toner had a strong "mahogany" color to it and was very transparent indicating a dye was used. That let me know the third coloring step on the cabinet would be a mahogany colored dye toner. The orange base color on the leg was also pretty easy; a lot of reddish brown stains look more orange when they're reduced with the stain base. So now I knew the second staining step would be an orange wiping stain. Now all I needed was a base color on the cabinet that would help blend the poplar, birch, and alder together. The poplar had a lot of green in it, the birch varied from light tan to a light reddish-brown, and the alder had a tannish-red color. I decided to go with a dilute orange dye to tie all the woods together; the dilute orange calmed the green tones in the poplar nicely and started the process to getting the base color needed.
Color Sample
As always, I made a color sample of the finish on some scrap to make sure I had the colors right. I used a piece of birch with different streaks of natural color in it; that let me know if the steps would blend the different colors in the woods on the cabinet. At the very bottom is a section of bare wood. Just above that is a section with the light orange dye (I used a diluted reddish brown to get the orange color). The third section from the bottom shows how the orange-brown wiping stain looks over the dye. Above that is one coat of mahogany toner with a second coat of toner on the very top. On the actual cabinet, I used a stronger toner, with just a little added mahogany colored wiping stain so I would just need a single coat of toner.
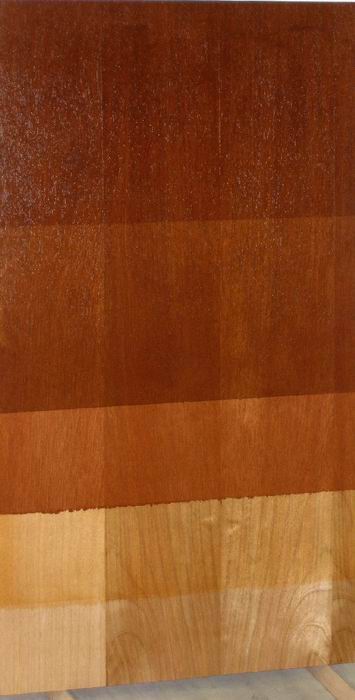
When I make color samples like this, I write the ingredients for each step on the back of it. I keep the color samples and use the same ones sometimes or make adjustments to them for new jobs.
Project Complete
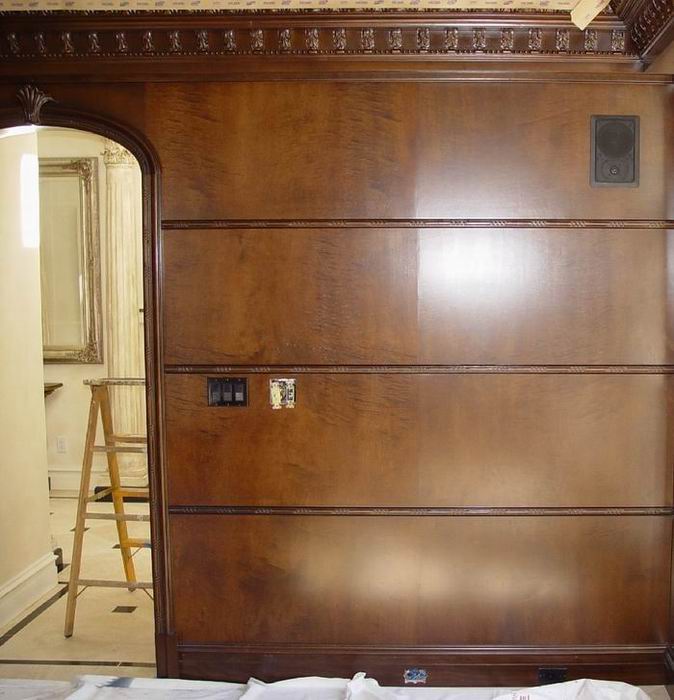
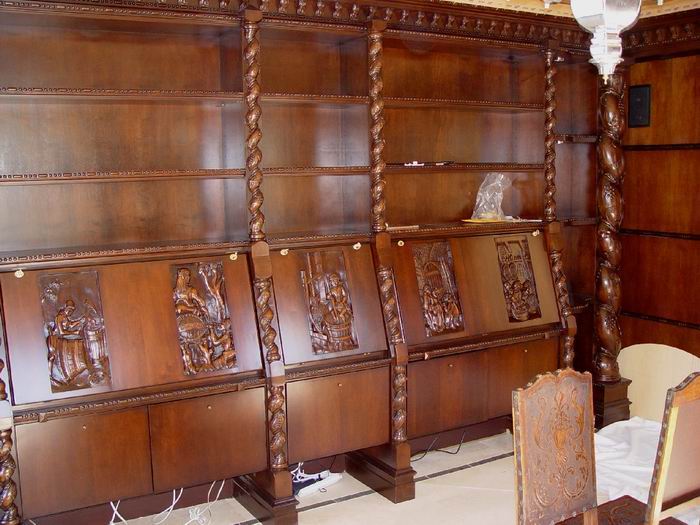
"Walnut" Color on Maple, Birch, & Pine
Here's another example of the three step coloring technique (on-site work). The library had maple bookcases, wall panels, and carved figures. Poplar was used for the trim pieces between the maple panels and around the door. The baseboard was pine.
Article by Paul Snyder. Visit Paul's web site.