Question (WOODWEB Member) :
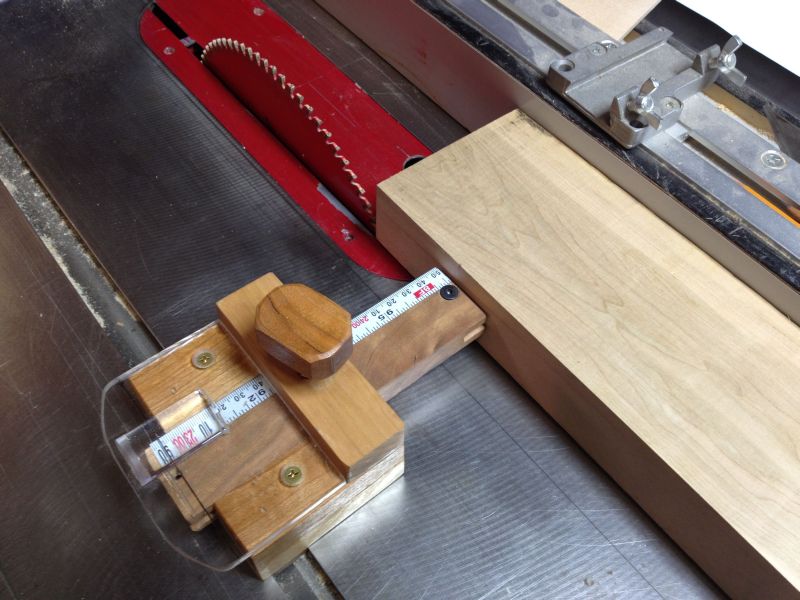
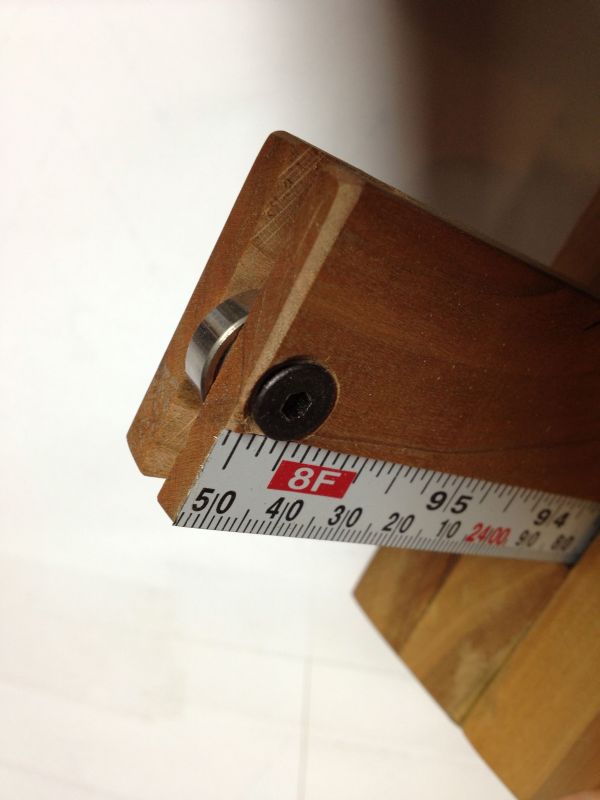
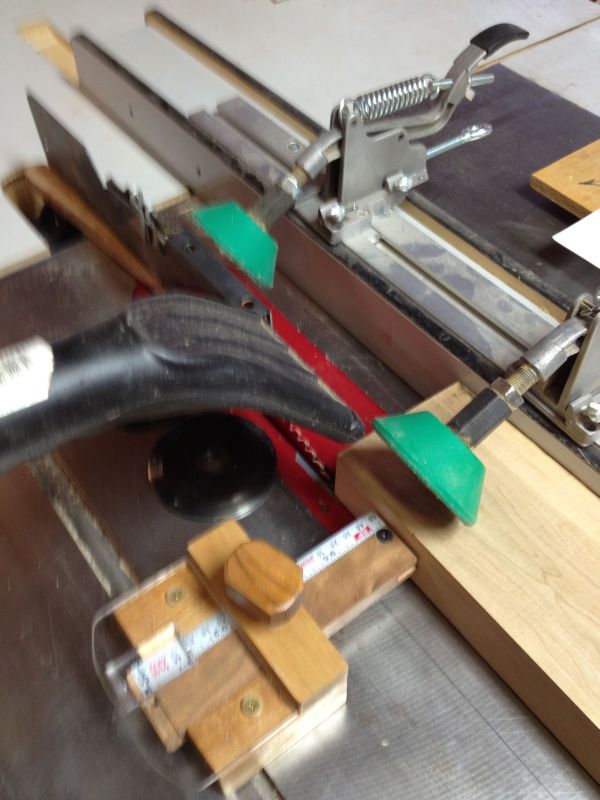
I've been doing strip laminations and using 3/32" contrasting elements sawn out of 5/8 to 1-1/4" stock to create repetitive patterns when I crosscut and re-laminate the surfaced long grain glue-ups to create fields of end grain. I'm ripping on a Biesemeyer-equipped 12-14" Powermatic variety saw equipped with an unused feeder. I use short pieces of clear, straight stock to make these thin rips. I push the cut with a skinny push stick. This is fairly tense work, sawdust in the face and about 50% waste between the short lengths and defect from flutter and burn. Can anyone suggest a better method of work, one that will yield a higher percentage of useable rips, allow me to catch the top-side dust, and get my face out of the action?
Forum Responses
(Solid Wood Machining Forum)
From contributor S:
If you have a widebelt sander and a decent bandsaw, rip on the bandsaw (carbide-tipped blades do an amazing job) and put through the sander. You can't put very short material through the sander, but most will handle 14-16" stock. If you don't have a sander consider finding a shop that has one, or buy an inexpensive one - the import machines are decent as long as you don't overtax them. There�s far less danger, far less waste, and you�ll have a far nicer product.
When cutting your face should not be in the line of fire! You want to be to the side a bit, using a better push block may help you out there also. Dust collection for that type of cut is going to be difficult. However if you do it enough it may be worth rigging a 3" hose off your main collection line to help. You'll have to play with positioning it so it catches dust without being in the way, but with a little patience I'm sure you can improve your results. I do think for parts that thin the bandsaw with a good quality blade (for large quantities your probably talking carbide), would be another good solution. It just depends on what you have available in your shop?
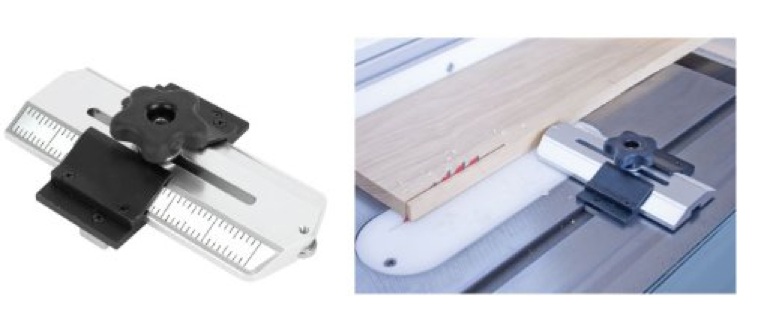
The low fence (contacting the wood below the upper surface of the wood) allows the feeder wheels to be well centered over the cut. The feeder should have good wheels and all the adjustments so you can rip without push sticks or threat of bodily harm. This will allow you to stand to the side feeding in at one side and removing parts at the other - out of the line of fire.
Use a zero clearance insert in the saw table also to give you good support. If you need to you can even fashion a dust collection hood over the feed wheels to catch the dust that escapes. I think your dust exposure will be greatly limited and safety much improved if you use the thin kerf, zero clearance, low fence and feeder.
I have a widebelt sander but use it on band sawn veneers (stuff 3/32" or thinner) except with a sled to support the work and narrow bands of thin double-sided tape to secure the thins. That causes .006" thin spots in the veneer above each strip of tape, no big deal using them in endgrain laminations, but a problem when stacking a bunch of identical veneers together or using them as face veneers on flat work. Since I could happily prepare an armload of thins in one session and be done with it for months, I'm looking for a process that turns a six hour job into one that takes two. I like the thin kerf/low fence/power feed/zero clearance suggestions but is some reasonable way to take successive cuts of the same thickness with such a setup? I work in isolation and am grateful for the collective insight of this forum.
By the way with a thin kerf blade these 3.5" blade stiffeners really make a difference. Of course the key to reducing burn marks is to have a consistent feed rate and don't stop and start. I'm still dreaming of the day when I finally get a power feeder.
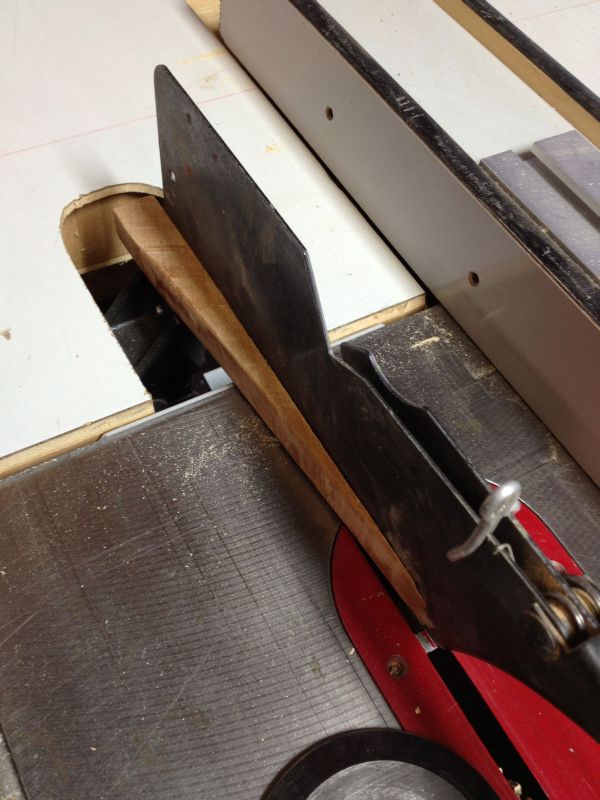
The overhead stock feeder mount I'm considering will also carry the above-table dust pick up and feeder wiring. The location of the saw and shaper, when they're rolled into place, will have to be repeated within an inch or two, not only so the feeder requires minimal adjustment, but also because the below-table dust collection and wiring will be in a trench in the slab. The saw and shaper's 12' plus infeed and outfeed paths are defined by larger machines that won't be on casters. One of my concerns, as far as thin rips are concerned, is arriving at a suitable riving knife arrangement. The Powermatic M-72 I'm switching to has a splitter to carry a top guard but splitter thickness is way undersized. I bought some of those little plastic nubbin splitters that fit into a saw kerf but I've grown accustomed to a real, proper thickness, laterally adjustable riving knife on a European saw I recently sold.