Tapered Stop Flutes
Other Versions
Spanish
The search for a simple, efficient method. December 26, 2004
Question
Tapered stop flutes... After about four hours of messing around, I finally got it. I'm wondering if anyone has an easy setup/jig for doing these.
For those of you who may not know what I'm talking about: You'd come in from each end whatever dimension and then start the flute at a point. As you push the router forward, it goes down the little ramps and finally gets to the depth of the flute. Then at the other end where you want it to stop, you ride back up the ramps at the flute tapers to a point.
Ugh. What a pain in the butt. I don't have a CNC, so I'm looking for a jig way of doing it easier.
Forum Responses
From contributor G:
Here's a thought. Build a box shape that the router will ride on, same as you might to flatten a board too large for a jointer, then make a platform that pivots in the center like a seesaw. On this, the board to be fluted is attached. What you do is set up to cut halfway to the deepest point, then reset see-saw platform to cut the final half. The initial amount of pivot will take some trial and error, but once you have the stops set correctly, you should be able to repeat fairly easily.
From contributor B:
The reasons I don't cut flutes with a moulding head on the table saw is because I don't like these taper end flutes.
However, since these are exactly what you need to produce, I'd suggest using a moulding head made for your table saw. These are readily available from Sears and LRH cutters.
From contributor C:
Over 70 different detail profile plugs are available for the LRH Magic Molder for your table saw, mentioned above. In addition, many innovative operational and safety improvements have been made by LRH in comparison to other systems on the market.
From contributor S:
Here's what we did to make fluted door jambs and it worked like a charm. We purchased a cheap Grizzly planer/moulder. I think it was $695. We disconnected the cog which was connected to the drive motor so we could manually advance and control the boards. We fastened a hand crank onto the cog that controlled the feed rollers. We then took the straight planer knives and ground our fluted profile. It was just a matter of sliding a board in, lowering the cutterhead to the desired level, cranking the board through to a designated point and raising the cutterhead. I could flute a door jamb every 45 seconds. The cutterhead was the perfect size to leave a tapered flute.
From contributor O:
I have had to do this before to match existing flutes. I simply built a jig out of 1/4 MDF with a slot in the center to let the bit pass through, applied a 1/4 stop to each side to guide the router base and stops at each end for the beginning and end of my route. Then screwed the whole thing to a piece of 1/2 plywood with the same slot for the bit to pass through in it, leaving the last 18 inches on each end loose. Then you simply shim the 1/4 from the 1/2 to raise the ends up until you get the desired effect. Of course it is a lot easier on the CNC, then you simply ramp in and ramp out in the desired distance to achieve the same effects.
Remember - you see these a lot on true antiques because before routers, these had to be cut with hand planes with repetitive cuts and there would be no true way to get rounded corners except by hand carving the final product.
From the original questioner:
This is how I ended up doing it. Took a long time, but it worked.
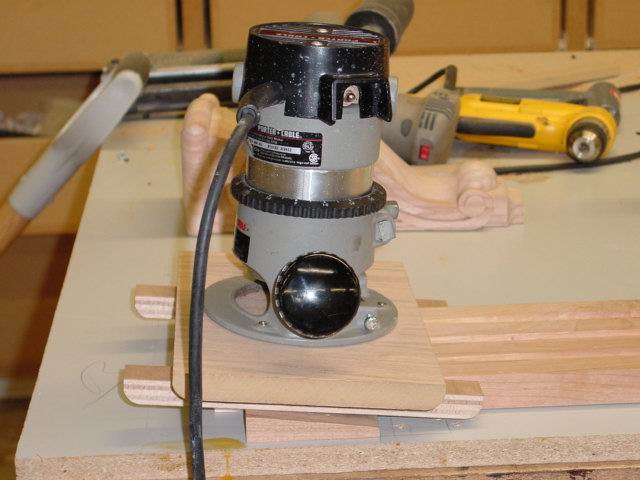
Click Here for full size image