Tricked-Out Job Trailers
An extended thread on how to customize your "shop on wheels" for convenience and efficiency. August 13, 2007
Question
I'm about to embark on building storage cabinets for my cargo trailer for installation equipment and supplies. It's too time consuming to load up for each job. Has anybody built these, and are there any tricks to it? I'm planning on loading up on regular used tools, supplies, etc. that can be left in trailer and just load larger tools, etc. when delivering.
Forum Responses
(Cabinet and Millwork Installation Forum)
From contributor M:
I also work out of a trailer. I build shelves to store all my tools and supplies. Don't use anything heavy like MDF or particleboard. The trailer + tools + shelving = mucho lbs! Can your truck pull that much? Also better on gas. Just keep that in mind. I use 3/8 plywood with 3/4 cleats to keep it from sagging. I also got plastic containers and screw them on to the shelves. It's been almost 3 years now and no problem.
From contributor I:
I'm curious on how you fastened them. I screwed bottoms to cleats on floor and used bungee cords at top to let them move and trailer to flex. After several attempts this is what seems to work best for me. I also used 3/8 ply but ended up using 3/4 in some places, as it didn't hold up. Top shelf I made full length for levels, clamps, etc. Second shelf I made bins to store sandpaper, screws. misc., to keep from sliding around. First shelf is for all handheld power tools.
From contributor A:
Tricking out a utility trailer is a living project. I've been messing with mine for two years now. I've found that I like being able to move everything out of my trailer from time to time, so permanent storage doesn't appeal to me like it once did.
I use one of the Sam's Club shiny silver 72" high baker's rack shelf units in my trailer. It's light, fairly strong and easy to bungee cord stuff down to. I have it strapped all the way to the front of my trailer with metal strapping like you'd hang pipe with. All around the inside of my trailer I mounted E track to the walls. I strap my chop saw and ladders vertically with these. I also use two of the big Stanley roll-around plastic tool boxes for storage. One is for my day to day tools, and high use fasteners, etc. The other is for bulkier storage and tools that I don't use every day. I keep all my fasteners in two small Stanley compartmented storage boxes that sit vertically into the large roll around box. I can keep three nail guns, a laminate trimmer, a Bosch jigsaw and the two Stanley boxes full of fasteners plus assorted junk in my primary box. This normally has everything I need for installing in one tool box that I roll in at the beginning and out at the end of the day.
I attached a web site that sells storage components for utility trailers. This stuff is big bucks and, for me, cost prohibitive. It will, however, give you some good ideas. I'd like to see the pictures when you get your trailer done.
From contributor L:
I built a 6' workbench on wheels. The little table saw has a place to live. I have lots of drawers. I attach it to an inside wall for driving and roll it out back when I get to the jobsite. I also have a miter saw stand on wheels I roll out. I can unload and set up shop in a few minutes. I need to make another little cart for my planer, air compressor, etc. When I need the trailer for large jobs I unload the thing in about 2 minutes and the trailer is empty.
From contributor J:
We installed 3" x 5/4 poplar rails from front to back on 3" x 3" x 1" thick plywood blocks spaced about 16" apart. The bottom rail is about 16" off the floor and there are 4 more rails above it, evenly spaced to within about 8 inches of the ceiling. This allows us to tie, block, screw or wedge just about anything securely.
We have 3/4" plywood L's, U's, H's etc. that we use for transporting moldings, etc. We have a benchtop that hooks over a rail with angle braces to the rail below. We have 24" deep removable shelves that span the front of the trailer.
Our current trailer is 18' long with extra height and works very well. I am planning to build a larger "total shop" trailer in the near future. It will include a small panel saw (SSC), table saw, chop/slider, etc. Regardless of its eventual completion, I'll start with the same hardwood rail system.
From contributor A:
Contributor J, I've seen a similar setup to yours in a delivery truck that comes to my shop. I like it. Do you have a good method to haul/protect countertops?
From contributor J:
We don't do kitchens, so not a lot of tops to move. When we do, they're blanket wrapped and usually tied or strapped to the sidewalls, on edge on the wheel well, with the good side facing the rails. Remember, the 1" space between the sidewall and the rail allows for all kinds of "job specific" engineering.
For deliveries I would not be without:
1. Moving blankets
2. Large mover type rubber bands
3. Shrink wrap
4. Packing tape
5. Cardboard
6. Blocking, wedges, plywood scrap, screws etc.
From the original questioner:
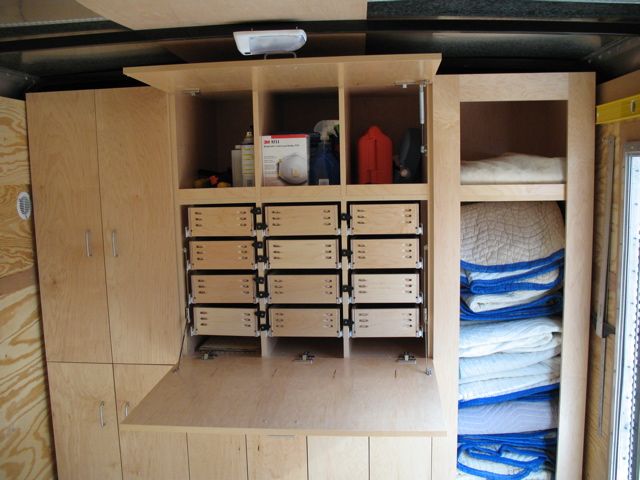
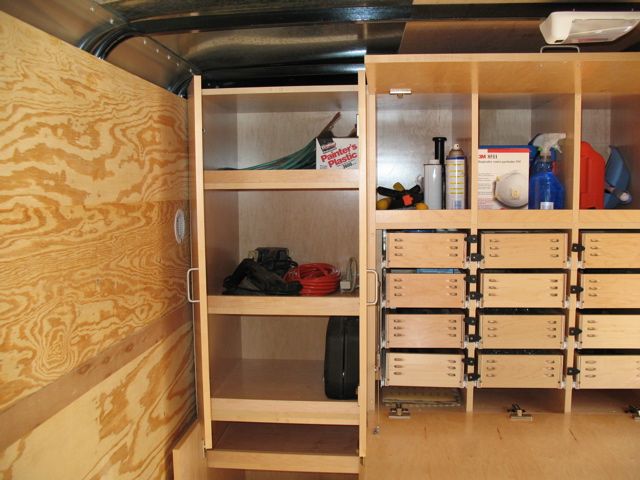
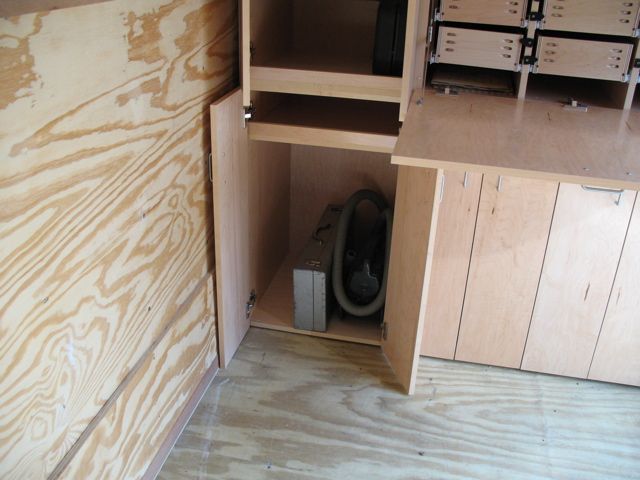
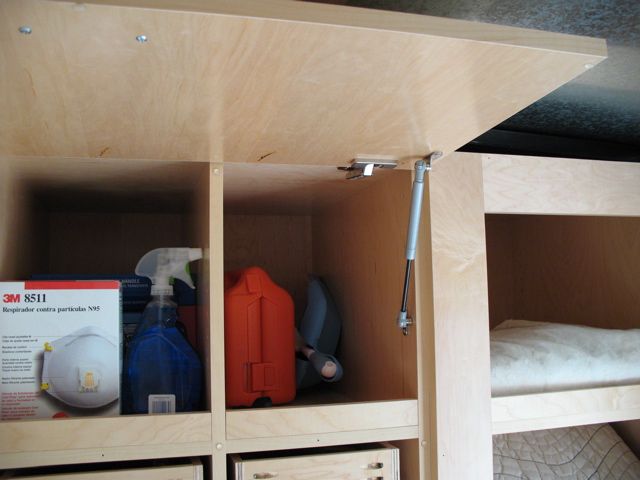
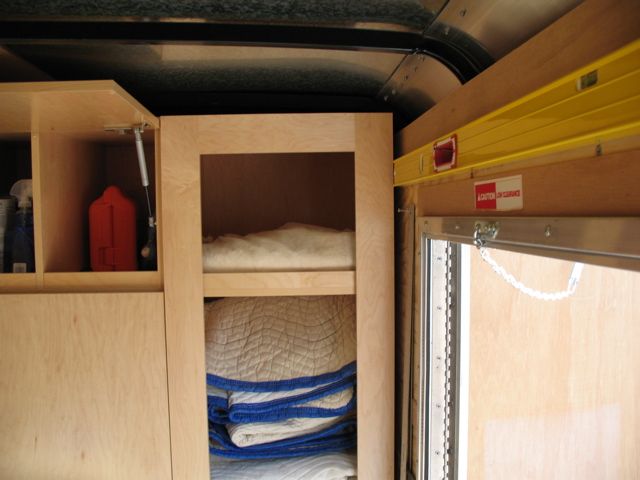
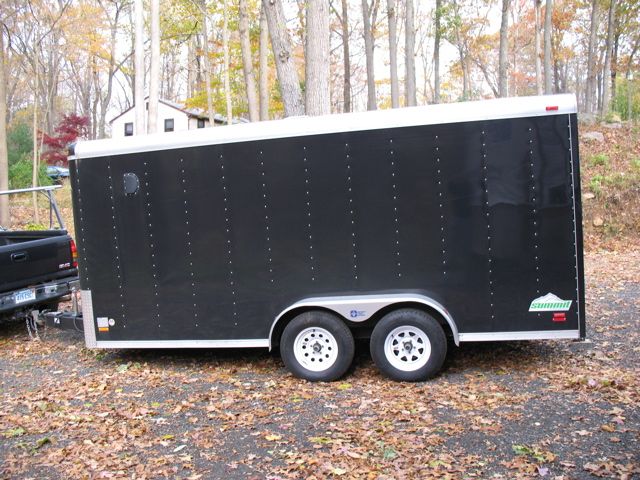
Here are the results of my efforts to trick out my trailer for installs.
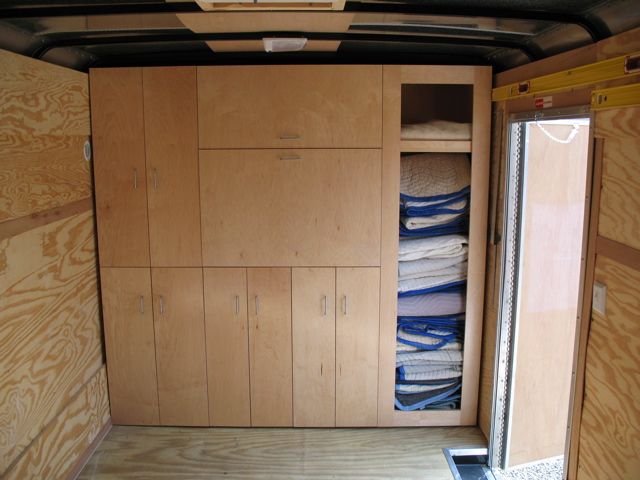
Click here for higher quality, full size image
Click here for higher quality, full size image
Click here for higher quality, full size image
Click here for higher quality, full size image

Click here for higher quality, full size image
Click here for higher quality, full size image

Click here for higher quality, full size image

Click here for higher quality, full size image
Click here for higher quality, full size image

Click here for higher quality, full size image
Click here for higher quality, full size image
From contributor A:
That looks good! Is that pre-finished birch plywood? Thanks for sharing.
From the original questioner:
It's pre-finished B-2 maple.