Vertical Siding
Other Versions
Spanish
Types of siding for "old barn" look. August 9, 2004
Question
To get an "old barn" look for a shop building, I want to install 1x8 redwood vertically. I can tongue and groove the boards through a shaper but am not sure how deep a tongue is needed and not sure whether to nail through the tongue when installing. I do not want the board and batten look. Any thoughts?
Forum Responses
(Architectural Woodworking Forum)
From contributor L:
No need to use a tongue and groove. Most of the boards for a barn were simple but jointed or ship lapped. Install black construction paper on the sheathing or studs and install your vertical siding. If the boards shrink a bunch, the paper will be black and look good.
From the original questioner:
The interior of the shop will be finished out, so it needs to be fairly tight on the exterior. I've even thought about putting silicone caulk between each board for weatherproofing.
From contributor L:
For some reason I thought you were installing the boards on the inside. The procedure is still the same. Installation of a good construction paper and redwood on the exterior is what we've used for many years. What part of the country are you in?
From contributor R:
I'd be hesitant to just butt it together. What about warpage? And tarpaper, if left exposed long enough, may lose its water resistance. You could put in a lap joint like in shiplap - that way the sheathing paper is protected and it's a really easy joint to make. In my neck of the woods we go with at least 1/2" sheathing or we go with firestop in the walls to give a decent nailing point for the siding to help prevent warpage.
From contributor F:
We use board and bat. Nail or screw one side of each board and screw the batten on each seam. The boards expand and contract under the bat and stays air tight. The screws through each batten pass through the gap between the siding boards.
From contributor J:
T&G or shiplap is the way to go - don't leave anyplace for the tar paper to show through. Water will get behind the boards and then into the walls - bad news. The depth of the tongue is usually about 1/4-3/8" but you have to know what moisture content wood you're using and how much it will expand and contract during seasonal changes. You'd have to nail it in the tongue. No fasteners showing though. Shiplap works, too, but you'll see the nails.
From contributor P:
I recently saw a building that had what I would describe as a reverse board and batten. Kind of a neat look I thought. The siding was rough sawn pine 1" thick (probably straight from the saw mill). Both edges were rabbetted on the back side about 1/2" deep. Then a 1/2" x 2" batten was placed between each piece of siding, nesting in the rabbets. The batten appeared to be Hardiboard or other similar material. The siding was stained and the battens were painted a dark grey. Sounds weird, I know, but it worked well in this application - store front of a country crafts store.
From the original questioner:
That is very interesting, contributor P. I was going to put horizontal nailing strips to nail the redwood to. I'm concerned the reverse batten would make the wall stick out too much from the framing. I'm also concerned about how many nails to use to keep the boards from cupping. I'm using KD lumber, but it still will cup when laying around loose. I'm in North Texas.
From contributor F:
That's what is so nice about the vertical board and bat with screws. The main boards float since they are fixed only on one side, the screwed battens holding the floating side(s)down. If the wood is not sealed well it will certainly try to cup. It draws moisture and dries faster on one side and cups toward that side. Barn board didn't tend to cup much since they tended to be exposed on both sides and gave up their moisture pretty much through both faces. Well-attached bats will prevent this even with untreated boards. Keep in mind that you must leave room for the boards to expand and contract or you will certainly get cracking since the boards you describe have little strength in that direction. If they are affixed rigidly on both edges, something has to give when they shrink. I use stainless or painted (bronzed) deck type screws on about 12-16" centers the length of the batten. The boards and bats are sealed before going up and then all are sealed again once in place.
From contributor R:
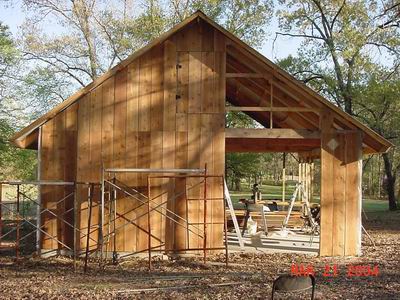
Here's a photo of a barn I'm currently building. I haven't put the bats on yet.