Question (WOODWEB Member) :
We are going through an upscale development and replacing wood door panels that have cracked and shrunk from the sun and weather. Routing out the sticking, remove bad panel, and dropping in a new one, then adding stop that matches original sticking. Discussion about using wood panels for exterior aside (wealthy people who want their rustic wood doors), the superintendent is asking us to caulk around the panels before stopping. My concern is, would silicone or caulk allow sufficient panel movement? Would it give and stretch or would it restrict the movement like glue would?
Forum Responses
(Architectural Woodworking Forum)
From contributor B:
Silicone will remain flexible but probably won't adhere very well. Plus there is the issue of silicone and finishing - a bad combination. Some caulks will remain rubberized but you'll have to research which one to use. Years ago Polyseamseal was great for this but then the company was sold and the caulk was never the same.
Your primary problem area is the bottom sticking where water can flow down the panel and in behind the moulding. Instead of caulk, why not try and come up with a small horizontal flashing that slips into a fine groove cut in the panel and then just wraps over the top of the stop? I've used this method to flash things like mouldings over windows when the sheathing is the siding (T-111 for example).
Panel doors in high exposure areas are never good, but we all end up doing them. There is not a good answer to this question. We just built a large mahogany door window unit with panels in the bottom for a south facing exposure, 10,000 foot elevation and no roof overhang. The unit it replaced had only been in a few years and was totally trashed. Time will tell if we do any better. I usually go back and look things over every 3 to 5 years for a maintenance coat if needed. This one is on the 1 year plan.
In Europe door panels on exposed doors are installed like glass. Blocked with room for expansion and caulked in. We build a lot of doors with glass in the top and panels at the bottom and we do them the same way. This works pretty well till you get to large panels. The Euro system has the advantage of water channels in the rails and weep slots to drain water out.
I have seen failure on doors shipped in from Europe with panels cupping and busting loose of the stop, cracking and leaking. We both have the advantage of working the local market and knowing weather and humidity conditions and hopefully this will make the panels last longer.
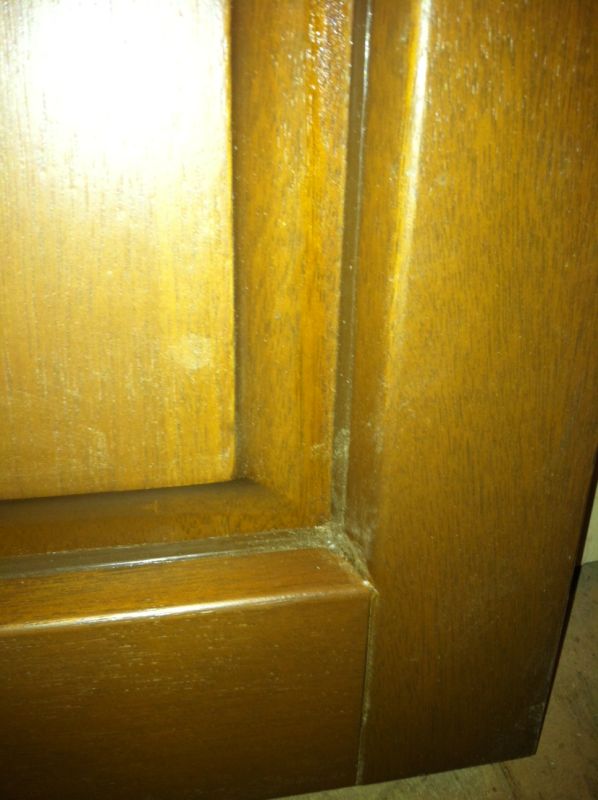
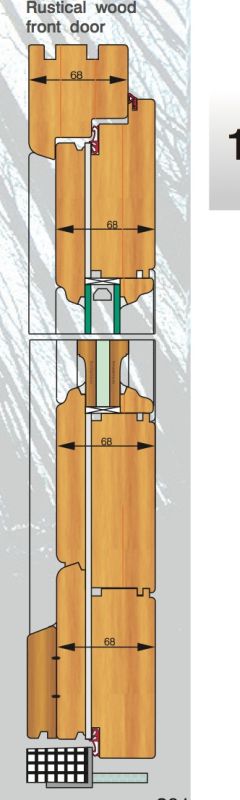
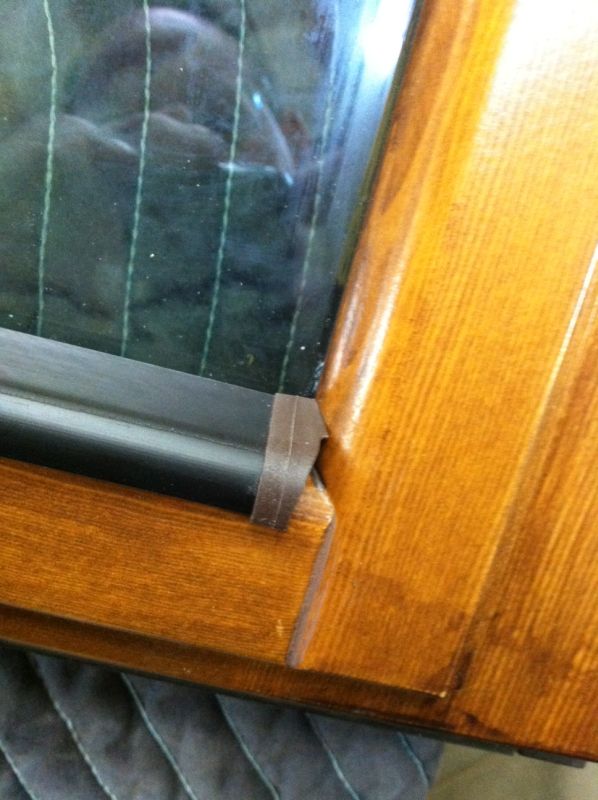
Here is how we set these type panels. Fully finish the panels, set in a bed of silicone (your existing doors probably do not have the caulking notch like the drawing shows, but that makes it better), block it in like glass, only with room for expansion. Another place water gets in is through the stile and rail cope joint. This should be caulked - see pictures. Most door and window finishes have acrylic. Silicone with acrylic is compatible with these finishes and can even be applied between coats.
Double panels are usually better for cracking, but not sure how that works in your moist climate. Single, well finished, one piece might be better.
The best test is to do one door and hit it with a hose. This will show any problems in a hurry.
We route the sticking out on the inside surface and replace the panel by bedding it in latex silicone like we would glass. Then a good solid infill of sealant around the perimeter of the panel, filling the expansion gap, then the interior stops go on. I like to see squeeze out on the exterior, especially at the lower panel/rail joint. We have tried some urethane sealant, but this takes a week or more to set up/clean up, but is supposed to be more flexible over time.
90% of what we do is Honduras mahogany, so panels above 14" are the only ones where we see any movement, and then it is minor.
We also seal the end grain of the panels with epoxy to limit water absorption. We won't warranty those 30" wide panels, unless we make what we call a "stable panel." Narrow panels are better for reducing movement issues.
A stable panel has a manmade core, thick veneers two sides, and a rim of solid wood for the raised profile. These are more costly to make of course, but can be glued in place if you like.
Contributor J, the new panels are designed to be raised on the exterior so any moisture that hits the face won't run behind the sticking (theoretically anyway). Now, I am routing the panels out from the outside. I didn't really want to but I decided to because the reveals on the panels need to be maintained on the outside because of that raised portion I mentioned. I decided to do it that way so I wouldn't be trying to look from the backside to check reveals while applying stop to the other side. That may have been a bad choice - I don't know - but there was method to that reasoning.
Outside stop changes things a bit. That system is popular in coastal areas like the UK and Denmark. A lot of shops on the east coast go this route also. We could probably start an argument over this. The main advantage of stop on the outside is it's better at keeping water from coming into the inside of the house. The disadvantage is the bottom horizontal piece is prone to getting water under it and rotting or damaging the panel.
Since you are committed to this now, I would rout a caulk notch into the stop before you apply it. Sometimes they slope the inside sash at the bottom but this would be difficult to do on a retrofit. In Europe they have developed a metal piece to replace the bottom stop to counter the rotting problem.