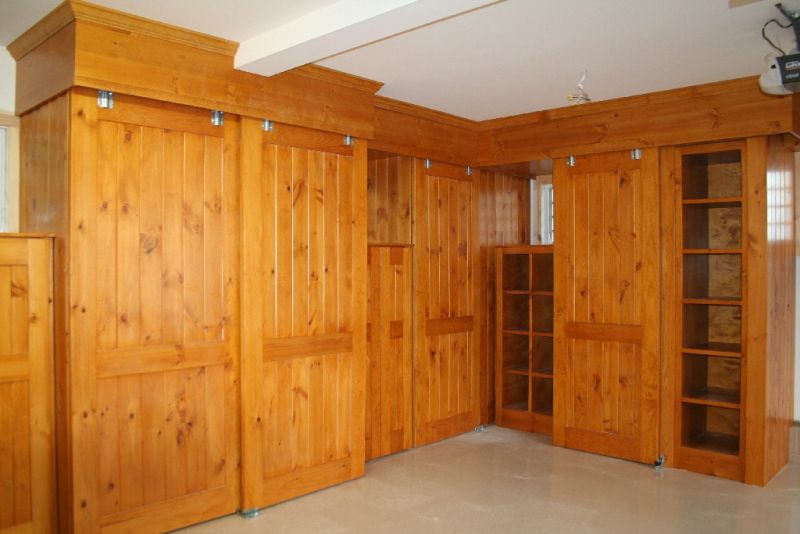
Question
I've been building stave-core stile and rail doors and am not satisfied with my setup for gluing the hardwood veneer to the cores. I made two cauls out of planed 2x4's topped with a 6" wide rip of melamine. I covered the melamine with cellophane tape to keep the glue from sticking and with a bunch of clamps, it doesn't work too bad. I've kicked around the idea of using steel or aluminum for the cauls and maybe even using hydraulics or pneumatics to apply the pressure. Something that will speed production a little bit and still keep things lined up.
Forum Responses
From contributor M:
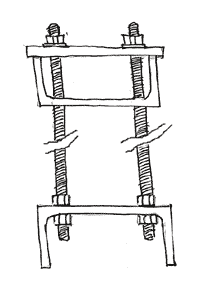
Our doors were all solid wood, but some were built using a different species for front and back. This required laminating stiles and rails from two pieces of 5/4 material surface to surface. We used a shop-built fixture that was fairly easily constructed from pieces of channel iron, threaded rod, nuts and bolts. We spread glue on the mating surfaces of enough stile parts for a couple of doors, dropped them into the fixture, placed channel on top and ran the nuts down using an impact wrench to clamp the stile parts together. I�ve drawn an example of something similar I think would work in your operation (an end view).
The solid wood panels were fabricated as usual and inserted back to back into a single groove that was milled into the stile during the sticking operation.
For what it's worth, we found that a squeegee type of applicator was the fastest and most economical way to spread glue on surfaces like these. We usually just cut up chunks of 1/4" ply. Pour a nice thick line of glue down the middle of the stile surface, hold the ply "squeegee" at a 45 degree angle and spread away. With a bit of experience you can get just enough squeeze-out of glue when clamped to let you know you've used the right amount. Cheap, fast and effective.
My next question involves using my regular cope and stick cutters to make doors with glass panels. I'm thinking I can run them through the shaper as usual and then rip off one side of the stick cut on the table saw to use as glass stop.
I believe my next machinery purchase may be an 8 station clamp carrier to speed up production of the staved cores.
From time to time we built large paint grade doors using poplar. We�d often glue the stiles and rails up like you do for the staved cores (but without the veneer faces). To do that efficiently, we would just stack as many staves as we could fit into the clamps applying glue to one side of each (except the one that would become the trailing edge of each stile). We�d just run a bead of glue on each, flip them all into gluing position, clamp lightly to spread the glue evenly to mating surfaces, and then apply pressure. We could typically do 4 or 5 stiles at a time this way. As each group is glued they�d be hoisted off the table (by 2 guys), set aside and the next group lined up.
A clamp carrier would make this a one-person job and likely speed production.
I think you'll find that any joining method can work well if the doorframe construction is not very complex. Single panel, 2 panel or even 4 panel constructions are not very demanding. Once you get into multi-panel constructions, especially if the design calls for a sandwiched panel (for multi-species or exterior use), assembly times and joint error margins go way up, calling for more accurate and efficient methods. Muntins or rails must be cut with absolute accuracy to make tight joints if you use a joining method that doesn't allow for adjustment - there is no margin for error.
We used loose tenons before going to all-dowel construction. There are advantages and disadvantages to each in my opinion. The tenons are easily machined in the planer, typically .005" to .010" under in thickness (compared to the mortise). We machined mortises on a shop-built, router powered horizontal slot mortiser. We used a 4" long, 1/2" diameter, high-speed steel router bit to mortise slots 2" deep. We did not round the ends of the tenons or try to achieve any kind of tight fit at the ends of the mortises. In fact we left a bit of clearance there. It allowed some joint position adjustment that was important when trying to get all the center muntin/rail joints tight in a complex design.
Most dowel construction methods are completely unforgiving when it comes to joint adjustment. Typical methods including drilling individual joints on a horizontal boring machine require far too much accuracy for tight joints in a complex construction in a custom-production environment. The best system I've seen for joining doorframes was a multiple drill horizontal system that bored all the holes in the stile at once. A similar, mirrored setup bored the holes in the ends of the rails after the more complex center rails and muntins were pre-assembled. That way the stiles could be left a bit long, the top and bottom rails a bit wide. The whole door was trimmed to length and the method used created beautifully tight joints.
We developed a much less expensive system that had the same end result, but was certainly a bit slower. Even so, the system was fast enough to produce doors on a custom-production basis at a nice profit.
Here's the gist of it: First we dadoed a 3/4" x 3/4" slot in the outside edge of the stile(s). Then we set the stile into a jig mounted on a standard drill press. Using a 11/16" dowel boring bit, we drilled through the slot and approximately halfway through the stile wherever we wanted to insert a dowel. Next we assembled the door gluing just the cope and stick joints. This allowed us to clamp sideways and top to bottom at the same time without the hindrance of dowels. After the door was assembled and the glue was dry, we set the door in a jig on the floor, on edge, and drilled through the previously drilled holes which acted as guides with a 5/8" x 9" dowel bit using a heavy duty portable drill. We flipped the door to get rid of the boring chips and drilled the other edge the same way. Flipped again to insert the spiral dowels (5/8 x 5); once more to insert dowels in through the other edge and finally glued in 3/4 x 3/4 matching-wood fillers into the dados. A worker easily accomplished all this drilling with little training.
Though it may sound a bit cumbersome, the procedures were fast since there was little need for extreme accuracy when placing or drilling the holes because the door was already assembled before the actual dowel holes were drilled. The system produced doors with tight joints, relatively quickly with a very small investment.
Comment from contributor T:
Stave core door construction is with a butcher block core. The boards for the core are ripped from flat grain stock and then glued on edge to get a core that is vertical grain. The grain is perpendicular to the faces, so any movement is confined to the thickness of the part, not the width. Commercial slabs are available made from basswood or poplar for interior doors. I make my own cores for exterior doors from good quality eastern pine. Staves should all be made of several pieces with the edges being the only full length peices. This gives a stiffer stile and allows any defects to be cut out. The veneers should be milled to .130" thickness and glued to cores that are 1 1/2" for 1 3/4" doors or 2" for 2 1/4" doors. Thicker veneers are liable to make the part move in its width. The 1/8" veneers are not strong enough to cause a problem.
The discussion about dowels and loose tenons is interesting, but you all are barking up the wrong tree. Solid tenons milled on the ends of your rails is the only good method. It is easier to mill the parts and there are zero errors when assembling the door. The tenons slide into properly prepared mortises and that is the end of it. There are no adjustments to make and the door is solidly made and should last virtually forever.
Sure, you need a big shaper or a real tenoner to cut long tenons, but you are only fooling yourselves and cheating your customers if you use dowels or loose tenons. The first clue is that they are loose. These doors are liable to come apart, like so many production doors do today. Solid tenons cannot fail unless you forget to glue the joint.
Anyone who can accurately measure a part can accurately mark a dowel location. We construct doors as tall as 12' and as wide as 4' with no limitation to design. Our doors construct successfully and you can not take a door apart. In fact you cannot separate the parts after clamping and before glue sets except with sledge hammers and reverse clamping. I will not honor warranty requests for anyone who either drops a door from a high rise building or sledges and reverse clamps my parts before the glue dries. Doweling construction is an old and proven method that may require a high level of accuracy marking parts but cannot be questioned as far as strength and integrity of joint is concerned.