Complementary Materials Enhance Hardwood Installations
Reprinted with permission from The Hardwood Council website.
As clients continue to demand one-of-a-kind installations, creative building professionals have started to add unique accents in their custom homes. They are combining the beauty of North American hardwoods with contrasting materials like ceramic tile, brass, slate, marble and other stone products.
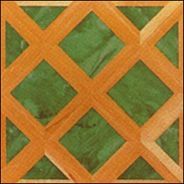
White oak surrounds jade-colored avonite stone tiles in this exquisite flooring installation.
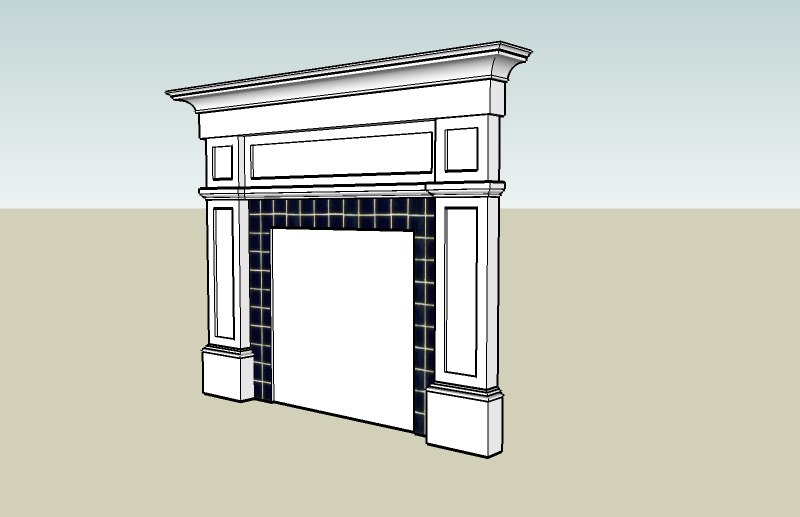
Ceramic tile accents a walnut fireplace mantel. A dark slate inlay borders a blonde maple floor. A marble countertop balances rich cherry millwork and cabinetry. An elaborate inlay of hardwoods, brass and natural stones create a unique welcome in a gorgeous foyer. These are just a few of the multimedia combinations that can create strong decorative themes and impressive results with only a few additional planning steps.
Creating Unique Multimedia Installations
All building materials have individual characteristics to consider in your construction. Here's how to work with, install and finish other building materials in conjunction with North American hardwoods.
| Hardwood Expansion / Contraction Tendencies In most instances, expansion and contraction of hardwood occurs more across the width of a board than along its length. For this reason, you should try to install the hardwood flooring strips with the ends abutting the other building material when possible (see illustration). These precautions allow hardwood to expand and contract more freely without putting any direct and unnecessary stress on the secondary material. Layout and pre-planning for the predicted expansion of the wood flooring is critical. Wood direction, orientation and starting lines may change with each installation. Vertical Applications |
Installation Considerations
Ceramic tile, marble, slate, stone, brass and glass block can be installed on or over most any surface, providing the material is solid, clean, dry and flat or plumb. This allows you to create interesting inlays in hardwood flooring, stair treads, countertops, mantels, hearths, cabinetry, shelving, wainscoting, paneling and decorative millwork.
Regardless of the materials involved, or the size of the project, planning is the most important step. Take exact measurements and design specific plans before beginning any work.
In this instance, a 2' square ceramic tile medallion is installed 45 degrees off center (diamond-style) in the middle of the room, and surrounded by a hardwood floor. The dimensions of the room are 12' x 12', with a 3/4" plywood subfloor. The hardwood flooring is unfinished, 3/4" thick, 2 1/4" wide, select red oak. The medallion is four 12" x 12", hand-painted, ceramic tiles that are 1/4" thick (see illustration).
Since the ends of the hardwood flooring abut the secondary material, the flooring in this project will have a "fanning" effect as it works out from the medallion.
Keep in mind that each building material is unique and often many factors dictate which material is installed first. The working drawings, building schedules and finishing requirements all must be thought out before the start of construction.
For this example, you'll install the ceramic tiles first because it is easier to work around the smaller inlay. Since the tiles are 1/4" thick and your hardwood flooring is 3/4" thick, you'll need to add a 2' x 2' square of 1/2" plywood under the medallion inset to make the two materials level.
Finishing Guidelines
Once you've anchored the 2' x 2' plywood lift, follow the manufacturer's guidelines to install, grout and finish the tile, allowing necessary drying times.
It's important to finish each material as you install it. You installed the tiles first, so they should be finished before beginning work on the hardwood flooring. Always follow the manufacturer's instructions when finishing and cleaning these secondary materials because some are pre-finished.

Remember that most secondary materials are cleaned with water, which can damage your neighboring hardwood flooring. To protect against moisture damage, thoroughly seal the sides and bottoms of any hardwood that you'll install next to the medallion. Consult Hardwoods in the Bath: Finishing for Wet, Humid Environments, for more information on finishes that guard against moisture penetration.
Hardwood Flooring Direction
Once the tiles have completely set, carefully cover and mask off the medallion for protection while you work on the hardwood flooring. Begin installing the hardwood, following normal guidelines as discussed in Installing Hardwood Floors Over Concrete Slabs. For each side of the diamond, start in the center and use a slip tongue for reversing direction at the mid-points of the walls, where the 45 degree miters are aligned with the diamond points. Remember to join the hardwood and ceramic tiles with a flexible grout, leaving between 1/8" to 1/4" for the wood's expansion and contraction in this case.
If the flooring is unfinished, make sure the secondary material is still masked off before applying any stains or finishes. Refer to Hardwood Flooring and Millwork Finishing Options: Pre-Finished or Site-Finished?, for more information on finishing hardwoods.
Cleaning and Maintenance Techniques
Proper maintenance is critical to the success of a multimedia installation. Hardwoods and secondary materials usually require different cleaning aids which are detrimental to each other.
Ceramic tile, marble, slate and stone are easy to maintain, requiring routine cleaning with a damp cloth or mop. Avoid soaking the area because excess water can harm the grouting, adhesive and neighboring woodwork.
For brass, numerous commercial cleaners exist to prevent the inlay from dulling. Apply these cleaners by hand, and take care not to let any solution set on the hardwood because they can stain or bleach the wood.
Day-to-day hardwood maintenance will depend on the floor's finish. In most instances, sweeping, vacuuming, and/or dusting at least once a week will keep the floor free of dirt and dust that can damage the finish. Use cleaning and maintenance products recommended by the finish manufacturer. Quickly dry any standing water and other spills, and avoid using harsh cleaners. These simple tips will help add to the life and beauty of the floor.
When the hardwood floor needs sanding, recoating or refinishing, carefully mask off the other material, sanding around the inlays by hand. Don't use a power sander near the sensitive areas. Take the same precautions when applying the new stains and finish, making sure not to spill anything onto the secondary material.
Similarly, stone materials sometimes need a thorough cleaning that can be dangerous to hardwoods. Oxalic acid is the primary chemical used to clean most stone surfaces, and also is a chemical that will bleach hardwoods. Be careful to mask off the adjoining materials during any intensive cleaning procedure to protect hardwoods from discoloration. If you do spill any harmful liquids, quickly dilute the spill with the proper thinning agent and thoroughly dry it as quickly as possible.
QuickTips
Subfloor Considerations
Since almost every building material is sensitive to moisture, the subfloor must be dry before beginning any installation. If you are working with a plywood subfloor, turn on the building's heating system and let it run for at least 72 hours prior to your installation. If the subfloor is concrete, take a one-foot square piece of clear polyethylene film to the slab in several areas, sealing all edges with plastic packing tape. After 24 hours, if there is no moisture on the underside of the film, you can consider the slab dry enough for wood flooring applications. Always install a polyethylene vapor barrier when working over concrete.
Purchasing Materials
As a precaution, buy about 10 percent more material than you actually need for the job. If you mis-cut a piece of flooring or break a tile, you'll have a perfectly matched replacement.
Technical assistance and/or photos provided by: Harris-Tarkett, Inc., Johnson City, Tenn.; Lodestar, New York, N.Y.; National Oak Flooring Manufacturers Association, Memphis, Tenn.; National Wood Flooring Association, Manchester, Mo.; Ornamental Mouldings, Archdale, N.C.; Tile & Designs, Inc., Pittsburgh, Pa.; and, Wood-Mode, Kreamer, Pa.
� 1999 The Hardwood Council
Reprinted with permission from The Hardwood Council website.