Beaded Face Frame Joinery
Detailed explanations with photos and drawings of how to achieve nice jack-miter joints on beaded face frames. April 16, 2009
Question
I have not done a beaded face frame yet and wanted to play around with it in my spare time. Can someone explain easily how the ends are done so that the stile and rail match up? I think I have it, but don't want to be doing more than I need.
Forum Responses
(Cabinetmaking Forum)
From contributor M:
If you're only doing them occasionally, you can just add the beaded molding to standard face frame openings - nothing special required. No one except people on this forum would know the difference.
From contributor E:
I use the Magic molder head on the radial arm saw for the middle (hutch) and band saw for the top and bottom rail. Also I'm building a machine with W&H cutter head and pneumatic table.
From contributor R:
I use a 45 degree chamfer bit in my router table. I modify the bit by removing the bearing and grinding off the stud. Now, by setting the height right, and using a miter gauge or sled, you can cut the bead away on the ends or in the middle. Works great, and because the bit is 45 degrees, the bead miters work well. I used to have some pictures, but I think I lost them last year.
From contributor S:
I made a simple router jig to do jack miters in the field. The same concept can be adapted to your beaded face frame. I use the same bit modification as contributor R does and a home made wooden accessory fence for cutting the ears on my SCMS.
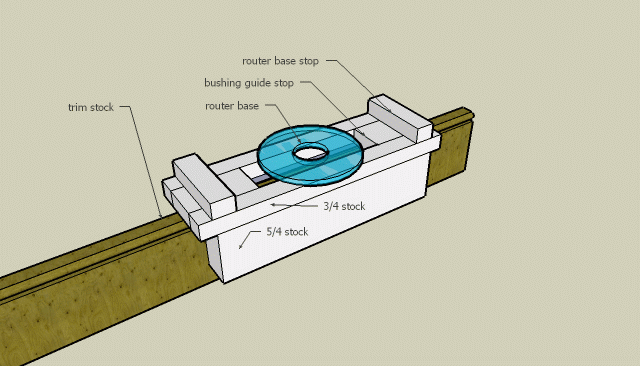
Click here for higher quality, full size image
From the original questioner:
Thanks. I get the how to do the "bead" just fine - I'm looking for how to join or match them when the stile and rail meet.
If the jig was a little shorter on the ends, wouldn't that allow for it to pass rail/stile allowing for you to complete the corner where they meet? If so that would work the large openings.
From contributor J:
Mortise and tenon ideally, or dowels, or pocket screws - what are you set up to do?
From the original questioner:
I use pocket screws, but not that type of joinery. I'm trying to see what options there are for making the bead go away on the stile where the rail joins it. I see that it's simple to run a bead on the straight stock, but what's the trick to making them match up? Obviously a center rail will then need two beads and the bead removed on the stile, but how?
From contributor I:
That's what they're showing you...
From contributor K:
Try these two links
Beaded Face Frame Fabrication
Jig for Beaded Face Frames
From contributor S:
What you want is called a jack miter. You miter off the bead for the rail and rip and miter the bead off for the stile.
From the original questioner:
I didn't say I was the sharpest tool in the pile... I thought that was how it was accomplished, but then thought there must be something I'm missing and an easier way. Guess not...
Contributor S, with that jig you show in the picture, do you use that to run the bead prior to joining?
Here is where my mind is at. The deal in the right corner is what I was taught with many years ago to mark jambs for casing. As you can see it overlaps up the side and then when you move it to the head it would intersect and give you a nice reveal. Why can't it apply here?
B=router base
A=guide/stop
Obviously crude and not to scale, but gives the idea. The bit used could even come to a point, be rounded or beveled. You could adjust the width with the guide and the stop with A. Just can't get in tight areas. Possible?
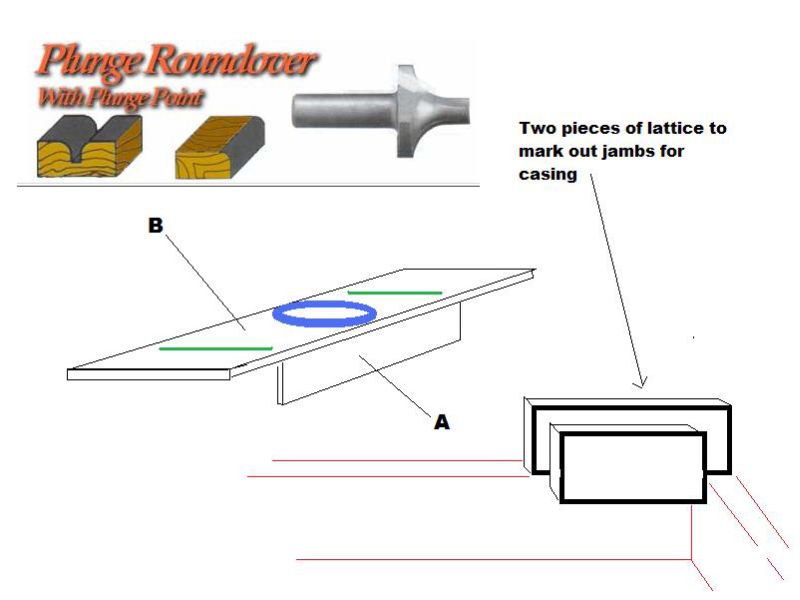
Click here for higher quality, full size image
From contributor S:
The bead is milled prior to cutting stock for face frame (or casing). For the occasional few beaded face frames, you can use the jig that I posted, and for field work like casing it works fine, but for any serious amount I would consider the Hoffman machine.
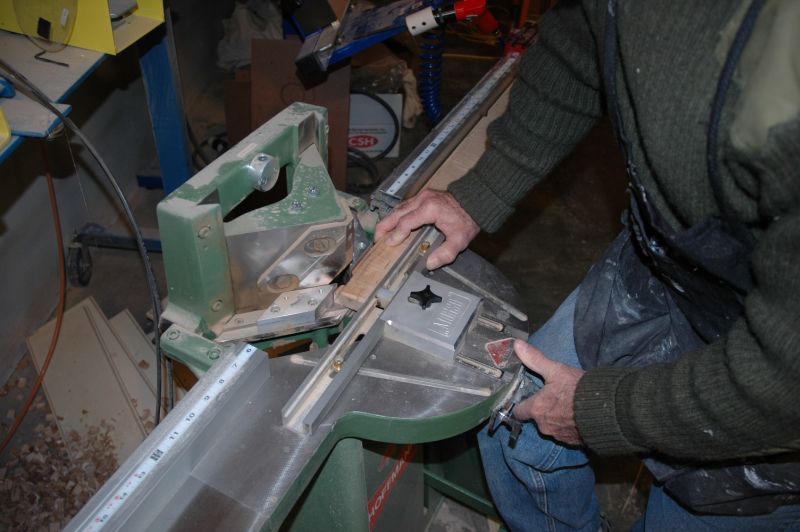
From contributor B:
Here's how I do beaded face frames.
1) Cut the bead. I use a W&M molder of which I added the variable speed control to slow the cut and keep it clean. My setup on the bed has a dedicated jig so I can repeat all cuts today or next year.
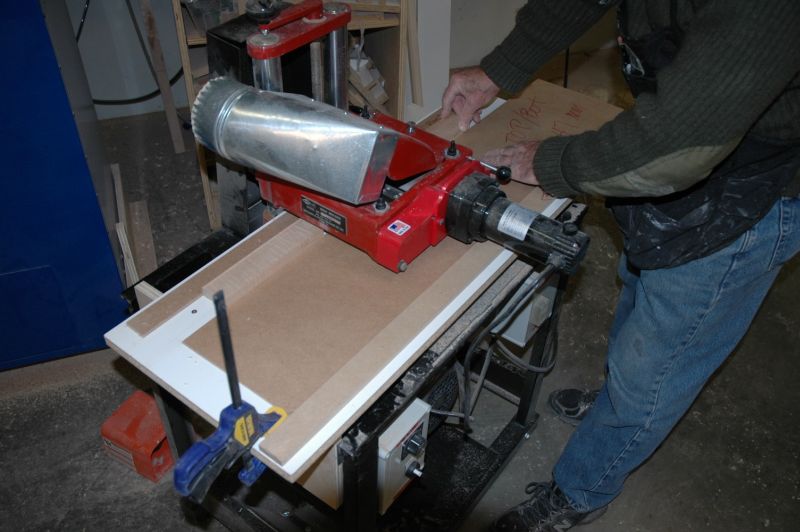
Click here for higher quality, full size image
2) The Kreg pocket hole machine is quick and painless. Here it's set up for single holes for all of the rails.
Click here for higher quality, full size image
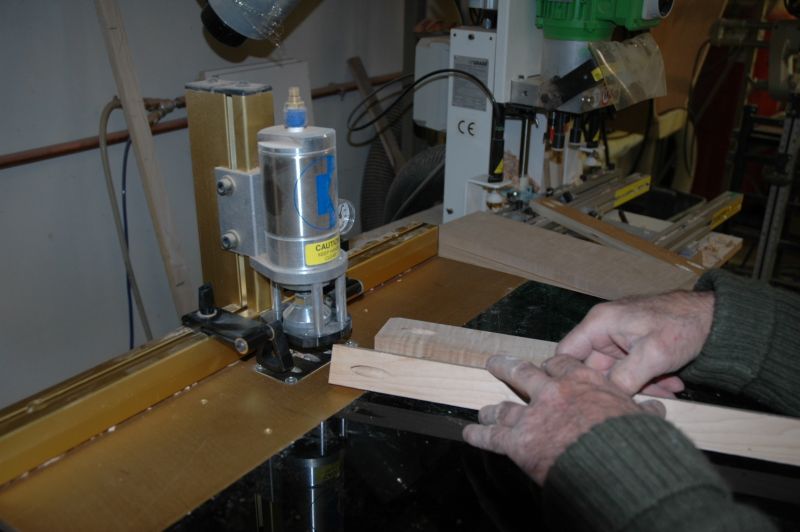
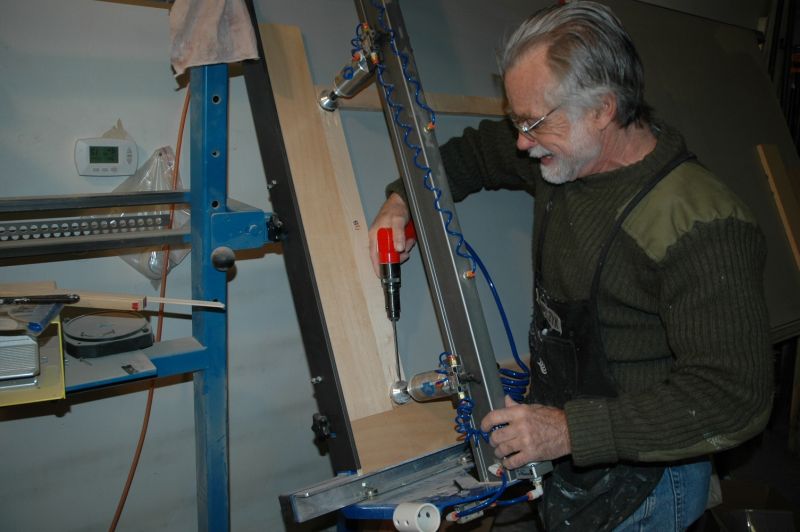
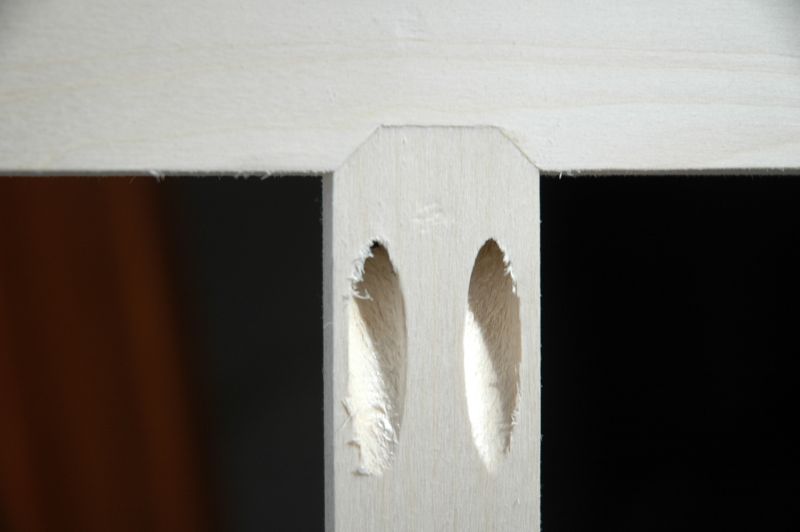
3) This is the Morso notcher for face frames. A foot operated knife cuts away the material only as deep as the bead. Rails will just have a 45 degree sliced at the bead at each end. This is a great tool to have if you own a SawStop and would still like the opportunity to remove a finger or two. Guard removed for clarity. (sure!)
Click here for higher quality, full size image
4) Assemble the frames really fast with the Kreg assembly table. The table keeps everything square and flat on the face side so you're not sanding forever.
Click here for higher quality, full size image
5) Here's the finished back-side. Spending the time to set up everything pays off in the end.
Click here for higher quality, full size image
6) Here's the front. I have done mostly Euro cabinets up to now. When I had the opportunity to do more face frame jobs, I invested in the equipment to do it right. Now they are painless.
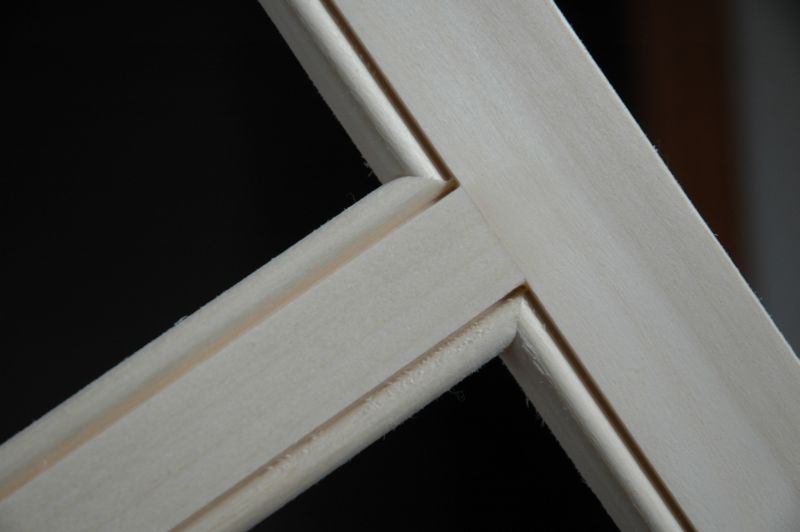
Click here for higher quality, full size image
From the original questioner:
Thanks for taking the time and effort - much appreciated. In picture 3, the Morso removes the notch/bead including the 45? So the mating piece can match up. The 45 on the other piece is just the bead.
From contributor B:
You got it. The last finished pics are one bite of the Morso. I made this stock width to equal that bite exactly, so the fit is tight.
From contributor C:
Nice setup. Investing in the right tools always pays dividends. A couple questions � In picture 3 I notice you are using the glide stop fence in lieu of the Morso stops. Do you find that a worthwhile improvement? You must be referencing the end notch from the opposite end of the stile. Why not use the Morso stops that fit on the sliding back fence?
From contributor B:
Glide Stops are way better than what came with the Morso. Morso had too much play and accurate repeatability is the name of the game here.
From contributor T:
We had our sharpening people grind a bead cutter out of an unused 3-wing 3/8" straight carbide shaper cutter, to run the frame stock bead by shaper with feeder.
The haunching-notching is done similar to the Morso machine except it is done on an old heavy foot power H/C mortise machine. With a custom knife welded on to a 1/2" hollow chisel, having a 45 degree at each end and about 3/4" inch between. Sharp, it cuts away well but requires a wood bed on the table to protect the edge and clean cut. Once frame section is in the clamp, the increment cuts are moved using the fine sliding table adjustments on the old 556 Fay & Egan machine. Frames are then pocket screw cut for assembly.
Not as fancy as the made-for systems, but not as costly either. Always amazed reading here at all the deep pockets out there, to snap up special tools so easily.
From contributor F:
I tried a sample of this technique. Unjoined, the face frames look fine. However, my stock is thin: 5/4 wide. I'm only getting one pocket screw into it safely. And where I have rails meeting a mid-stile at the same elevation (i.e. two drawers separated by a mid-stile), getting screws in both directions is a trick I cannot perform.
Can one reliable biscuit join this style of stile? Note that the notches in the rail prevent the FF cutter from contacting the frame, so a typical biscuit slot isn't possible. Can I cut the slot into the rear of the frame? So that the biscuit is oriented parallel with my mid-stile where it meets the rail? Yes, the biscuit would be visible to the folks inside the face frame.