Building Up New Stair Treads
Woodworkers discuss techniques for applying new stair treads over the top of existing stairs. November 26, 2007
Question
I am replacing a staircase in a 100+ year old home, which is nearly gutted and is being redone. The stairway had a wall that was removed to open it up. The wall was simply 5/4 boards strung from the second floor joists to the first floor joists and faced with lath and plaster.
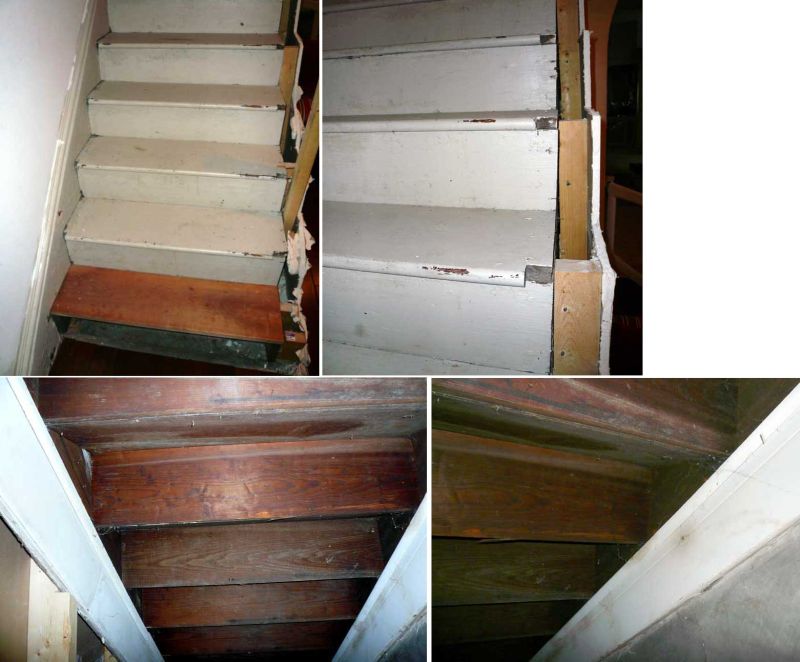
The walls were framed and drywalled. The 2x4's were notched under the stringer and placed on 16" centers (take a look at the lower left picture). The wall to the left of the stairs (as looking up from the bottom) retains the original wall and base. You can see in the upper right picture that the 2x4's are cut to support the outer edges of wider treads. The treads are getting replaced with q-sawn red oak and the risers with poplar. There will be spindles the whole way up for the rail, which needs to make a 180 degree turn at the top and goes about 8' to an open hallway which terminates to another stairway to the attic. Fortunately, I can get to the underside, as shown in the lower two pictures.
Should I worry about any additional structural treatments? It is currently very solid.
What is the best way to attach the treads and risers?
What should the face treatment of the treads be, where they meet the drywall?
I have all the necessary tools and W&H moulder to make and trim products I may need.
Click here for higher quality, full size image
Forum Responses
(Architectural Woodworking Forum)
From contributor J:
As for the existing treads and risers, leave them in place. Rip/chisel the existing bullnose off the treads to make them as flush as possible. Attach your new risers and treads directly over the existing ones. You may run into a transition problem at the top of the stairs, but a little planning can all but eliminate that. Extend your treads over the drywall and return.
From the original questioner:
I was thinking of doing that, but since the treads and risers are just nailed in place, I am not satisfied that it would be a good choice for future stability and prevention of creaks and cracks. I guess I could screw and glue each one?
If the "place on top of" solution is viable, I have some excellent 4/4 wide quartersawn red oak in stock that I could use. It finishes at 3/4 comfortable... beautiful material, lots of ray flecks!
From contributor R:
The "place on top" option would only be good if a similar amount of flooring is placed on top of both the lower and upper floors. When building stairs, it is important for each step to be the same height. I think most building codes state that the difference between the shortest rise and the highest rise must be less than 3/8". I think they should be within 1/8", since people trip on small changes. Adding material of 3/4" without changing flooring would increase the bottom rise and decrease the top rise, giving a difference of 1 1/2" between the shortest and highest, way beyond any codes.
From the original questioner:
Actually, there has been 3/4 inch flooring installed at the bottom, and the second floor hardwood is going in now. So, I guess problem #1 is solved. The second floor hardwood is running parallel to the travel of the steps (end-grain will meet the top of the steps). What would be the proper way to deal with that?
From contributor E:
If you are going to overlay the treads and risers, I would just use Liquid Nails and nail them on. There will be a little shrinkage, so don't nail too close to the edges of the boards. The bullnose on the front can be laminated to the edge of the 3/4" tread, and be 1" or 1-1/4" thick with a rabbet to hang down over the top of the riser. This will allow for a gap and some shrinkage at the top of the riser. By working your way up the stairs, you can install a tread (with rabbeted bullnose) tight to the first riser, drop the next riser down tight to the tread, and continue up the stairs until your back and knees hurt. I would install a matching skirt-board on the right side, before installing the treads and risers. Snap a line for the top to match the other side, and scribe it to fit around the rise and run of the steps. If you get within 1/4", everything will cover with the treads and risers. Make an adjustable end-guide for the treads and risers (two end blocks with wing nuts and slots to match the out-of-square sides) and cut the treads and risers tight to both sides. The handrail and balusters is another chapter.