Choices for Sanding Moulding
Hand-sanding mouldings is tedious and time-consuming. Here's a set of suggestions for mechanizing the process. July 23, 2005
Question
I am looking for a way to sand the moulding I make with a W&H Moulder. Right now I just sand by hand, however that really makes my tendonitis flare up. I have been looking at the QuickWood products, but my first impression is that it will deteriorate the profile. I am curious as to what other people do for sanding moulding. It would also be nice to be able to scuff sand as well, but it�s not necessary. Most of the moulding runs are less than 2000 feet. Any insight would be greatly appreciated.
Forum Responses
(Architectural Woodworking Forum)
From contributor E:
I had one of the QuickWood sanders for mouldings at my last shop and you can�t go wrong. I am currently trying to talk the owners of the shop I am at now into one. The profile does not get wiped out either, and it does a fine job as long as it set-up right.
From contributor G:
To the original questioner: How much sanding do you need for staining and painting? What kinds of wood are you using?
From the original questioner:
To contributor G: It needs to be sanded for staining. Most of the trim I do is oak and black ash, however knotty pine jobs keep popping up.
From contributor S:
One way to sand moldings is to take the molding and glue 80 grit sandpaper to it. Then take some foam insulation board and rub it over the profile, and get a reverse pattern. Then glue sandpaper to the block, I use contact cement.
But I still see guys in the shop sanding the profiles by hand.. I bought a used Profilematic molding sander, but it�s not worth setting up unless you have at least 2000 feet, so I sold it. Now I bought a used Holz-Her molding sander that you pour a latex epoxy over the moulding for a mold, and mount it to the unit.
From contributor G:
I've done many 1000's of feet of red oak crown by water-popping the wood. This removes the glaze or polished surface produced by the moulder, allowing the stain to bite in evenly. After staining and two sealer coats of lacquer (post cat), I scuff sand with a Scotchbrite pad to remove nibs and finish coat. I can do a thousand feet a day by myself using this method.
From contributor G:
Another method I use is to wet it evenly with water and use a t-shirt rag. I use carts with sticks on them that hold eight 12 foot lengths. By the time I've wet the last cart, the first is dry enough to stain. By the time I've stained the last cart, the first is ready to spray.
From contributor B:
Make sure the moulding is as good as possible off the W&H. Sharp knives (remove burr left from grinder and make sure to have proper back and side clearance), balanced knives - any vibration in the machine will create a bad finish. Shoot for 25-30 lf/min. If you go too slow, it will glaze and/or burn the wood.
If you do it too fast, it will leave to much space between the knife marks. If the profile is deep, try a light pass and then a finish cut � which is not always possible. The chip breaker before the knife and the pressure shoe after the knife are keys to a good finish. Too much pressure and the board will not feed. Too little and the knife will pull the board up off the bed and leave chatter marks. Have the wood close to the finished thickness before going to the W&H. On a casing with a deep cut, I have seen guys pre-cut some of the waste wood on a shaper using a raised panel cutter. This lessens the chip load for the W&H to remove.
From contributor C:
To the original questioner: There are companies that specialize in manufacturing sanding wheels for different types of sanding operations. One such company is Bardo Abrasives. Here's a web page with information on their products. If you need any technical assistance, feel free to contact Craig Waldon at 1-800-TOOLING [1-800-866-5464]. He can advise you on what type of wheel would work best for your application and machinery.
Bardo Sanding Wheels
http://www.woodtechtooling.com/Bardo_Sanding_Wheels/bardo_sanding_wheels.html
From contributor L:
I bought my W&H moulding machine with the table that they offered. It has the motor hanging from a plate that is on a hinge to allow the motor to move up and down as you crank the handle when you are adjusting it. My motor used to bounce and shimmy, which caused all kinds of uneven chatter marks in my moldings, which made for a lot of sanding. I removed the motor hang and built a new one using a set of 100LB ball bearing drawer slides.
I mounted the motor on a piece of plywood and then the drawer tracks on the backside of that. Then I mounted another piece of plywood to the frame of the W&H stand and the mate to the drawer tracks. Now the motor is directly below the arbor pulley and moves in a vertical direction when the crank is turned. This has greatly reduced the chatter I get and I can hand sand with 150 grit in no time.
I also made a machine to sand my moldings. This was before I made the adjustment to the W&H. The sander has a flappy wheel and does a great job. I use a stock feeder with it, which is not shown in the picture below.
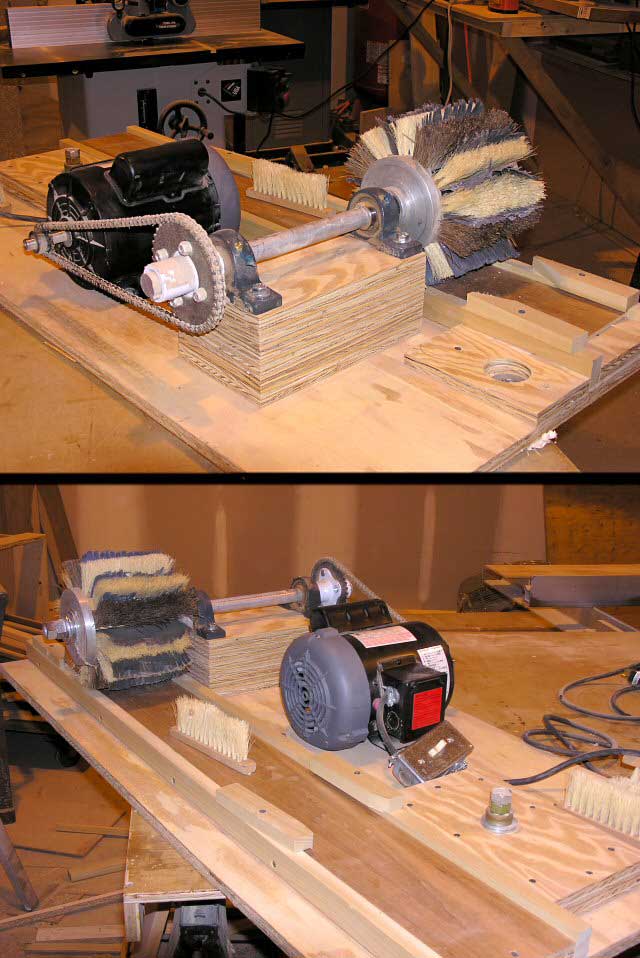
"Photo by Leo R Graywacz Jr".
From the original questioner:
To contributor L: That looks like a great idea. What king of sandpaper is on the wheel? How many RPM's did you end up with on the head, and how much dust did it produce?
From contributor L:
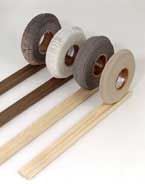
To the original questioner: For sandpaper I used a J weight 180 grit. It doesn't produce a lot of dust, but it is a fine dust that gets into the air. If you put a shroud with a vacuum attached to it you could reduce it substantially. The motor is a half horse with a 13:40 gear/chain setup (go-cart stuff) which gives you about 560 RPM.
From contributor M:
To contributor L: I am thinking of making a machine pretty much like yours. Does it knock much detail off the mouldings? I use mainly oak, maple and cherry. I hate the hand sanding though. What make
is the wheel?
From contributor L:
To contributor M: I usually do a lot of poplar moldings through my machine, and it doesn't alter the detail very much. The pointed 90� corners on the molding surfaces are done a little bit more than if you did them by hand, but it is not overdone at all. The secret is to make sure you get sandpaper that is cut into 1/8"-1/4" strips at the ends. Without looking at the wheel I don't know who makes it, I got it second hand for about $60. It is 6" wide.