Question
I recently completed two of these doorways. I framed a square opening to match the arch provided, installed jambs and trim, but then I had to fit these molding pieces to the corbels. The pieces were half roundish, about 1" thick, and 1 3/8" wide. It took a while, which makes me wonder if there is an easier way. I tried to align the corbel over the trim and eyeball a line. I then cut short of the line. I filed and test fit and filed and test fit.
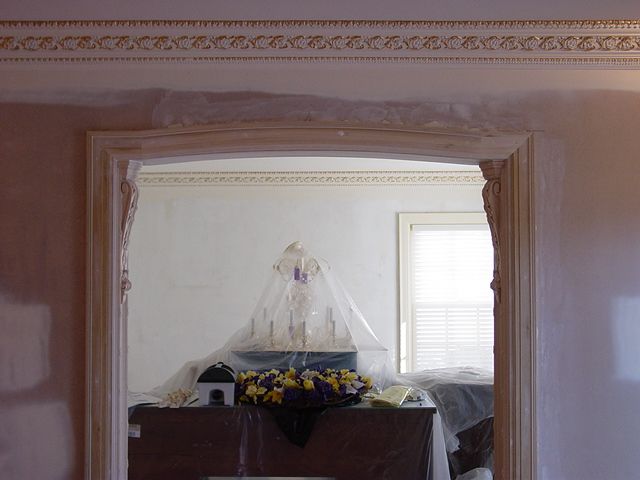
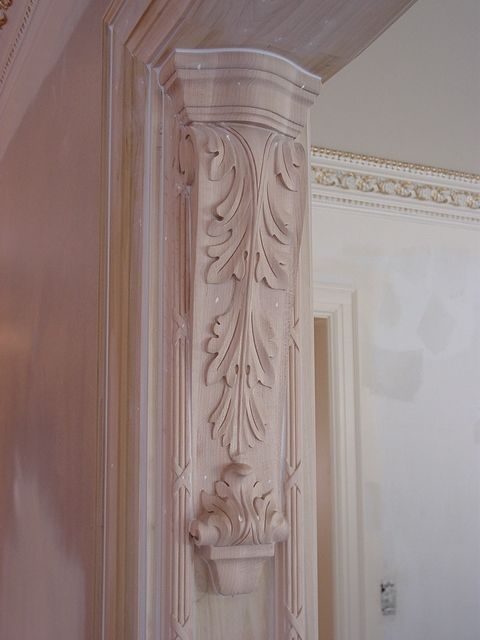
Here is the corbel.
Forum Responses
(Cabinet and Millwork Installation Forum)
From Gary Katz, forum technical advisor:
Far out! Is that J.P. Weaver reed-and-ribbon molding? Or is it wood? I think you done good for what you had to do. Too bad the jamb wasn't wider, huh? Everything good - at least most everything good - happens in the planning stage, doesn't it? I mean, if you consider that most things that are bad happen at that point. :)
Is that jam on a radius (curved) wall?
I guess the only thing I might have done different was build the jamb out wider, installed backouts of some kind behind the casing, so that I had room for the molding to run past the corbel, or... installed a plaque under the corbel, almost the width of the jamb, so that the molding terminated beneath the corbel, or... do exactly what you did? Looks nice to me.
To the point now. I was just wondering... If one is forced into having to scribe and fit irregularly shaped or highly profiled pieces to other pieces, is there a way to accurately mark and cut the pieces? I mean, other than filing and test fitting and filing and test fitting? It took me about 2.5 hours to fit and install what you see in the second picture. Times 4 sides is 10 hours. It seems like a lot of time. I didn't rush it, as I had only enough pieces for the job. Thanks for the response.
One basic fundament when using a pencil compass to mark for scribe is that the compass needs to be held as parallel as possible to the direction that the piece of scribed work needs to move. In other words, in the case of the corbel, the compass would be held as perfectly perpendicular to its vertical plane as possible while marking the casings.
I have to confess that like Gary, I can't really discern much by looking at those photos as far as exactly what you did. The photos are vague and it could all be mistaken for plaster work. Last tip, learn to use a coping saw and it will become one of your best friends when it comes to fitting things.
I was faced with the same kind of thorn on a mantel with a keystone. I started scribing moldings into the keystone and then realized that I'd spend too much time doing something that was going to have a questionable look when finished, so I ended up backing out the keystone and terminating the moldings against the backout, rather than letting the moldings come in contact with the keystone.
Gary, I did make a template of sorts out of thin cardboard and used that in addition to setting the corbel over the rounded molding to eyeball the best line. I wanted to make sure things were fitting before I fastened them. I jigsawed the waste, then filed and test fit. Sometimes I feel like I'm doing things the hard way, then I come to find out that there is no easy way. The 2.5 hours/corbel was the average of the 4 sides. I was starting to get faster as I went, but like some things I do, I felt as if I was moving in slow motion. Thanks for all the help.
In your case, much like Gary's keystone problem, the solution may have been to use deeper jambs and then the casing could be modified to include a back band to carry the extra distance back to the wall.
Of course in that same vein is a more obvious solution of using a corbel that was the correct size in width for the cased opening's jamb depth. I understand that you had other parties involved. These sorts of problems are bound to occur when there are no detail drawings or calculations made in advance of ordering the millwork pieces. The designer was pretty sure the parts were correct!
I have helped out a few finish carpenters in my time when they came to an impasse doing some difficult project. The solution? Often all that is needed to figure it out are a few quick full scale drawings or sections on a scrap of floor paper or cardboard.