Question
We do a lot of high-end cabinetwork with a beaded inset design. My partner is bothered by the crack that will appear between the bead and the face frame. We use an applied bead. He wants to try and caulk this crack, which I think will be a nightmare. Should we even be concerned with the slight crack in some places, or is there a method for installing that would eliminate this crack?
Forum Responses
From contributor E:
Could you use face frame and door stock that has the bead moulded in?
The first jig is for the stiles and has stops for the corresponding rails, so I can clamp the two matching stiles back to back in the jig and then take a trim router (it is much easier to work with) with a clear rectangular base and a 45 degree chamfer bit (with the bearing removed and the post ground off so it will work as a bottom clearing bit-> \_/ ) then carefully start nibbling and climb cutting (to stop tearout) as I cut the miters for the top rail, center rail and bottom rail.
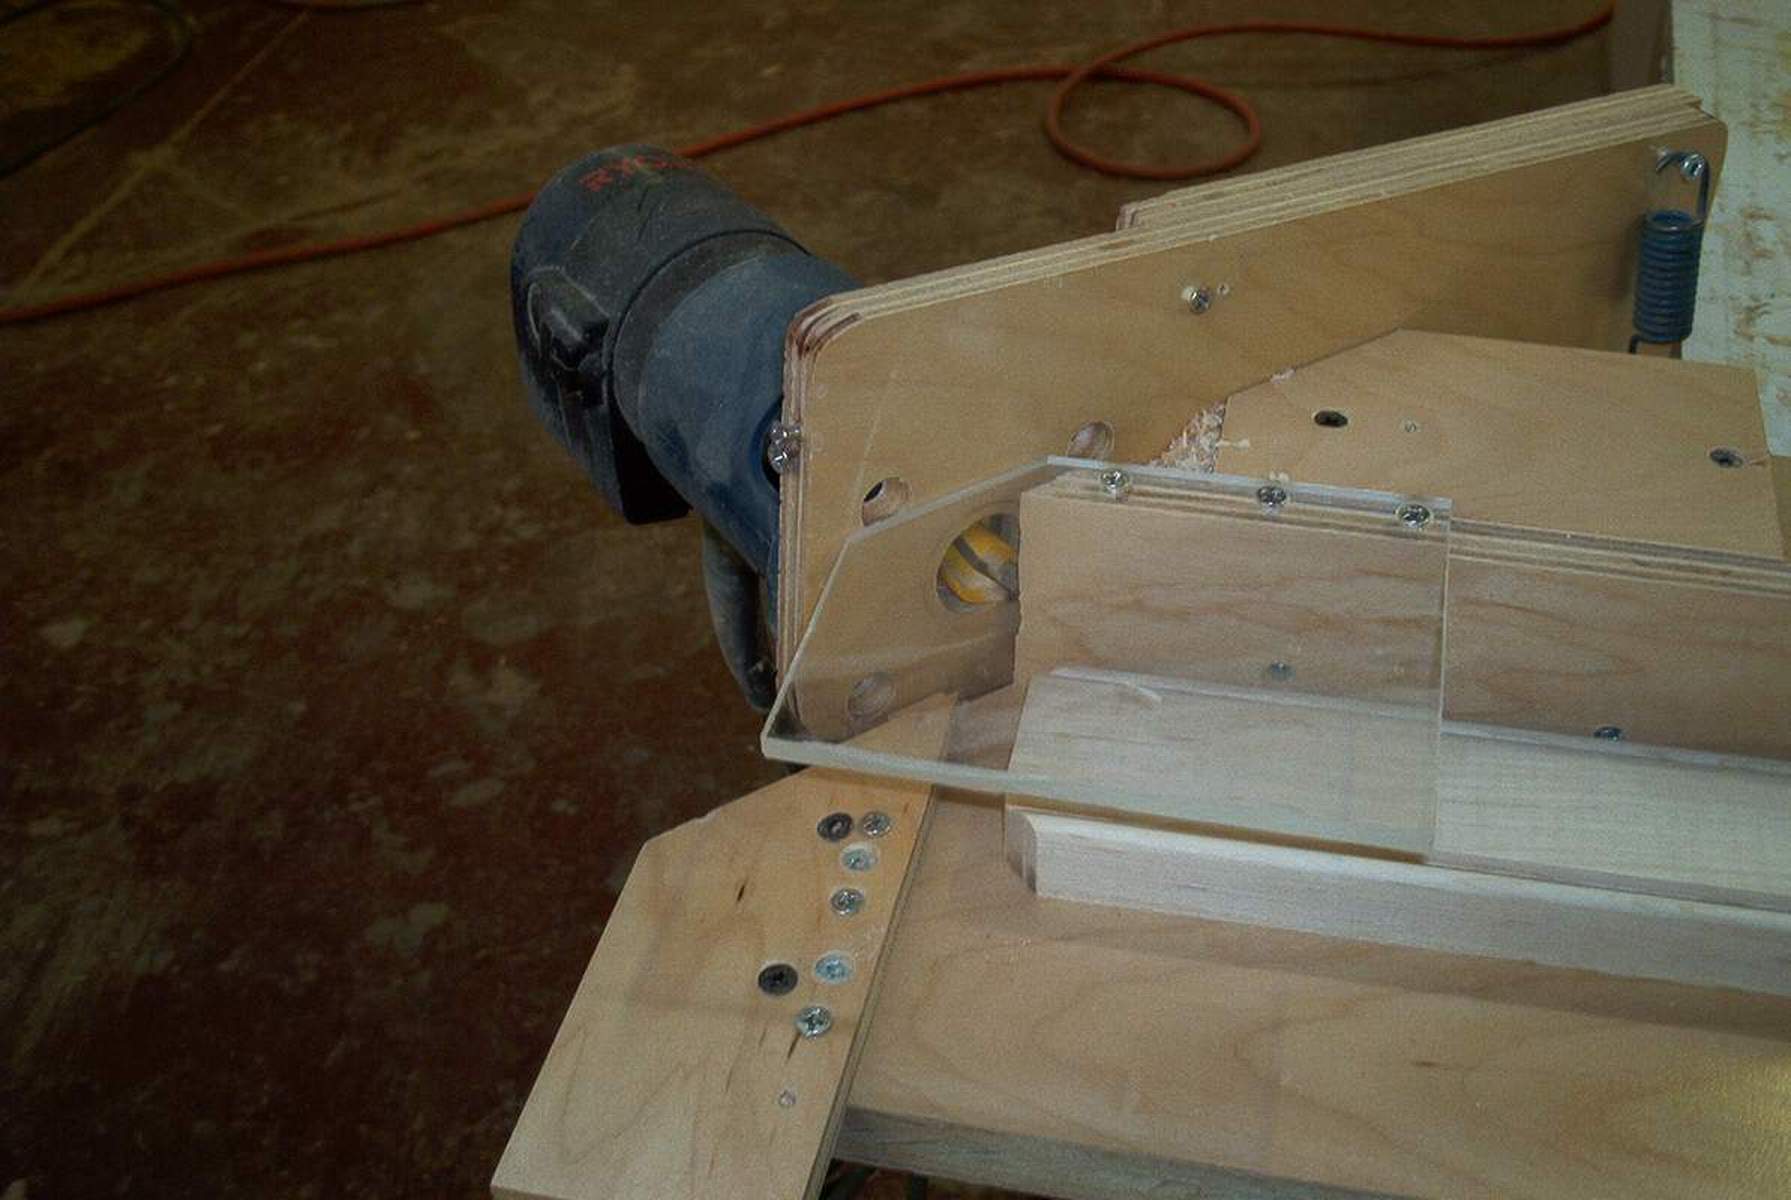
The second jig cuts the rails (which could also be done on a chopsaw). It consists of a fence with another trim router mounted horizontally on a pivot at one end at a 45 degree angle with a 3/4" straight flute bit, so when the end of the rail is inserted, you just push down on the router and it cuts the miter. The beauty of this is that if you run all of your center rail stock on edge through a planer first to maintain consistent width, you can just flip the rail upside down and cut the other miter and still have a perfect joint every time. This method has become quite efficient for me, even with clear cherry.

Below is the second jig for rails. These are a tad crude but have given me very good results. I plan to rebuild them with better stop fences of aluminum and acrylic for better changeover time for different kitchens. The stile jig is set up for upper and lower face frames at the same time (48"long), so after first-time setup, every frame can be done without changing the stop/fences. If there is an oddball, I just remove the end stop and shift the stile as needed.
I have done beaded frames using a combination of both applied and molded frames, mostly for projects like entertainment centers and such where I have doors on one half and adj shelving, etc. on the same unit. I would mold the bead into the frames and then rip the bead off on the stiles of the door areas, stopping the rip at a 45 miter created with a radial arm set to the 1/4" depth. The rails (top, bottom and center) would have the bead clip off on a 45 using Lion trimmer (a chop saw could also be used). The only applied bead is then the stile section where the doors are located. This system allows me to avoid the center rail to stile dilemma and also the only pin nails used are covered by the doors.
Comment from contributor D:
We have cracks in our bead as well, and I have pondered over this problem for quite some time. One thing we try to do is use a lot of glue when we nail the bead to the frame, in order to get a good squeeze out. However, there are still always some gaps here and there. We have been - this is gonna sound like a pain - taking a little brush and filling in the cracks with paint after the cabinets are on the jobsite. We do this when we touch up any damage that has occured on the jobsite. It seems to work, and has got to be easier than caulking the whole job before painting.
Editor's Note: For top quality carbide cutters (upcut, downcut, straight flute) consider LMT Onsrud (website).