Cutting Flutes in Pilasters
Advice on using a table saw or router to make fluted woodwork. January 13, 2009
Question
Looking for the best way to cut 3-4 fluted coves into 4 long pilasters. The width is 4", and the length is 8.5'. I don't have a moulder, and usually do this with a hand held router.
Forum Responses
(Cabinetmaking Forum)
From contributor J:
Depends on your regular volume. I use a LRH round bottom head for the table saw. Most of mine is 3/8" flutes on custom 7-8 piece runs. Most of what I do is stopped flutes with varied end stops. I have a power feeder setup for through flutes. Could be stacked in pairs or triples with the right saw arbor and spacers. The setup runs very clean with no burn on the ends when stop fluting, and added bonus is tapered flute ends, which look better to me than round ends (burned). Alternative is maybe the Williams and Hussey style moulder for up to 7" wide for through, multiple flutes in one pass.
From contributor S:
This could still be done with a hand router. One way is to build a rail for the router to slide on and just move and clamp your stock for the next pass. A simple router table could be built pretty easily for a quick job like this. Just attach a piece of plywood to your router base and hang upside down. Attach a straight fence and go.
From contributor I:
I use a PC plunge router with a larger sub base and an edge guide with skis that support the router. The key to cutting clean flutes is to make the cut 1/16" shy of the finished depth, then go back over it at full depth. Sometimes I use a 6" taper to make the ends of the flutes pointed instead of half round.
From contributor K:
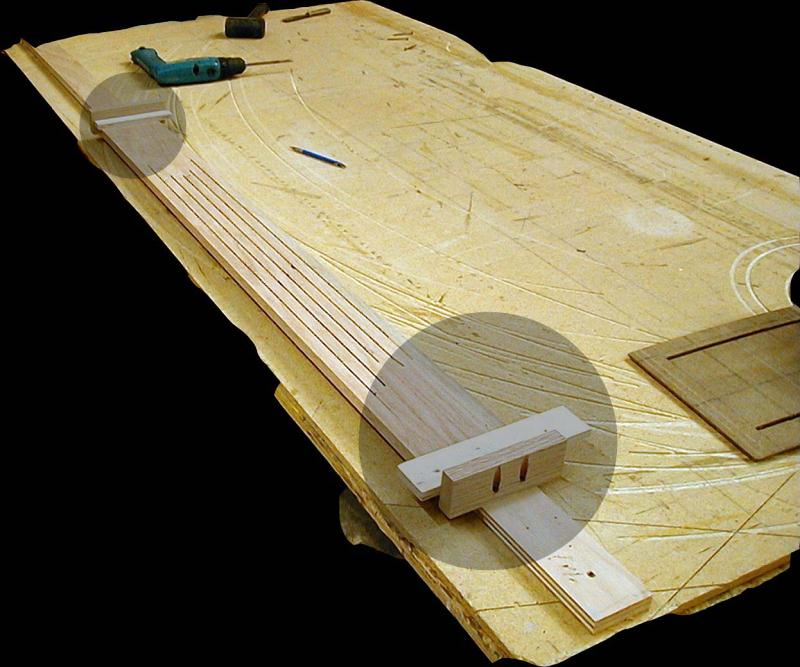
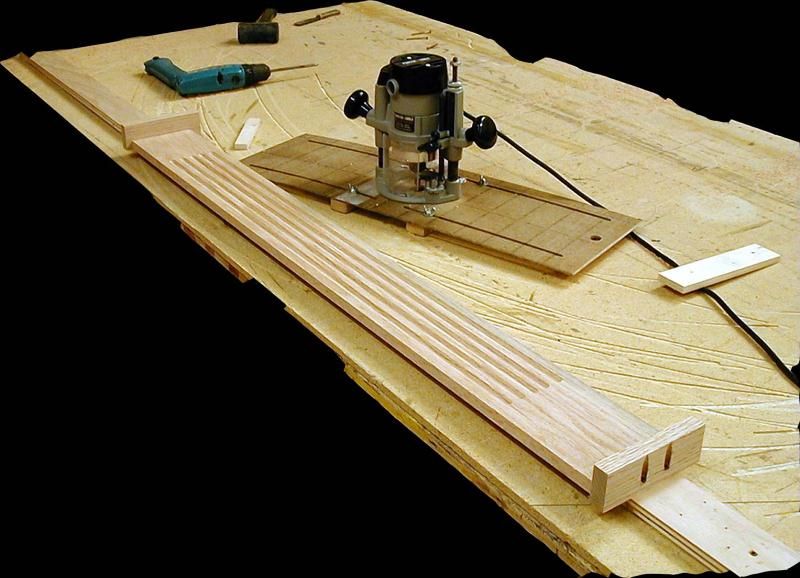
Here is my fluting jig. It is shop made from scrap, has no size limitations and takes up zero floor space to store it. It is just a piece of tempered wallboard with the router centered, and slots cut for two adjustable guides. It is drilled to fit two different plunge routers.
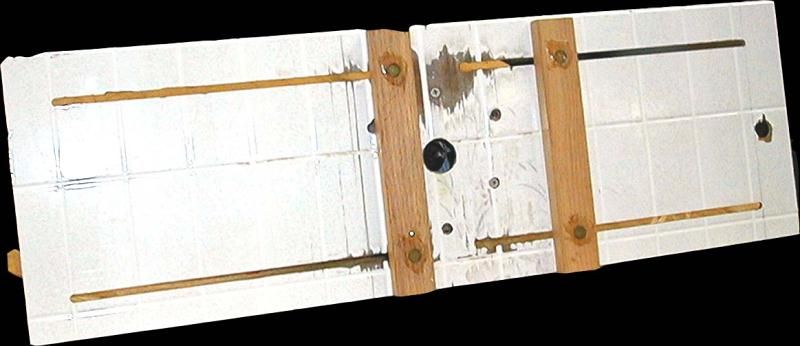
Click here for higher quality, full size image
Click here for higher quality, full size image
I was always going to build a better one but this one has worked so well I never did.
I hold my pieces with this simple clamp made from scrap plywood attached to my work bench. The stop blocks are pocket screwed through the back, which puts enough pressure on the piece to hold it. You can snap different pieces of the same length in and out if you are fluting multiple pieces.
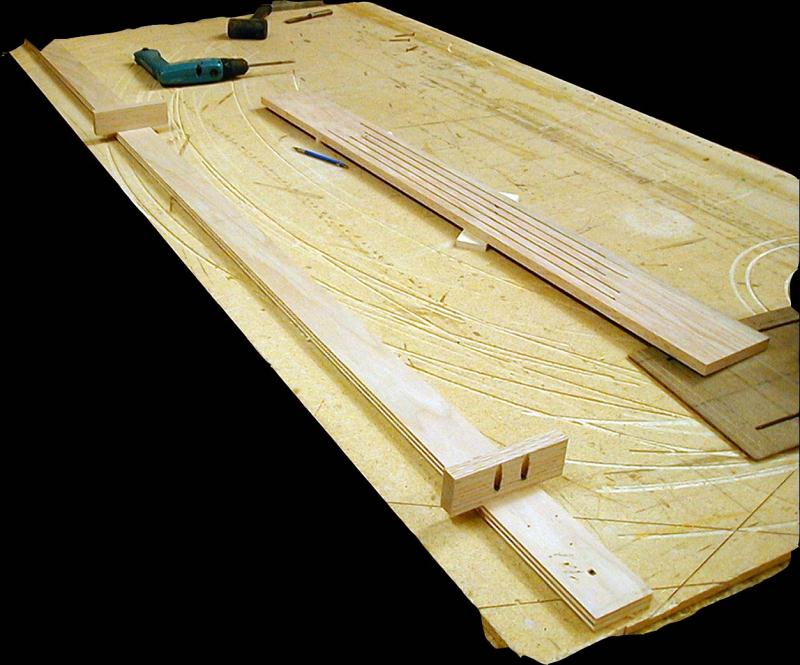
Click here for higher quality, full size image
I snap my first or "Pattern" piece in the clamp and lay off the flute spacing. (I did these with a marker to show up on camera. A fine pencil line is better.) You only have to lay off one piece.
Click here for higher quality, full size image
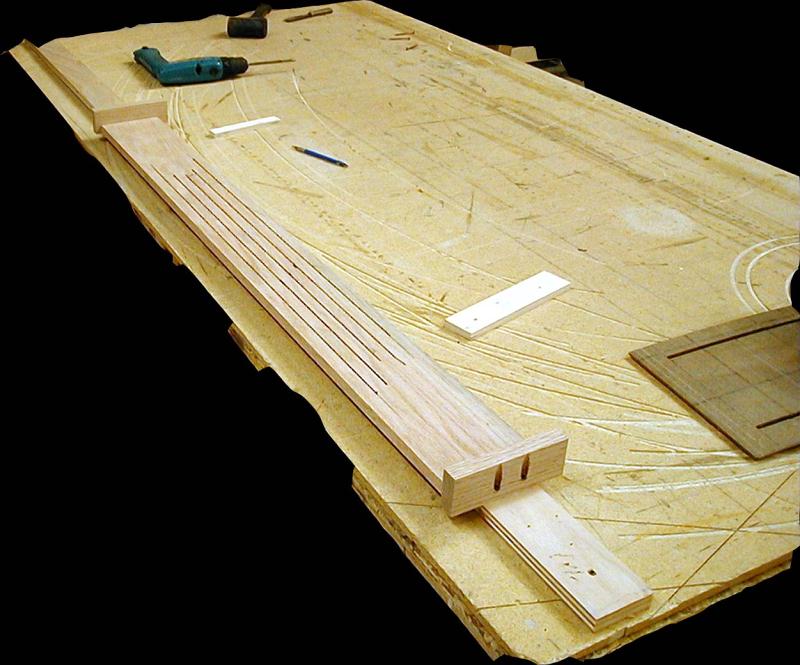
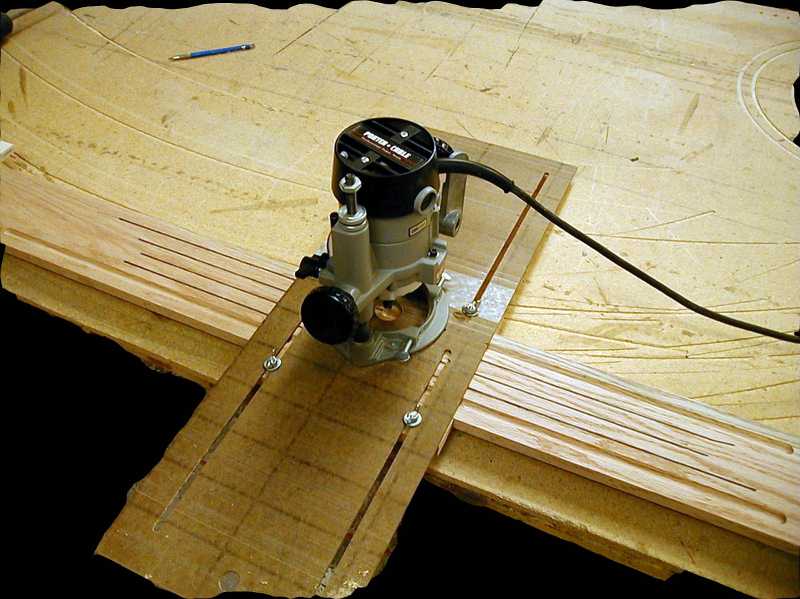
You can cut spacers to stop your flutes at different places on the piece. These just lay on top of the piece while you cut and can be any width. If you want to have "through" flutes. Clamp the piece with a board that will allow the jig to pass over.
Click here for higher quality, full size image
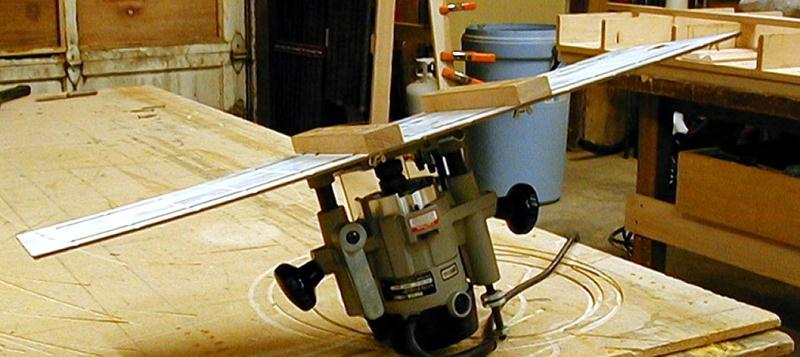
I cut two very fine saw notches on each side if the jig centered with the router bit to align it to the piece. This a very quick process. Align to the first flute, slide one fence into place, tighten, then position the other fence.
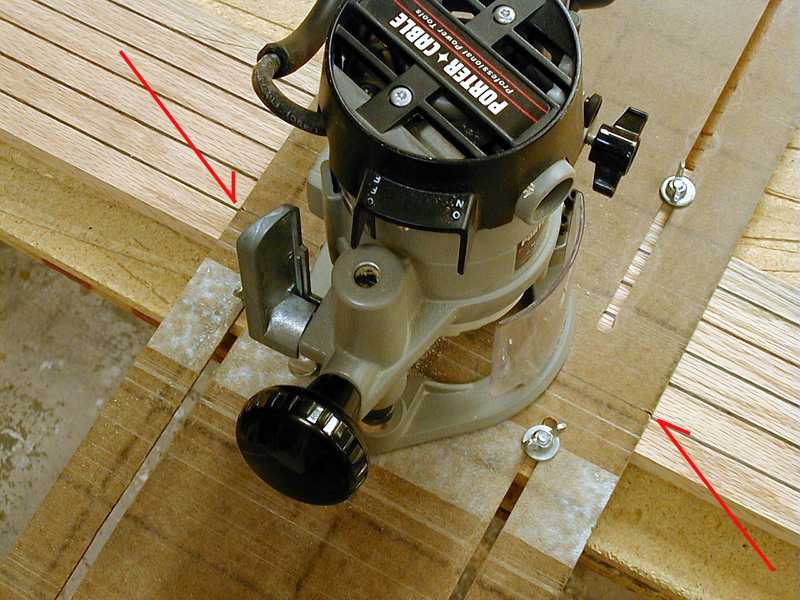
Click here for higher quality, full size image
Set your bit to the correct depth, plunge and cut the first flute. Rotate the router at the end, plunge and cut the next flute. If you are doing multiple pieces, snap this pattern piece out, place another in the clamp and keep cutting.
Click here for higher quality, full size image
After all your pieces have the first two flutes cut, put the pattern back in, align to the next line and repeat all the cuts until you are done.
By changing the width of the stop blocks on one end for each set of flutes you can "stair-step" the flutes. I did these to go around this corbel.

Click here for higher quality, full size image
Or you can step them the other way as in the columns for this entry.
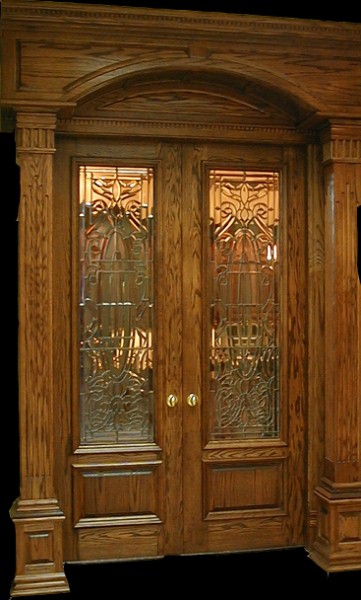
Click here for higher quality, full size image
Here is the piece I did this morning. I have used this jig for cabinet pieces like this one as well as for fluting some eighteen foot tall, sixteen inch square columns for a car dealership.
Click here for higher quality, full size image
From contributor T:
Check out a system called the Magic Moulder. It attaches to your table saw and is the cat's meow. Spent countless hours doing the hand router, power feed thing. This has it beat hands down. Way less time spent on final sanding as well.
From contributor D:
Regarding molding heads like Magic Molder: Be sure you have positive stops mounted onto your tablesaw. In the first week of my last real job, I watched a guy use a molding head on a t-saw for fluting, and thought, "I need to change that - it's dangerous." I left the building to get a call 15 minutes later that he removed the end of his left index finger. We made a router jig that fluted hundreds of jambs with no injuries or near misses. These heads are banned from commercial use in European countries for safety reasons. Beyond that, you are cutting blind, and there is no protection against kickback.
From contributor A:
Thank you for posting that. Many people do not consider the danger of the TS moulder heads. It seemed that they fell out of vogue (due to injury perhaps) until Magic Moulder came out with their version. It's just a nicer looking version of the same critter. Except it has two sharp cutters instead of three dull ones. The one advantage of the TS is those nice tapers. However, for some reason no one ever seems to mention router injuries. I once saw my old boss pick up a brand new 3 1/4
Dewalt router and mistook the on/off switch for the plunge lever. He had a good sized beer gut and the thing turned on and wound his t-shirt up the bit. Not a scratch, but I bet he hit the gin and tonic pretty hard that night.
From contributor D:
Proper stopped flutes have historically ended in their own radius. No "nice tapers." This makes the router (or very small diameter tooling) the preferred way to make these. Through flutes, of course, don't stop, so can be made on the molder, shaper, router or molding head.
This garden gate in the Project Gallery is a good example of proper stopped flutes.
Garden Gate
From contributor P:
I designed a fluting jig for exactly this sort of work. What makes it different is that it uses two fences to keep the router on the straight and narrow. Once the fence is solid and fixed, the other is adjustable and spring loaded. The two fences keep the router from swinging off track like can happen with a simple edge guide. The second fence is spring loaded to keep it from binding if the stock is not perfectly milled.
From contributor N:
I made a jig like contributor K's and keep a plunge router on it permanently. Basically it is a router base that is rectangular with two guides that are adjustable. It works great and no setup - just mark it out and you're done.
From contributor P:
Festool router + guide rail + stops. Easy, accurate, and can be used for lots more than flutes. Will set you back at least $700 if you don't already have a
Festool router and long guide rail, though.
From the original questioner:
Thanks to all who have offered their advice. Sometimes just hearing how others do the same thing differently really sheds a light on the task at hand.