Edge Sanding Curved Parts
Craftsmen discuss off-the-shelf and shop-invented solutions for smoothly sanding unique curved wood items. May 16, 2014
Question (WOODWEB Member) :
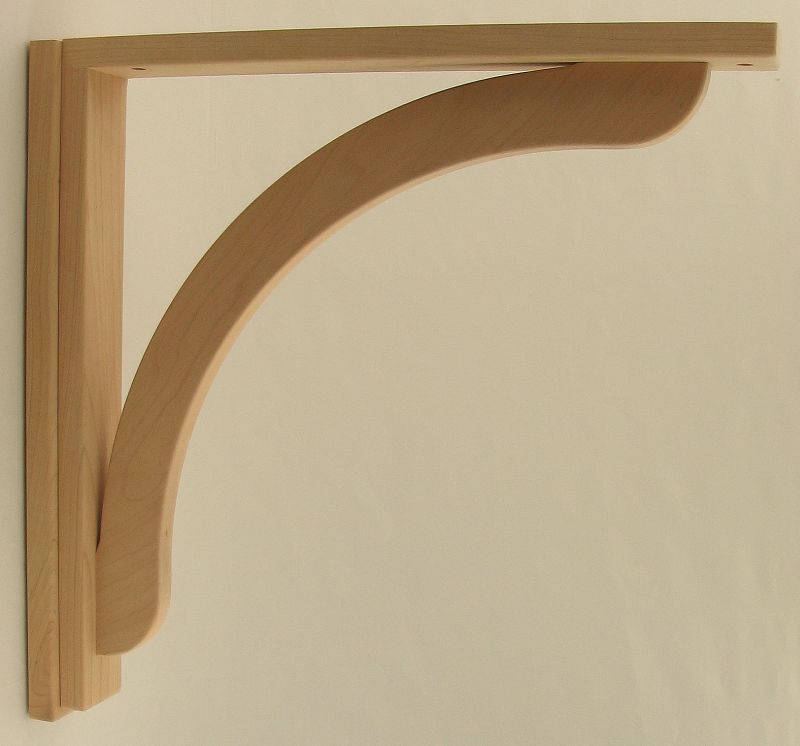
I have a technical question. My four person shop manufactures wood brackets and we have determined that the best machine to sand the outside edges of our concave braces (the diagonal member) is the 3 ˝” diameter x 7” tall, drum (idle) end of our Grizzly 6x80 edge sander. But, we are having a problem "absorbing" the seam in the sanding belt. It leaves a chattered appearance when closely inspected. We have tried sewing on a wool sock to our hard rubber drum - and it works, surprisingly, however the stitching/thumbtacks/duct tape cannot withstand this abuse. So, we are looking for a drum that will absorb the sanding belt’s seam. Has the question ever been addressed? Any advice on this matter would be greatly appreciated.
Click here for higher quality, full size image
Forum Responses
(Furniture Making Forum)
From contributor M:
You probably just need a better belt. Flush diagonal seams are good, taped both sides, no abrasive for about an inch around the seam. If you are doing a lot of this, a pneumatic drum sander would probably be a little more forgiving, but really, hand processes require skill.
From contributor D:
It seems to me a softer durometer rubber is needed. I haven't done a search, but I'm pretty sure something like that is an off the shelf item from a drum manufacturer.
From Contributor O:
An inflatable drum sander is the way those type of parts are most often sanded. Use good quality sleeves made for this kind of machine and work. Two basic types - one is hand held (two hands) and taken to the work - a dough roller we call ours. The other is a pedestal type where parts are taken to it.
From contributor K:
My favorite method is using graphite canvas over a wooden semi-elliptical nose on the other end of my edge sander. With the elliptical curve I can use the portion of the curve which matches my part, as the contact point, and smooth out any bumps on a wide variety of shapes without needing to change to another setup. The longer belt of an edge sander can cut faster and longer than those small diameter drums without the heat issues, which lead to loading.
From contributor D:
Brilliant Contributor K. I shall be trying this soon. We always just placed manual dexterity above a jig, holding elliptical jambs with light fingertip grips and a wide stance, gliding in and out of the outer drum in a kind of rhythmic dance. I always thought there should be an easier way. As it is, you can screw up a head with a moment's hesitation or misstep. By the way, we've had the inflatable drum sanders Contributor O mentions, but retired them long ago. For production work they clogged and dulled way quicker than edge sanders, which also allow you to sand the outer radius. A cylindrical sander is not effective for this.
From contributor K:
For sure Contributor D, give a try, I'm sure you and your help will love it. Sounds like you already have the dance moves down. I do a lot of curved work, and when the parts get to big to handle on the edge sander I slip a curved piece under the platen of the hand-held belt sanders, which works pretty well. I have even used a 24" belt on a 21" sander with graphite canvas for some special situations.
From Contributor B:
How about an osculating spindle sander? It's easily one of the handiest machines in my shop.
From Contributor O:
Well, now this discussion has evolved to where I will divulge one of my shop built tricks to address the problem of accurately sanding curves. We have used a 6" drum, 12" tall, mounted vertically (with a bottom point fastened to the table) in a drill press with an oversize table to sand the insides of curved jambs. However, a moment’s hesitation or distraction could create a large distortion in the part.
So to evolve we added a template to the part (same one used for making the part previously) and a fixed bearing point on the lower end of the drum (much like a router with a bearing). Then the bearing would be the final depth/shape guide for the part, sawn out oversize. This took the hit and miss out of it, and allowed the maker a reasonable chance of success on every part. Over-heating was reduced by keeping everything moving, and once it was to size, the sanding stopped. I am 1,000% for developing skills, but eliminating risk is very important. I am no gambler, and I take few risks with these parts that are labor intensive, but can be screwed up in seconds.
One thing not mentioned so far is dust collection. The pedestal sanders are great for free-handing small parts, but require dust hoods to keep operators alive. Fixed drum sanders also require some sort of collection, for the same reasons.
From Contributor B:
A drill press is often used as a small spindle sander but mounting a large pneumatic drum and horizontal table is definitely an interesting spin. I sand parts "to size" using an elevated ring around the sanding spindle (same as the shaper). The part moves directly from the shaper to the sander on the same form. An osculating spindle sander will also sand curved surfaces square (or beveled with the tilting table) without rounding over edges.

Click here for higher quality, full size image
From Contributor H:
Some good suggestions shared above. We sand the inside edge of most of our curved mouldings with 5" Dynabrade hand held sanders. We use J-weight cloth backed PSA discs since paper discs break down and expose the pad to edge damage. The pads conform to the curve surprisingly well and last for years. It is quick, easy and takes very little time to get the feel for the process.
More on the lines of what has been discussed above is a machine I saw at IWF years ago. It was an edge sander that could be used from both front and rear. The front had a standard flat platen but the back had an adjustable steel strap for a platen. The ends pinched together to change the radius. Unfortunately I saw this so long ago that I don't recall the manufacturer.
I would think that with a little creativity you could build a similar machine. You could probably put a longer belt on an existing edge sander so that a radius platen and table could be put on the back. If variable adjustment is too complex to be worthwhile you could make replaceable MDF framed platens for your various radius parts.
From contributor D:
The outer edge still has to be sanded on an edge sander. A drum, oscillating or not is not the tool for that job. I got in the shop this morning thinking about this and will hold off modifying any platens and tables before trying these belts mentioned. We don't really have a problem ourselves, but if I can make things better I'm all for it.
From Contributor C:
Contact your abrasive supplier and inquire about different belt splices available. I have worked for a couple different companies that had no idea different splices were available. If your current belts and/or sleeves have tape on the joint on the back they are mostly likely the wrong ones. I'm no longer in the millwork business so don't quote me on this, but I believe the belts you should seek are "T joints" as we bought from Klingspor. It's an overlapped joint with grit removed from the splice. When we switched to these belts all of our sanding problems like you are describing were gone. Of course these belts cost more, but the product will not look like barn siding after finishing so it's money well spent.
From contributor K:
It had dawned on me, that I should have asked the following question. Does your belt bump and leave a mark when you sand on the straight platen? If not, I'm not convinced your problem is the belt seam. I have never had much success sanding on a hard idler wheel, with any belt, without getting lots of imperfections, due to either bumps in the hard wheel, or maybe dust between belt and wheel. I have achieved great results sanding on the drive wheel of my edge sander, which come to think of it, I should mention, is a pretty old machine. About ten years ago, the rubber tire finally fell apart too much for repair, right in the middle of a job where I needed it badly.
Necessity, being the mother of invention, pushed me to try something that I'm still using. After cleaning up the wheel, pulling tacks, and dressing/sanding, I sprayed numerous coats with high strength, 3M 90 contact cement. When it dried, it was thinner, but had all the rest of the properties of a good tire, and is still in service. As I mentioned above, I really like my shaped platen idler end, but don't know why a spray glue on a idler wheel wouldn't help get a smoother finish, or how it could hurt anything.
However, I am confident that if you replace the idler wheel on the end of your edge sander with a fixed canvas covered radius slighter smaller than your finish product that you will get a finish product fast, with about100 to 150 grit with very little effort. Just a quick light touch will knock the corners down in a few seconds.