Entry-Level Edgebanding
Here's a discussion of how to accomplish occasional and incidental edgebanding with decent quality, when you don't do enough of that kind of work to justify a big investment. August 19, 2013
Question
I'm getting a lot of tear out even if I pay close attention to grain and cutting direction. I am flush trimming with Fastcap's flush cut gizmo. Recently I ordered some .5 mm "Fusion Maple" (PVC or some sort of plastic) and had it pre-glued for me from the factory. I was told a heat gun would work and it didn�t. I tried an iron set high with a t-shirt over the edgeband, also a no-go. I could elaborate but that would be another paragraph. What gives - any solutions here?
Forum Responses
(Cabinetmaking Forum)
From contributor M:
I started using the trim router with a 1/16 roundover bit. I was having the same problems with tearout.
From the original questioner:
So flush cut first and then roundover? I'll try it but it seems like it would leave some of the plywood core showing, especially on the crossband.
From contributor U:
I use a little tabletop edgebander from
Rockler. I couldn't do any good with the iron. I use a trim router also and I use a ''no file'' laminate bit to trim with.
From contributor A:
I didn't use edge banding for anything other than shelves for almost ten years. We build beaded inset faceframe cabinetry so there isn't any point in owning anything more than a small hot air bander. The laminate trimmer with Amana's no-file bit works well. The hand trimmers do not work on wood because of grain direction.
From contributor U:
I only edge band shelves as Contributor A mentioned. With the no-file bit I set it to where it puts just a slight round over on the edge instead of being square and sharp. I think it looks a lot better.
From the original questioner:
I have been around the globe working here and working there in order to satisfy my curiosity about the world we live in. Re-inventing oneself so many times is difficult at best. There is a cost. One of them being not having the money for an edgebander � another being that I don�t use the stuff enough. I�m not just cranking out frameless items. I am a one man (sometimes two) show and have three mouths to feed and have successfully done so through the entirety of our recession.
I usually build high end custom casework, furniture and also do a bit of finish carpentry. If I have a bigger job where lots of banding is needed, I take it to someone that has a bander, but for my needs I use some shelving and some case work banding every now and again as I can�t see justifying a bander. I am under the impression they are very finicky beasts requiring techs every now and again. If a decent edgebander was available for under 2K I would be there. I know that many are over 10K and beyond. I �ll try the routing method.
From contributor V:
I use one of these when my glue pot edgebander doesn�t trim properly or for the odd-ball part. It has worked really well for me and might be the ticket for you as well. At a minimum you have invested basically nothing to try it out. Just kidding on the basically comment (you�ll see when you watch the video).
If you are seeing this message, your version of flash needs to be upgraded to view this video.
Click here to get the latest version of the Flash player. |
From contributor D:
I saw the video a couple of years ago and it�s the best tip I've ever seen. We also clean up miscues on the bander with it to this day.
To the original questioner: You might look up a Cehisa ep-2s. I had one of these before I picked up an ep-7 six months ago. It is definitely in-between a real bander and ironing on, except it is a glue pot machine and I was able to run 1mm thick banding. Combining this with the linked trimming method enabled us to produce a lot of banding in a short period of time. It�s much faster than ironing it on but still lagging significantly behind the bander we have now. I picked up my ep-2s for $1k.
From contributor F:
Count me in as another guy who isn't a real pro even though I've been making a living at it for a bit over a decade now. I'd go with the router bit as the others have mentioned and ideally throw it in a router table to move things along quickly. I did pick up a used entry level bander a little over a year ago and it does make a world of difference. Yes it's finicky and I did have a local tech come out and set it up. The ability to do PVC banding for closet systems now made it worthwhile.
From contributor R:
I sold a Cehisa EP3T for $1500 around ten years ago. I did a lot of banding on it. It requires a bit of hand work and had top and bottom trimmers, but no end trim. We did cut the banding off automatically leaving a two inch tail. I have a builder I work for that I sold a Westavco table top bander with a big phenolic table around 2'x3'. It has a heated platen to activate the adhesive and a pressure roller to press the banding on and worked pretty well for wood shelves, not great on PVC or ABS. Watch your feed speed and dial in the correct thermostat setting. I was building face frame cabs at the time and all I used it for was adjustable shelves.
From Contributor G:
I use an iron. I don't use any cloth to isolate the iron from the banding. Set it on high and go for it. The Fastcap trimmer can be used but you have to be aware of the grain direction. On some species you won't be able to use it and will have to use a router by hand. My edging looks better than when it�s put on by a machine. It certainly isn't quicker though.
From the original questioner:
I think I remember seeing one of those banders. I now have 600 feet of "fusion maple" edgeband .5 thick and pre-glued. Has anyone ever used it? I can�t seem to get it to stick.
From contributor R:
This was actually a unit made by Adwwod/Cehisa if I'm not mistaken. I bought it from a guy retiring that completed daycare centers with it, mostly PVC. It�s been a while since I've even seen it, but as I recall it had a turntable to put the roll on to, a gate with a spring to tension the tape, a horizontal iron around 12" long (could be adjusted from warm to hot) then a rubber covered pressure roller and another smaller roller that you could use to band around a 90 degree corner. It sure beat a hand iron and j roller. I made enough with it to pay for that Cehisa Ep3 new in the crate (10.5k at the time).
From Contributor Y:
We use to only use iron on banding and it worked fine for us. We didn't use much PVC or HPL until we got a bander. To flush trim top and bottom we use a plane iron. Occasionally the bander will miss a little bit and to this day we still keep a plane iron hanging on the end.
From contributor K:
The glue on the fusion maple should have a melting temperature. Find out what that temp is from the manufacturer, then check your iron. I only edgeband with the tape once in a blue moon, but I use a banding iron (not a fabric iron) so I'm not sure how they might compare. Could you be going too hot, and causing all of the glue to disappear into the substrate?
From the original questioner:
Thanks all. I�ll see if I can find a used Cehisa ep3. The one you are mentioning Contributor R sounds interesting. I�m still checking on the Virutex handheld.
From contributor A:
Skip the Virutex handheld. I bought a new one and it was very finicky. I then bought a little tabletop by Woodworkers Supply. It worked awesome for pre-finished maple tape for shelving. I use a razor blade when I can't be bothered getting out the laminate trimmer.
From contributor P:
It could also be a bad batch of edgebanding. Get a sample of another color from the same manufacturer and see if it has the same problem. Also, try a different iron. Process of elimination!
From contributor M:
I just go right to the router. It may be a 1/16 dia. bit not radius because it is a very small round and it blends very well with no edge to chip or ply core showing. I noticed it works best when I move quickly so it does not reheat glue and get gummy. The roundover looks great on a shelf but does leave a small seam between two frameless edged cabinets.
A friend of mine uses a flat file but I never liked that method. If you still use the blade trimmer try doing a few inches at the end of the board first then trim smaller lengths into the already trimmed area in front of it (yes, slower but avoided gouging). Then run the trimmer the whole way to clean up any slivers. I just started offering frameless cabinetry so this is a work in progress.
Contributor U: I had trouble using a no-file bit. The bit needed to be set so shallow that if banding was slightly rounded over the edge of the ply. The bit did not route it properly.
From contributor U:
You are correct. There is a very fine line of adjustment. I use the little edge fence that came with the router. So with the router in my left hand and with my right thumb I press the fence against the wood and my fingers on the back side of the wood I am able to keep the router level. The best thing to do is set it high and make a pass, then start lowering it slightly until you get the result you want. Again, I only edge band shelves. I do like the shelves to be slightly rounded. I feel this gives it a better look and less of a chance for the banding to get torn off. After I trim route I then wipe over it with a worn out 320 grit sanding sponge to make it smooth. Hope this answers your question.
From the original questioner:
I'll try it. It seems the trick would be a plastic bearing on the router bit so as not to damage the finish of the plywood. I�ve tried various setups but can�t seem to get the setup right.
From the original questioner:
I figured this out. I have been getting my edgebanding in .5mm real wood/pre-glued (and pre-finished) from E.B. Bradley. I have recently switched to Edgebanding Services due to price. The material from Edgebanding Services is also .5mm real wood/pre-glued (pre-finished) and a dream to use. Today I realized the difference � it�s excellent. No miniscule tearout and no need to iron missed spots after flush swiped with the Fastcap gizmo. The material from E.B. Bradley tore out badly and needed spot ironing and burnishing after flush swipe. I called E.B. to see who the manufacturer was (and was told it was Veneer Solutions). I called Edgebanding Services and asked the same and was told it was Edgemate. Upon closer examination of the two types side by side it was obvious what the difference was (at least by eye). Veneer Solutions type had way more glue. More glue to melt more burnishing and more glue to cut through equaled more resistance and more tearout.
Below is an image of the Veneer Solutions edgeband.
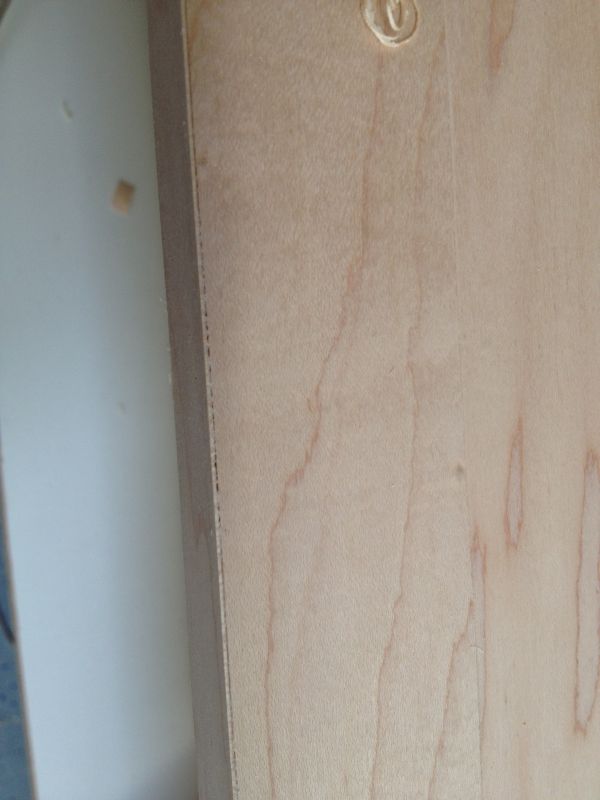
Click here for higher quality, full size image